Prepare shower area
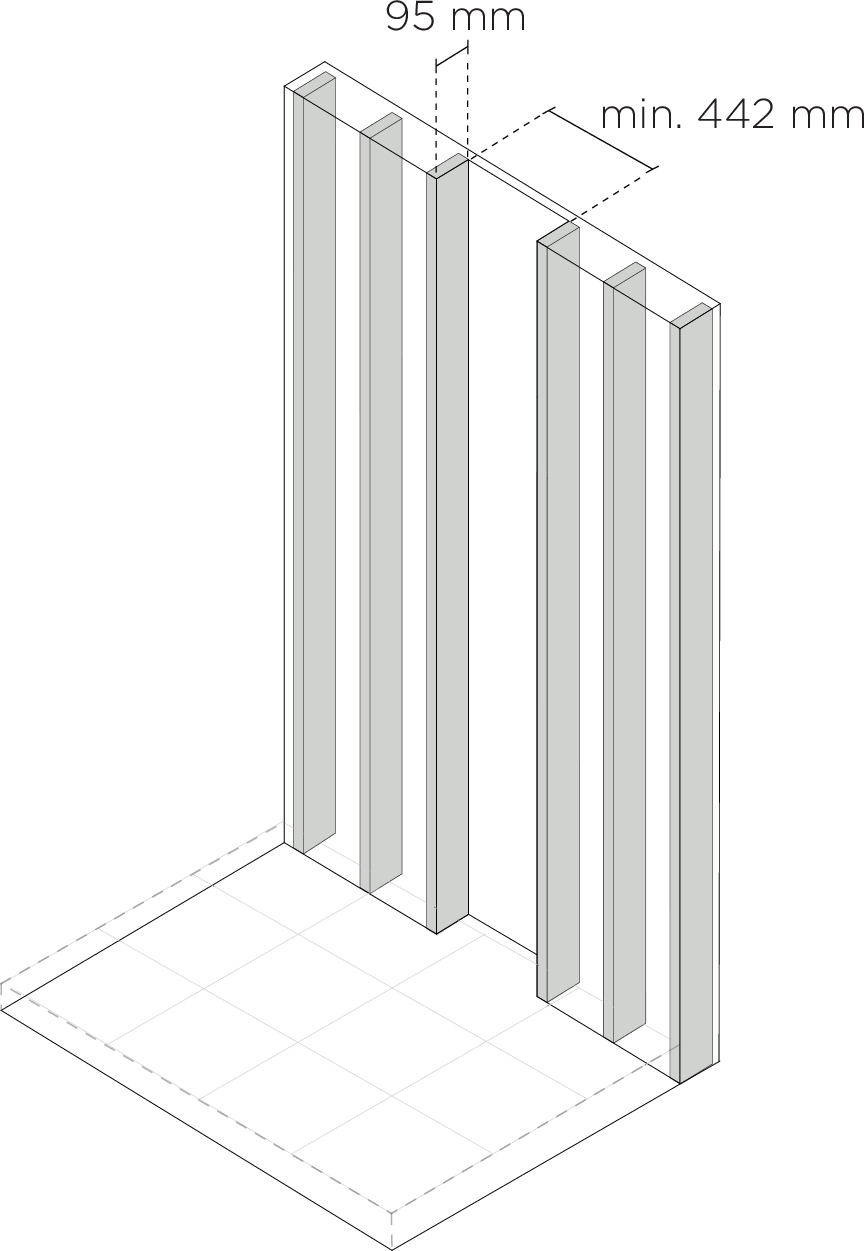
Frame the shower area.
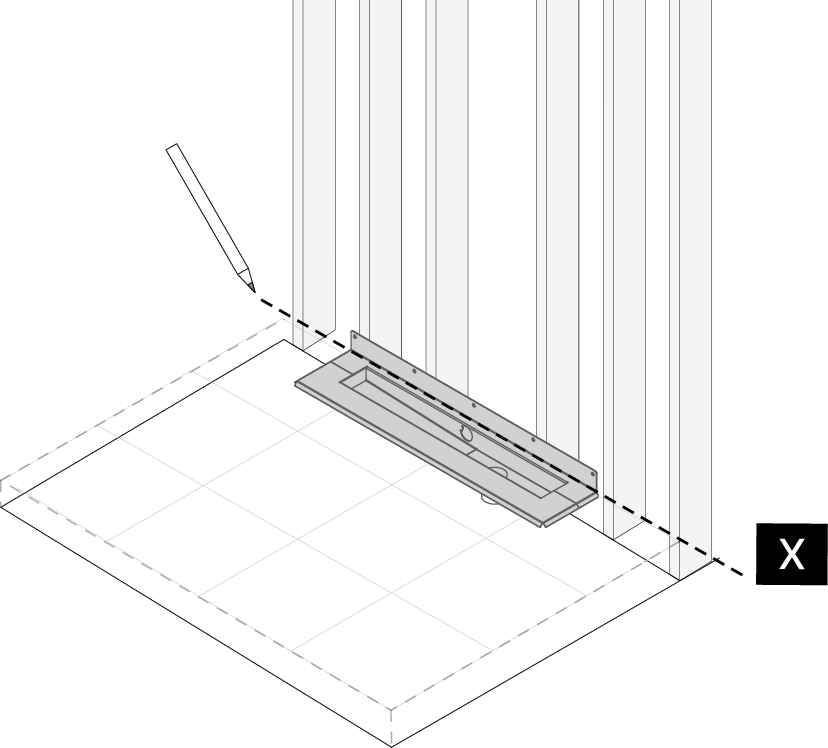
Mark the floor level where the waterproofing will be connected to the drain unit flange. This mark will be used as measurement "X" in the installation process to ensure that there is enough space for the drain unit.
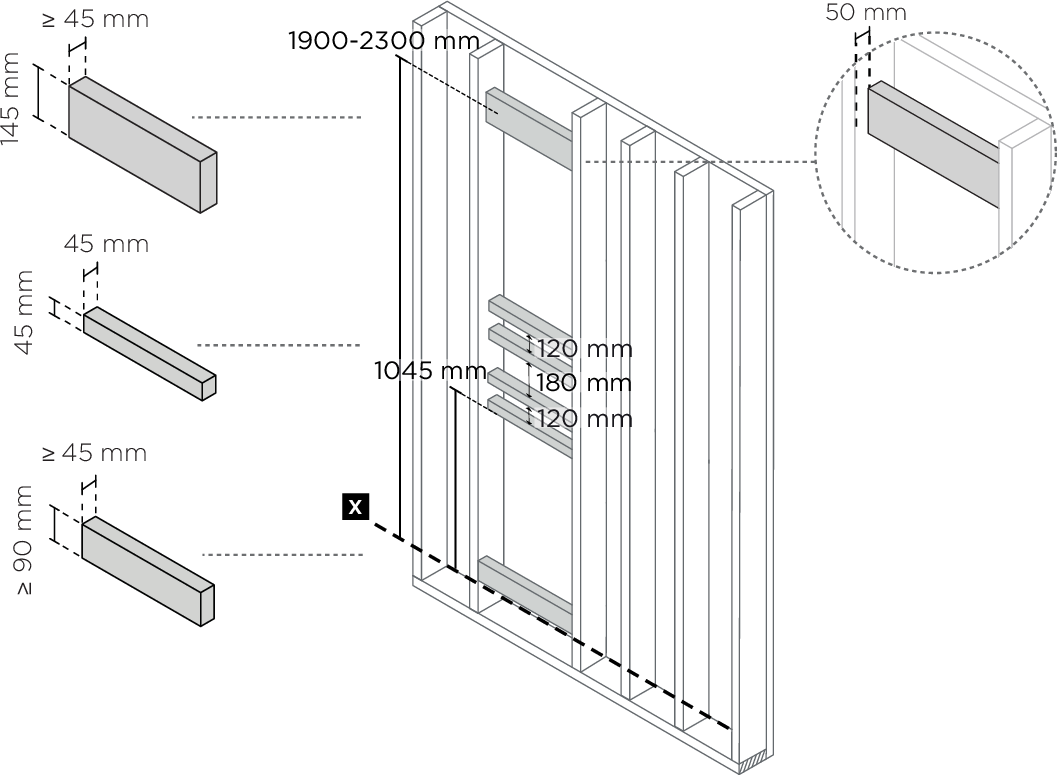
Install noggins.
Caution
It is crucial that all noggins are level and set according to recommended measurements to avoid misalignment in the shower installation.
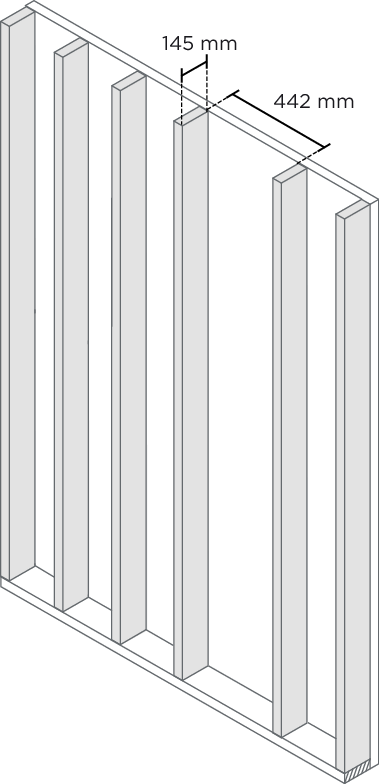
Frame the area where the Wall Box will be installed.
Make sure the Wall Box will fit inside the wall. See chapter Kit measurements for correct measurements.
Drill holes in the studs in between the shower area and the place where the Core will be installed.
Notice
Adjust slot in studs and wall covering depending on hand shower and Control Dial placement.
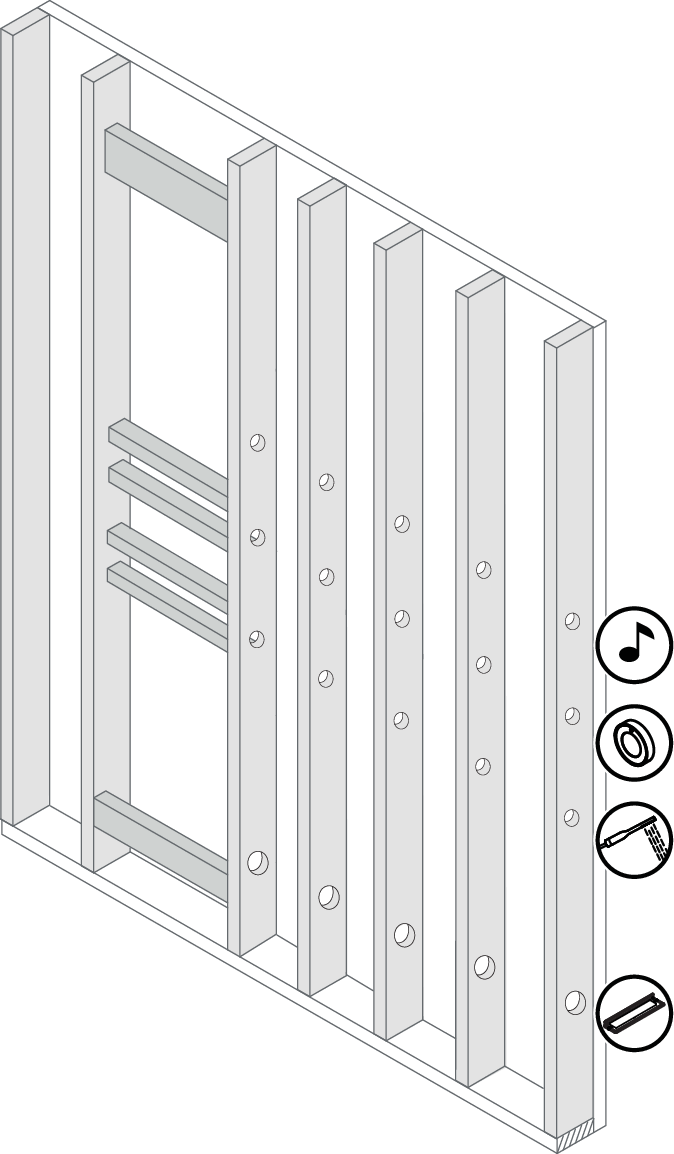
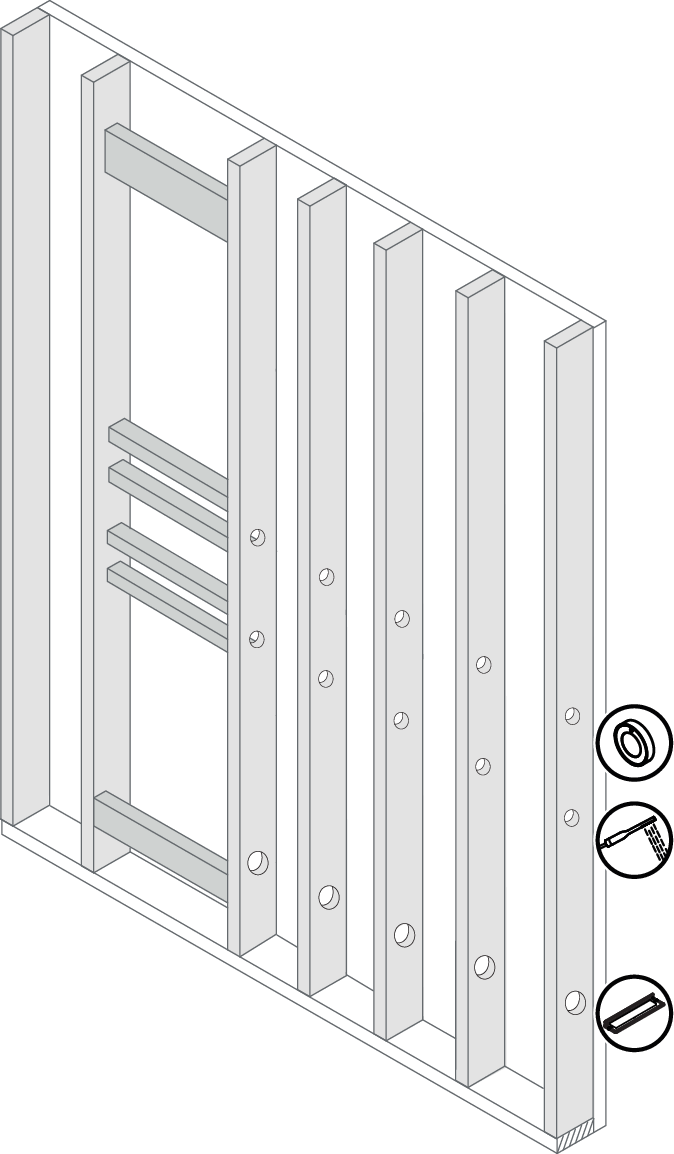 Figure 91. Only valid for Orbital Audio installation
Drill additional holes for the speaker cable.
Apply wall covering according to the illustration. Follow applicable industry standards.
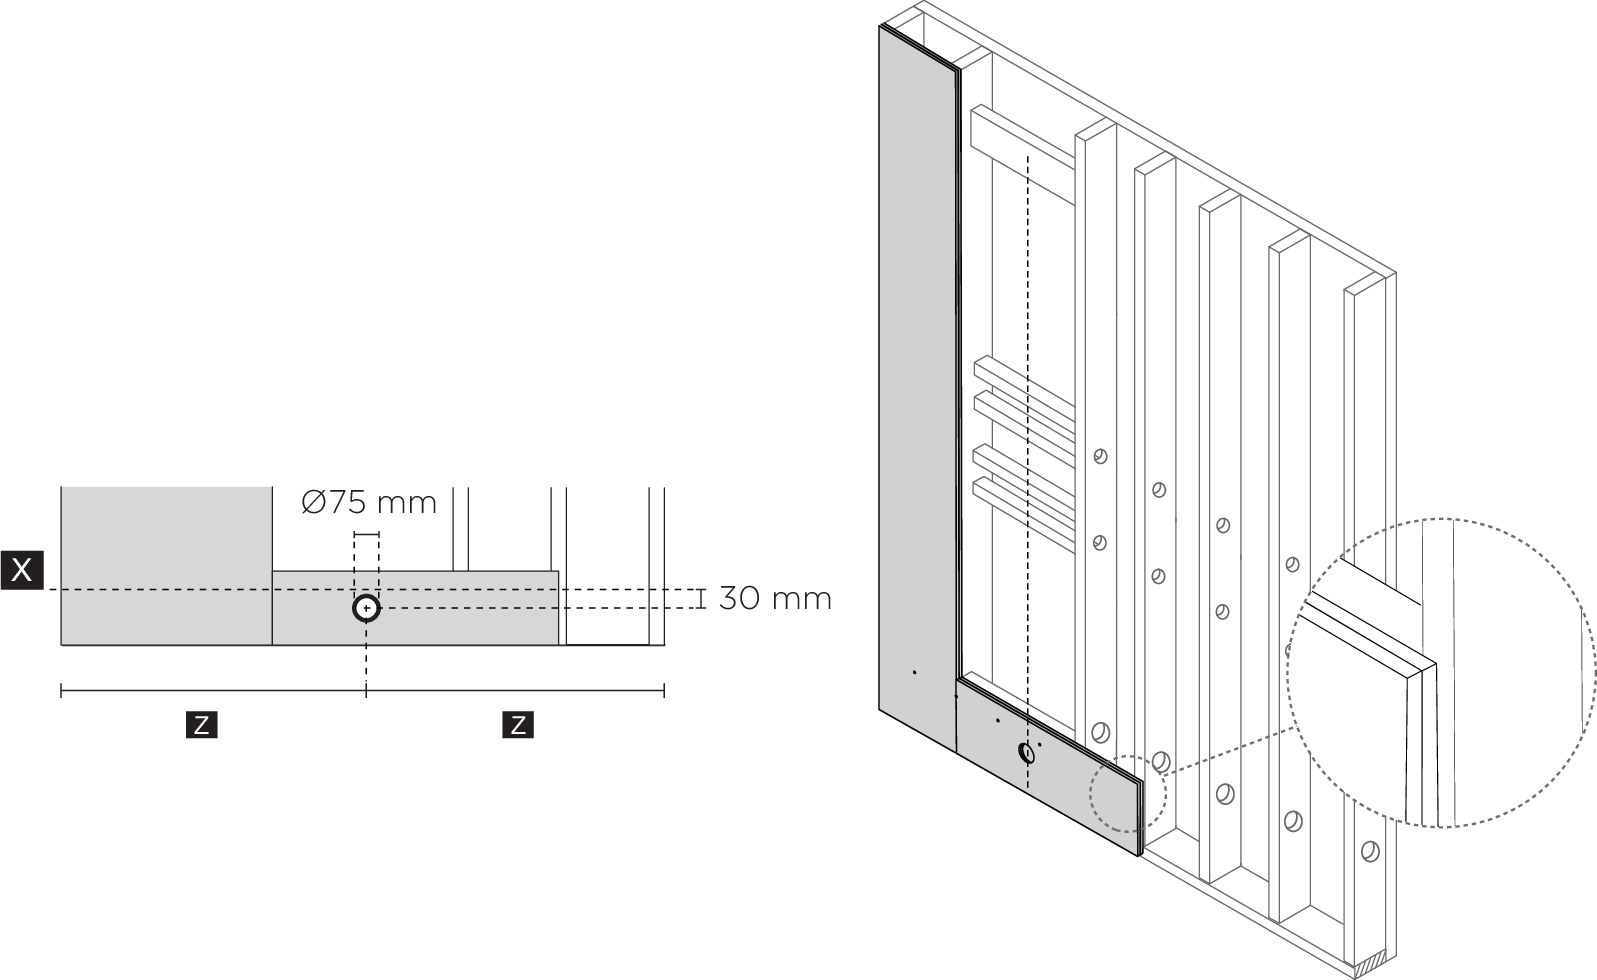
 The hole is centered in the shower area.
