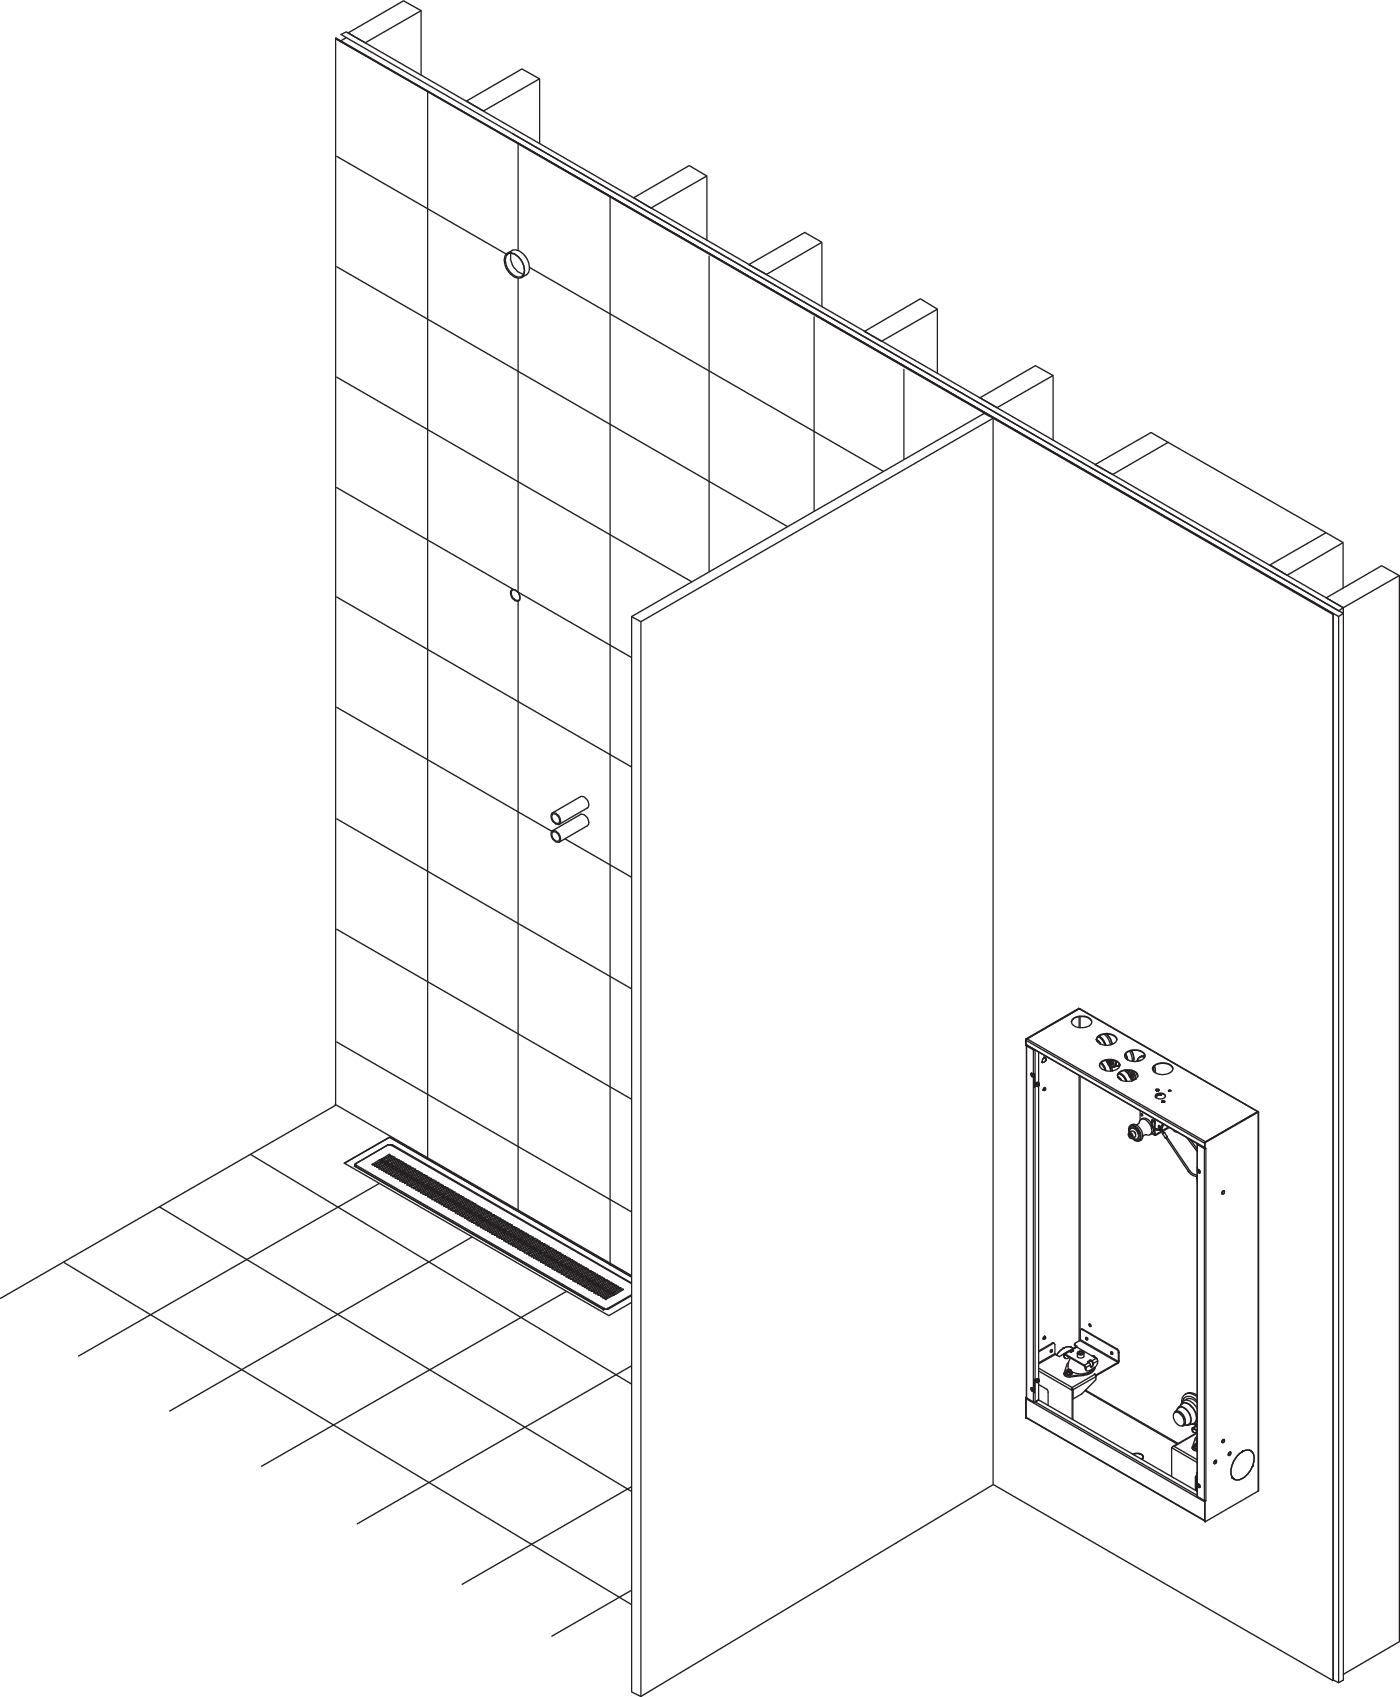
Pipes & connections in the Wall Box
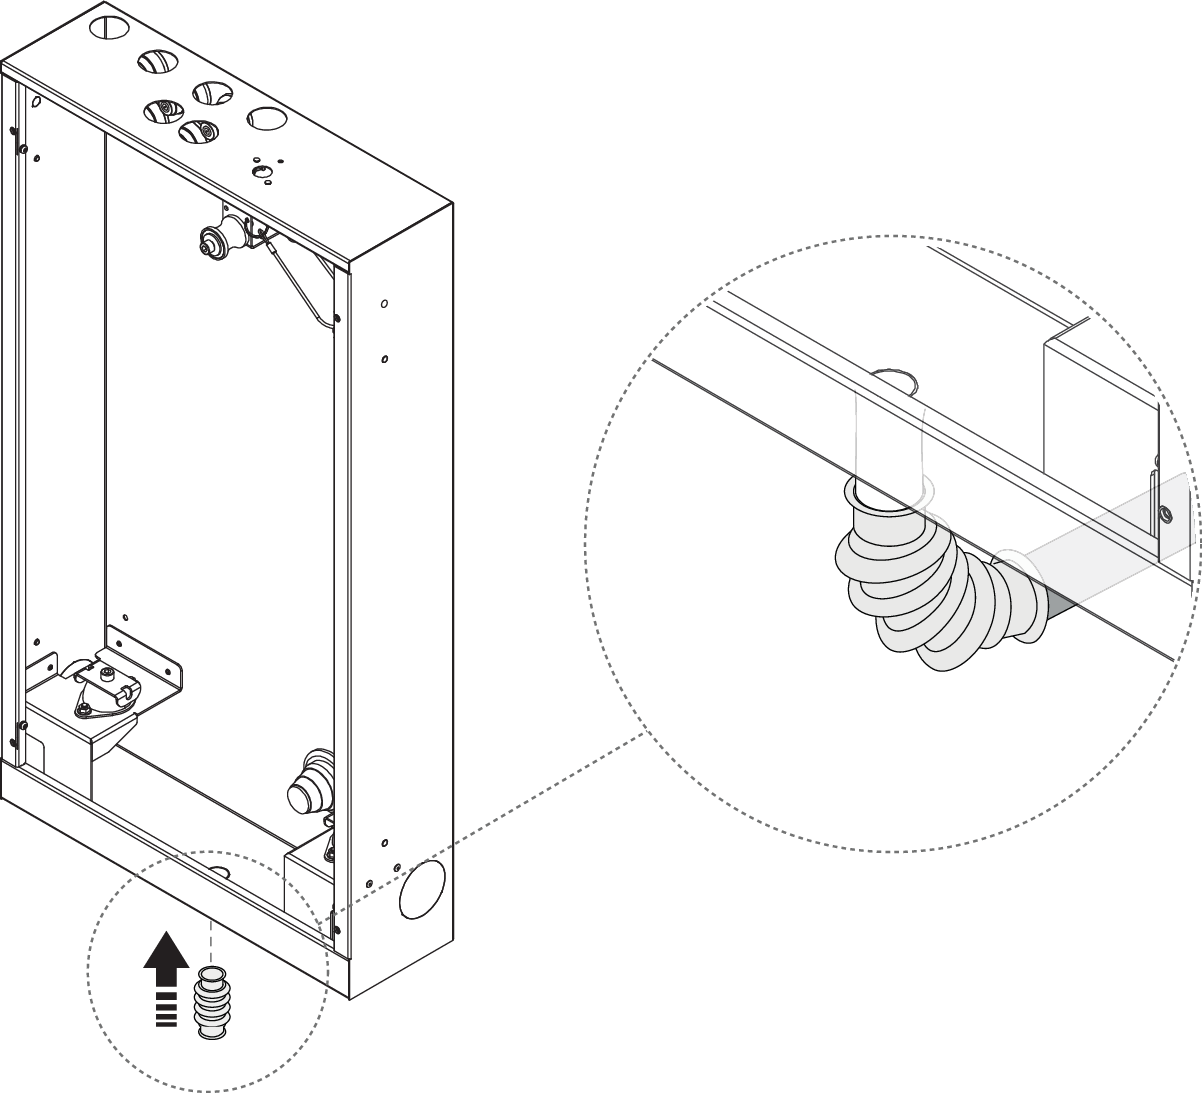
Insert the drain pipe into the cabinet.
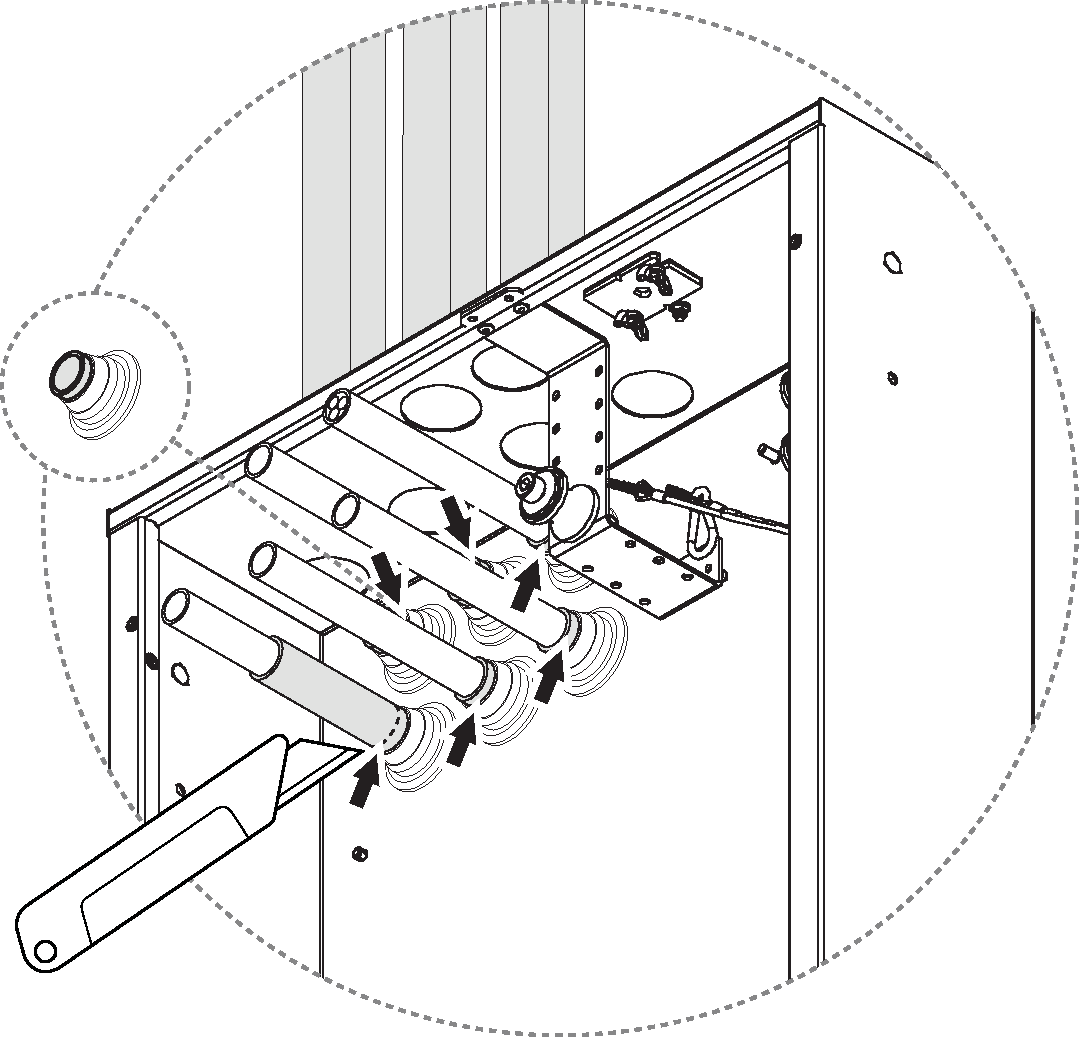
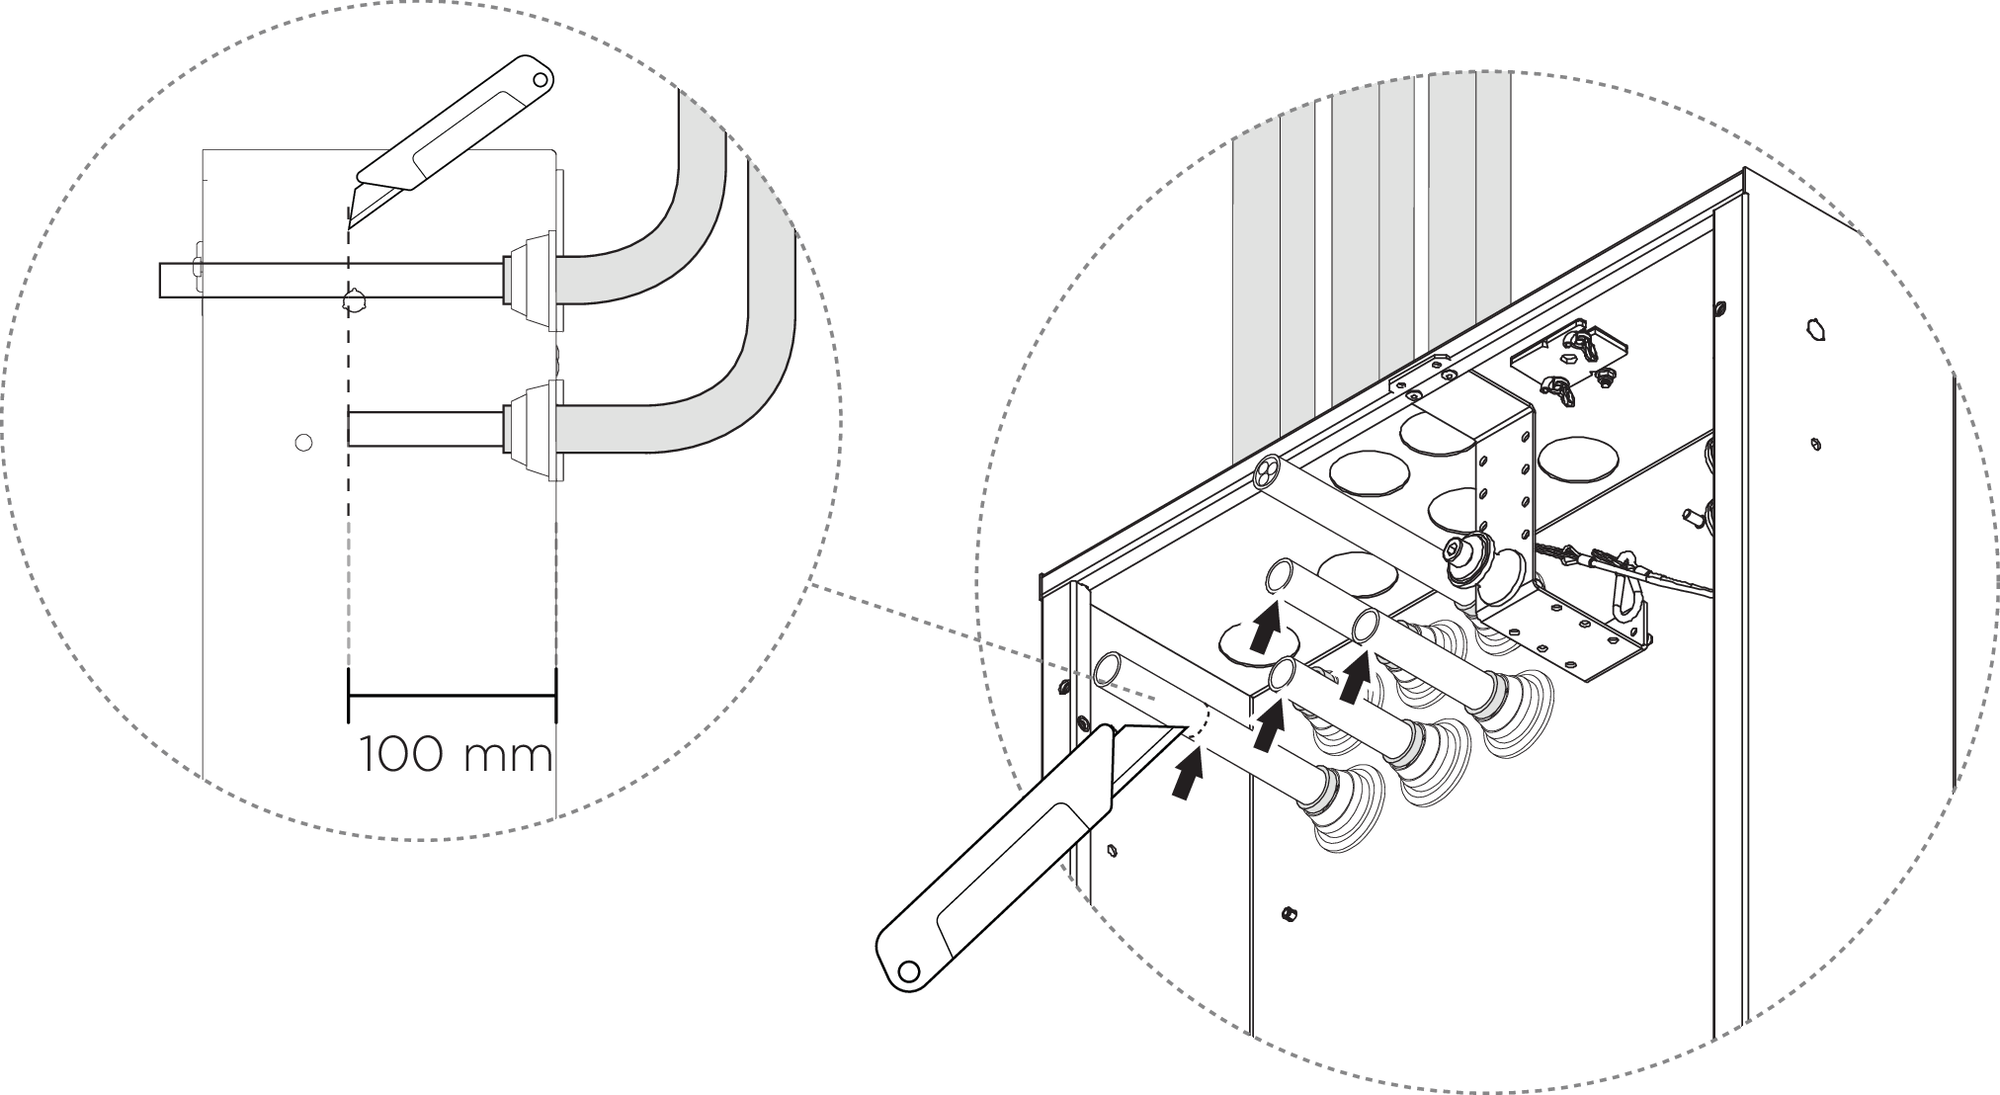
Cut the conduits at least 10 mm from the seal.
Cut the PEX.
Notice
Length might be adjusted depending on the chosen connector applied later.
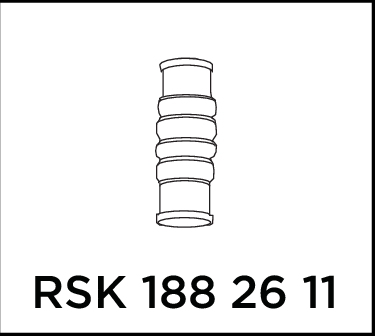
Connect the bellows sleeve to the Wall Box drain outlet and to the pipe from the drain bend.
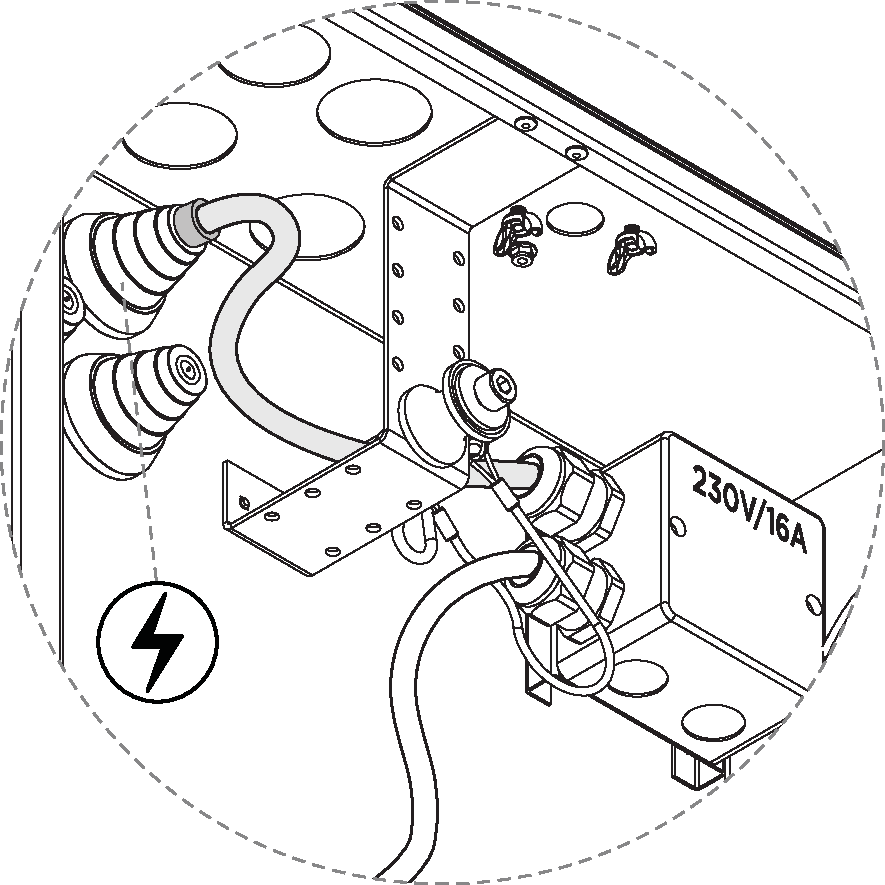
Connect the electrical cable to the junction box.
Warning
Electrical installation should be performed by a qualified electrician according to applicable industry standards and regulations.
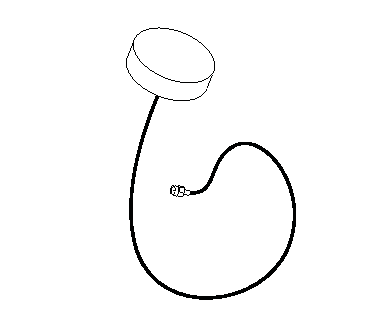
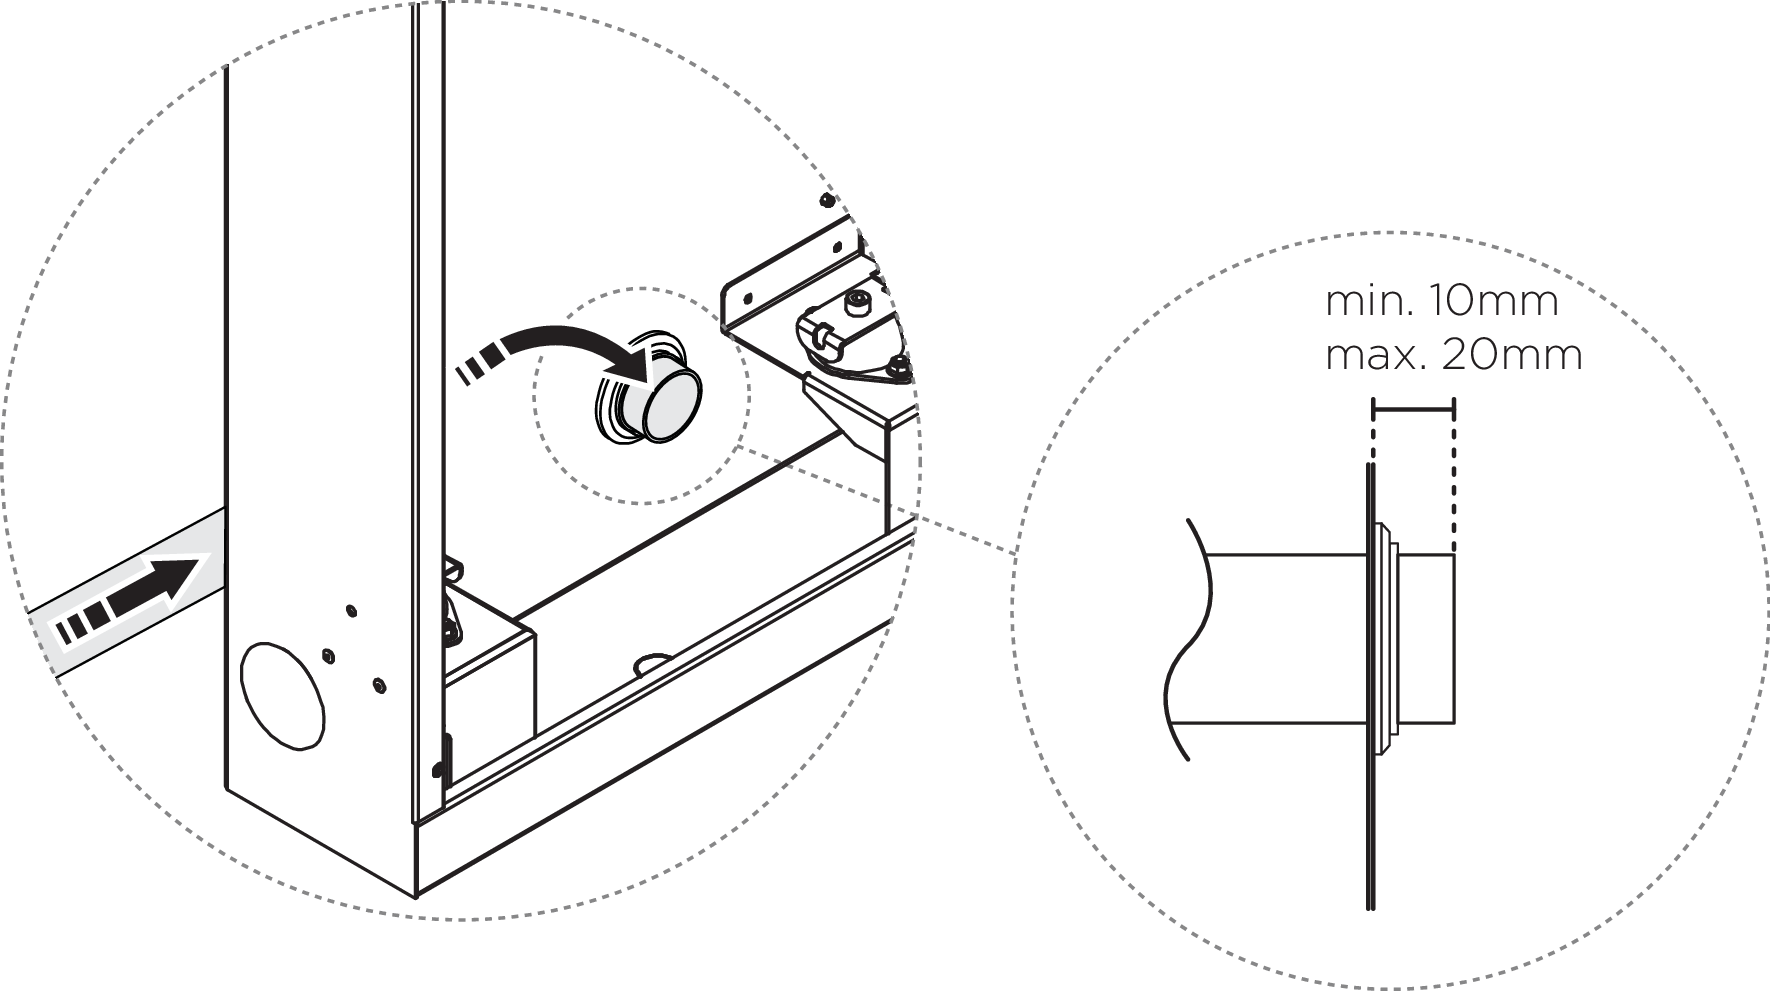
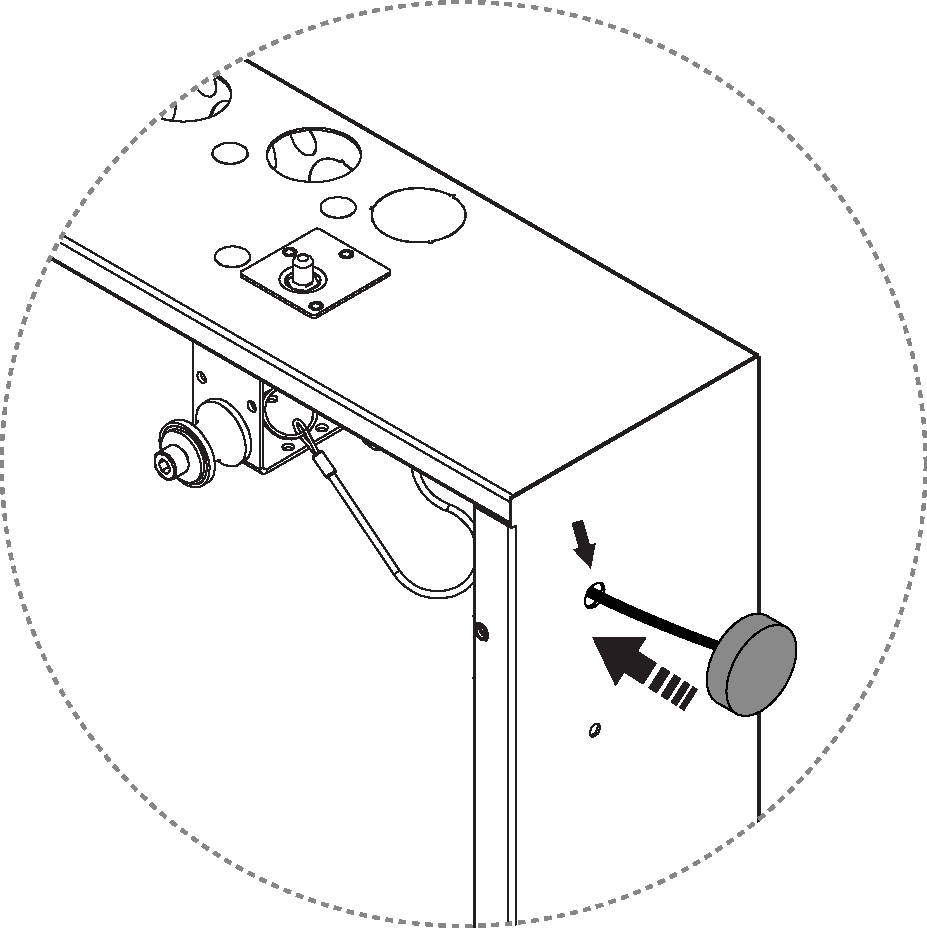
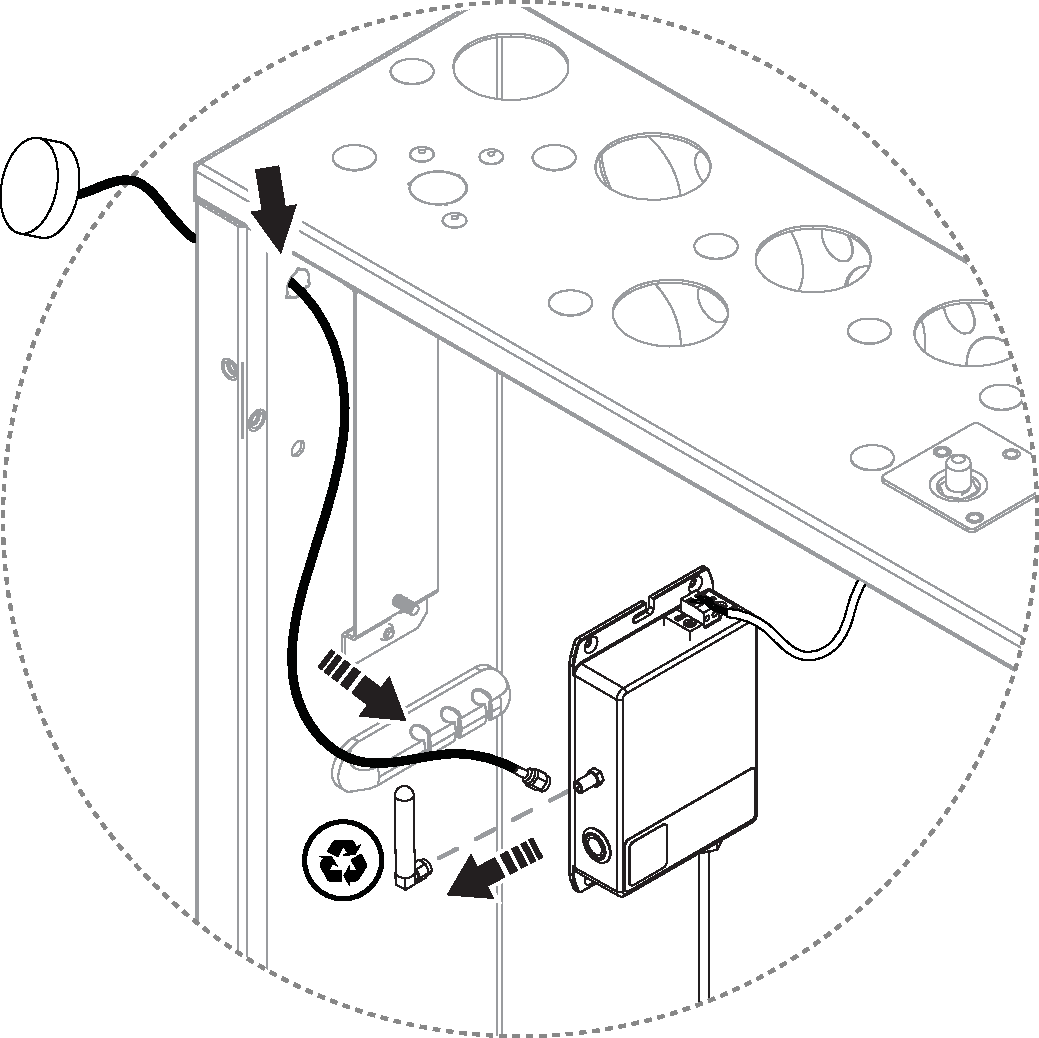
Punch a hole in the sheet metal on the left or right side, and attach the puck antenna.
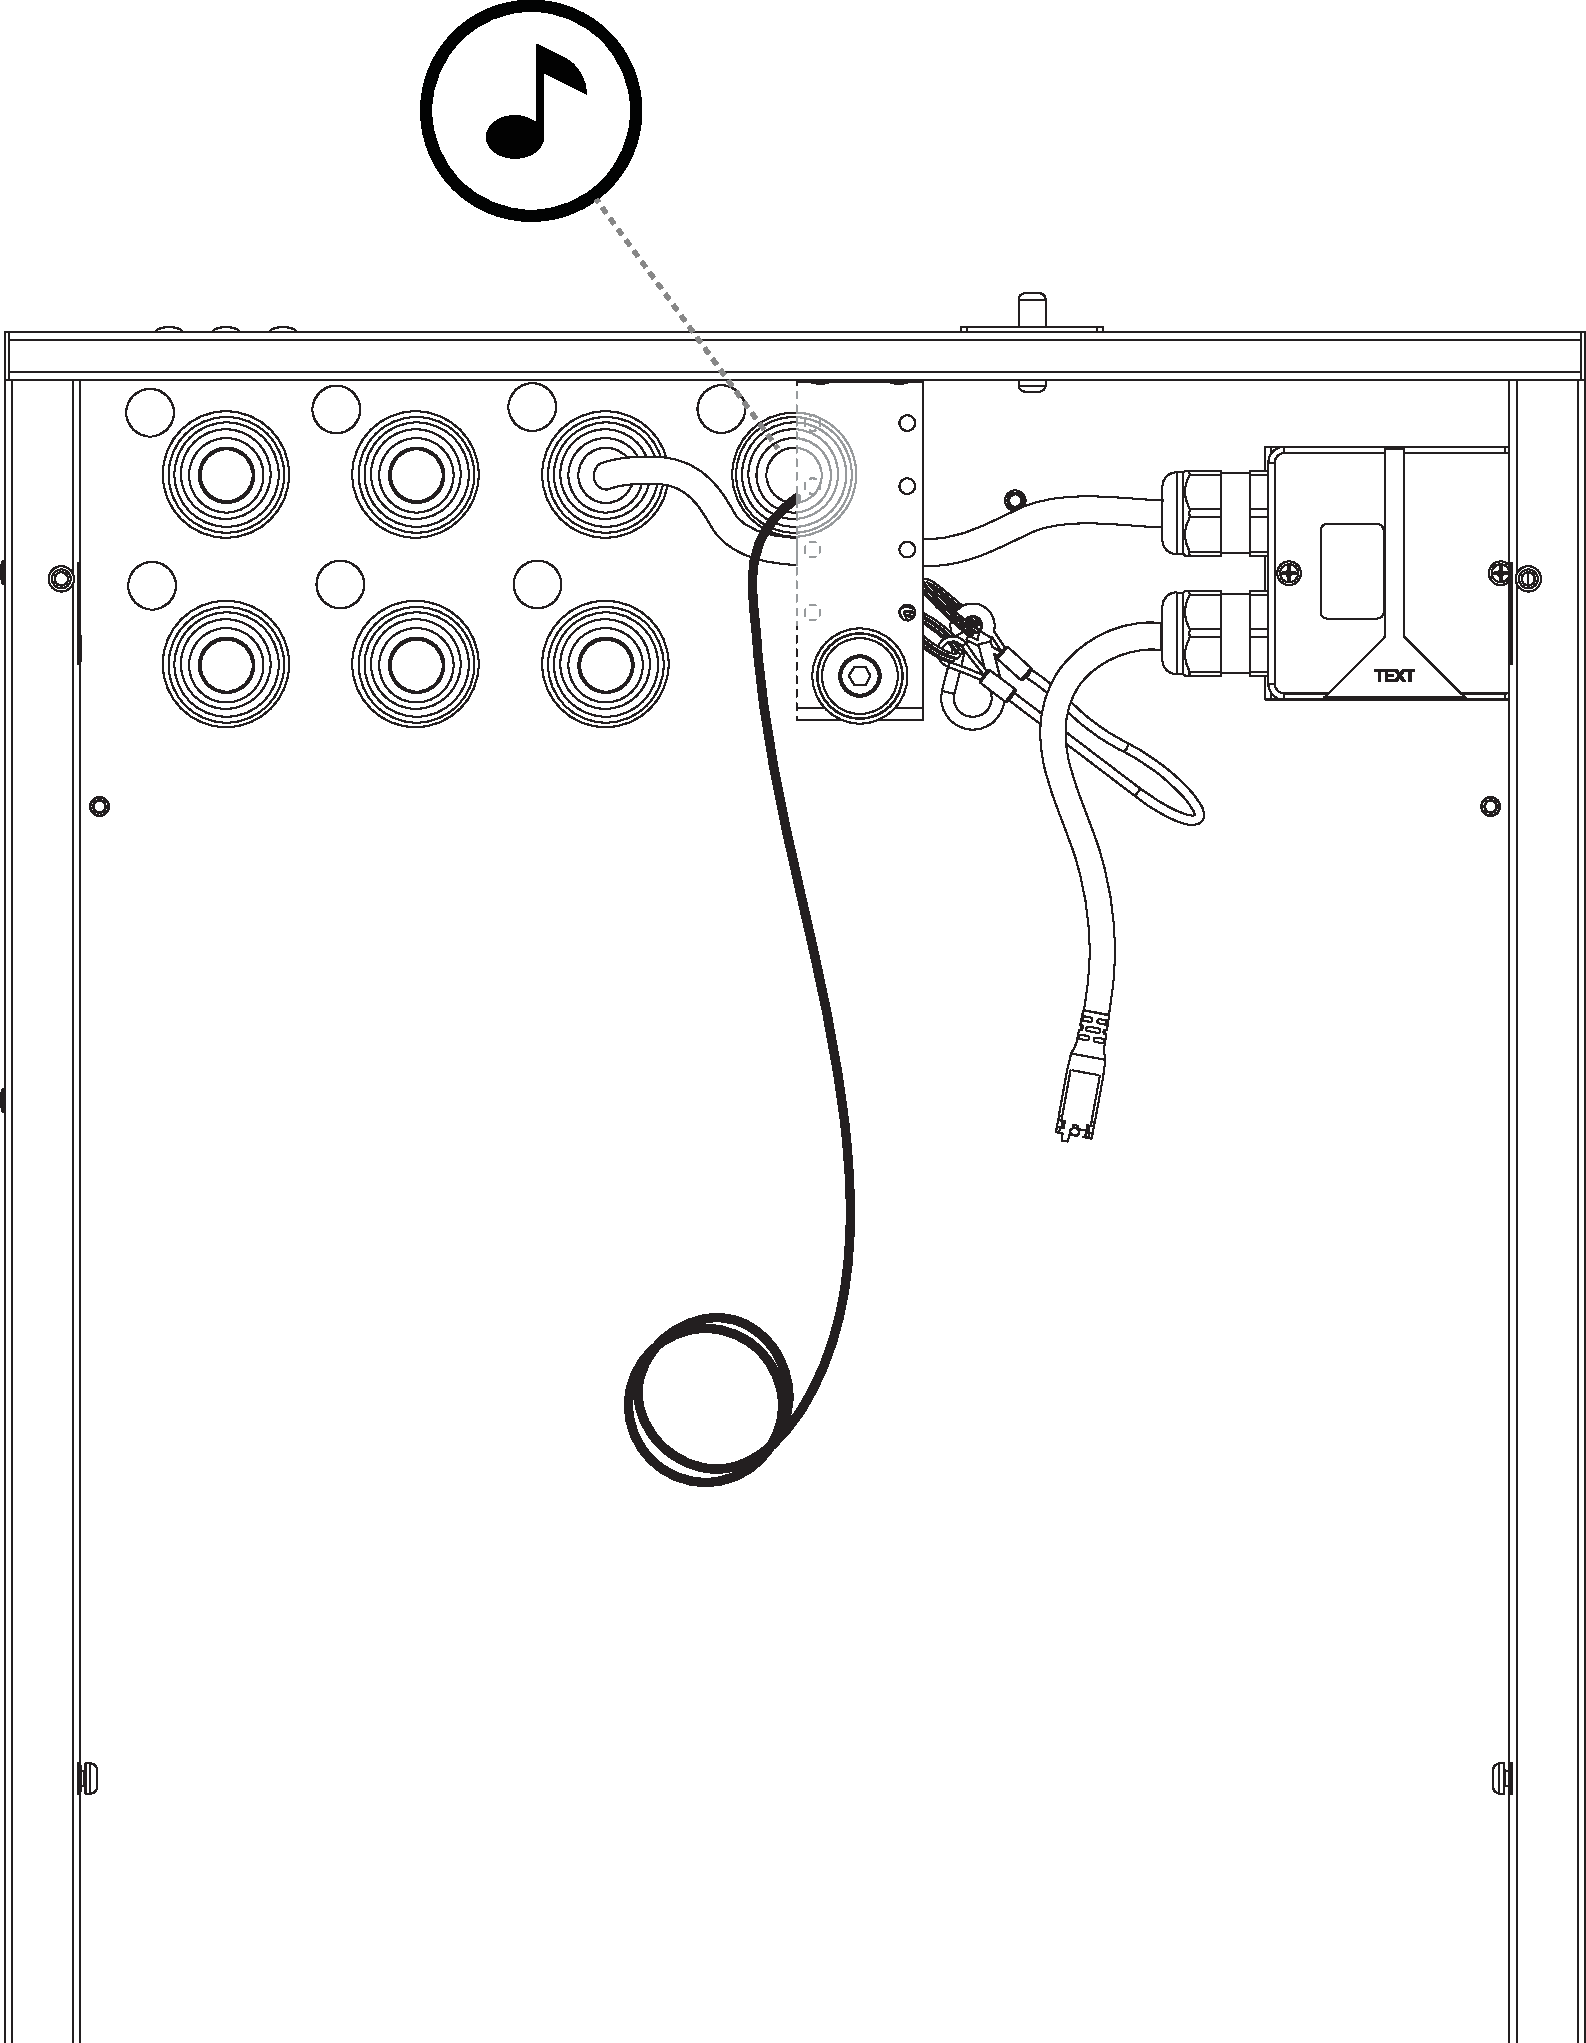
- Figure 70. Only valid for Orbital Audio installation
Thread the speaker cable into the Wall Box.
Caution
Use the supplied rubber plug.
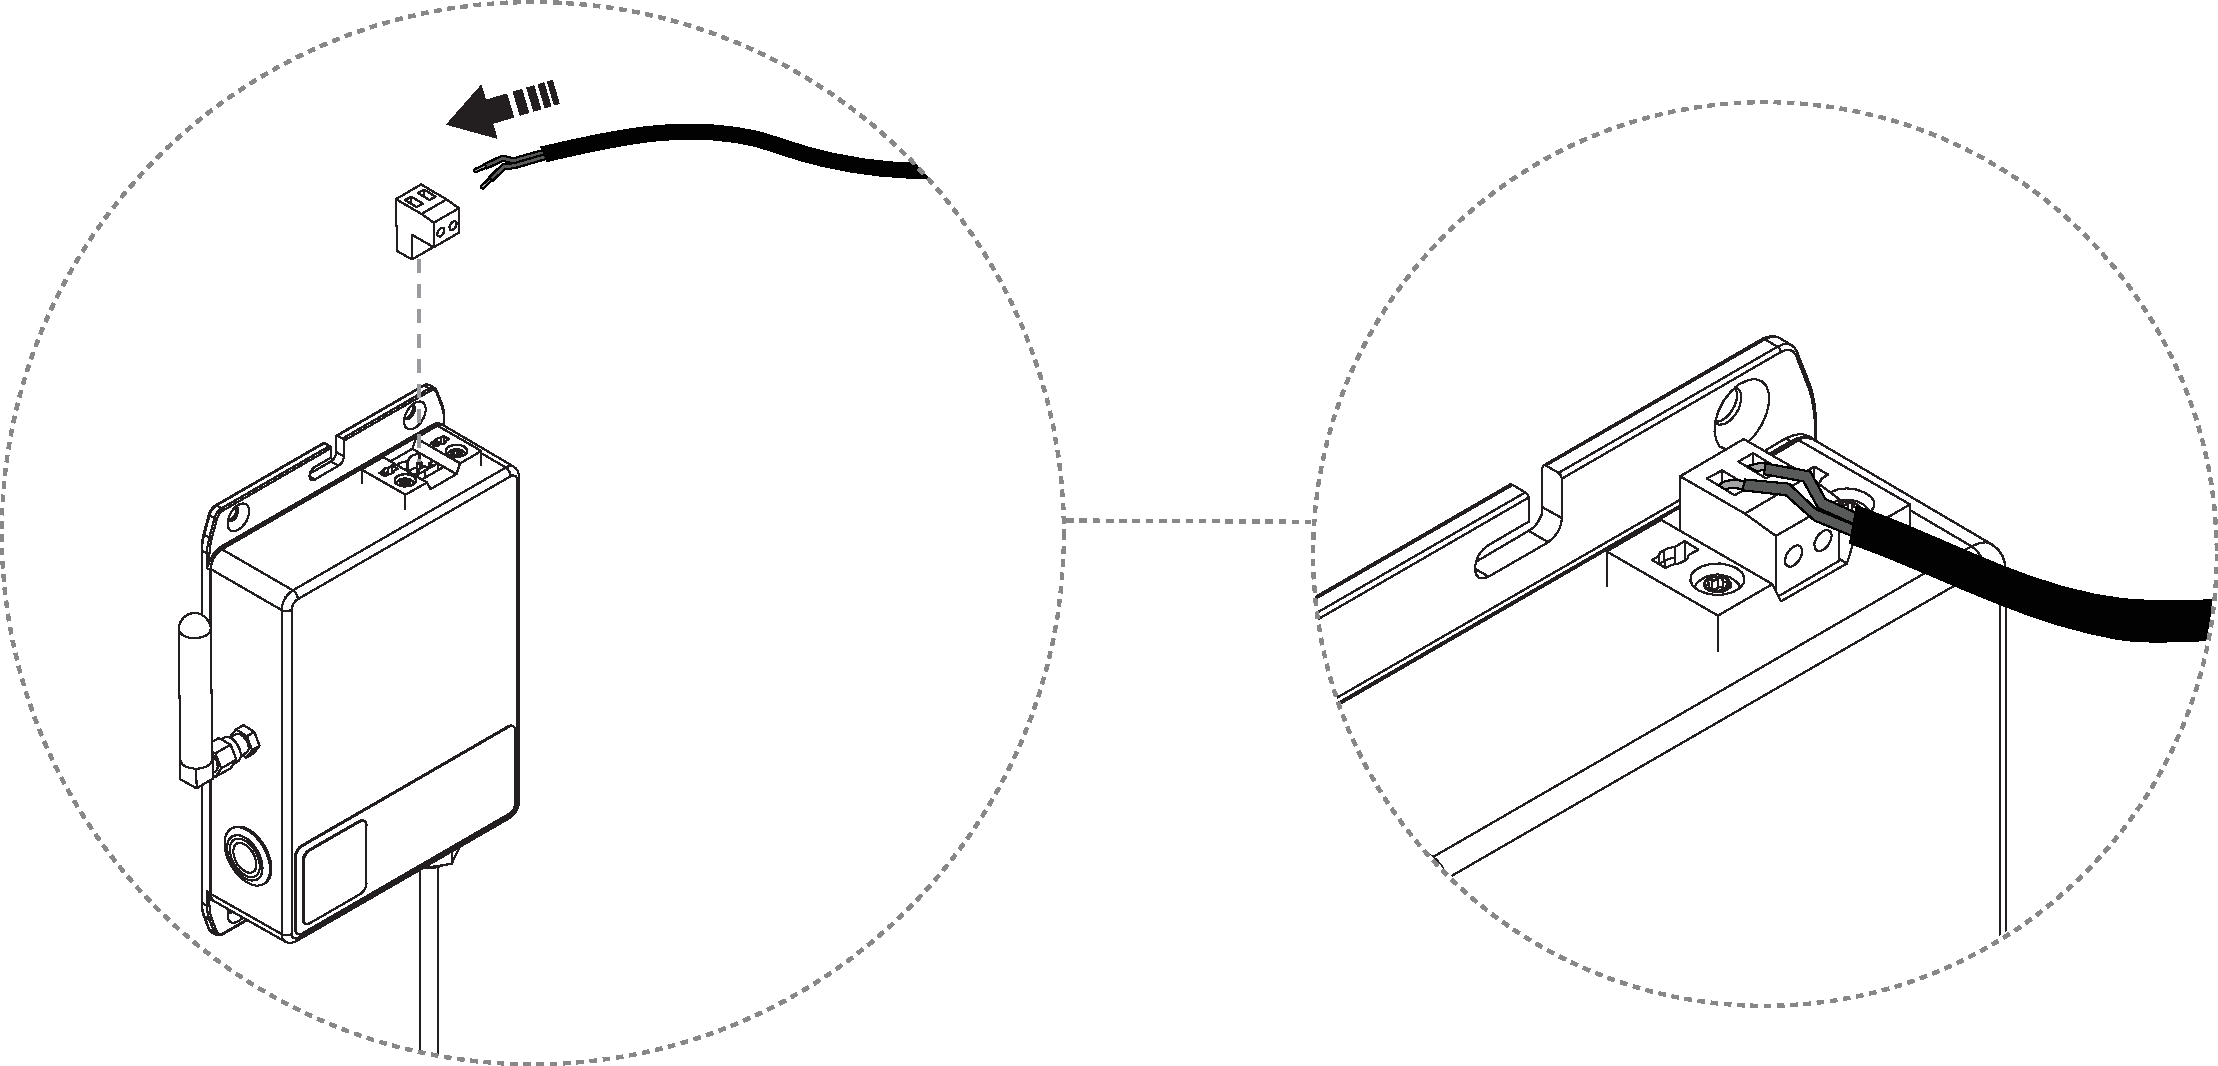
Strip the speaker cable and attach it to the amplifier.
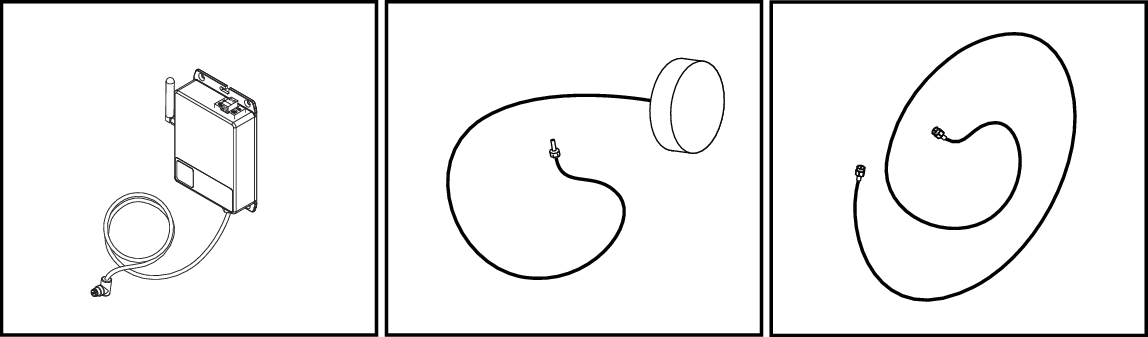
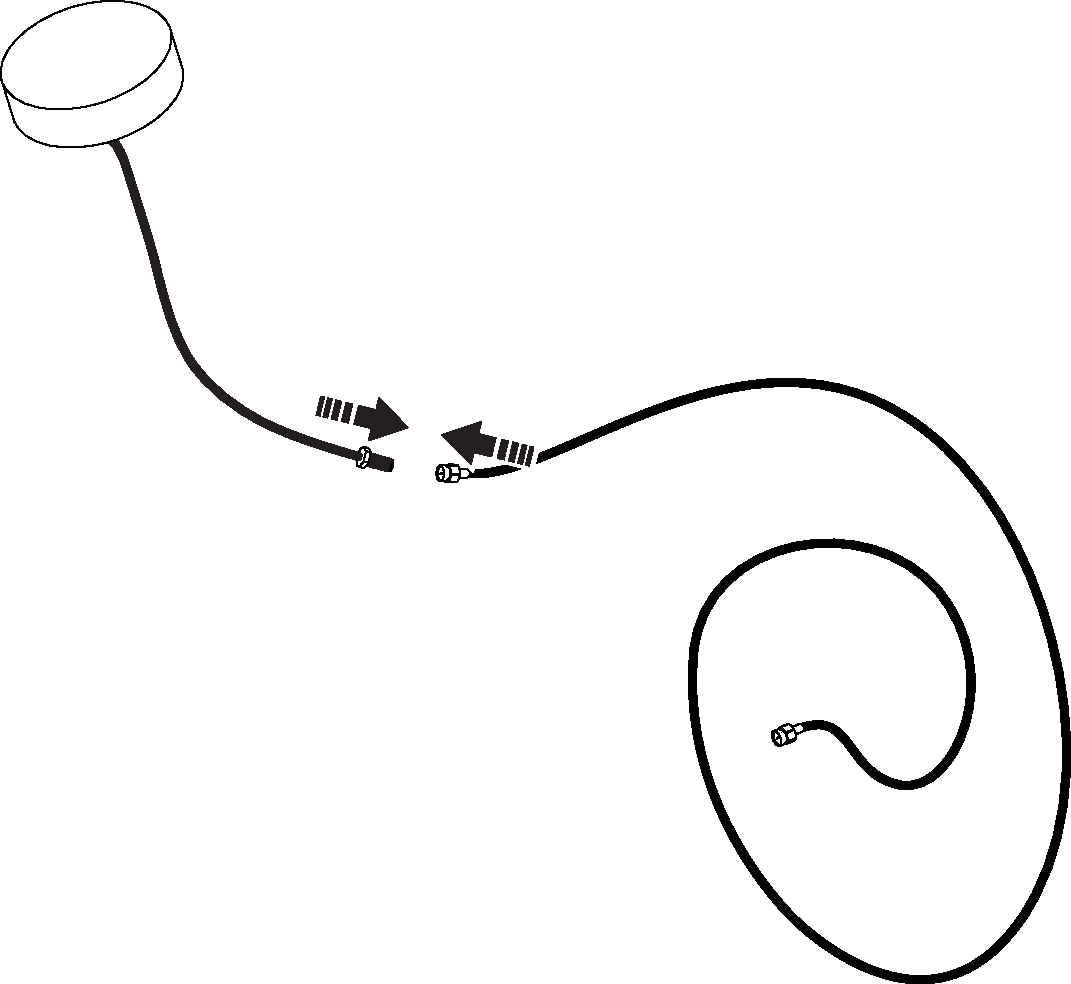
Connect the extension cable to the puck antenna.
Punch a hole in the prepared perforated plate. Remove the stub antenna from the amplifier, and replace it with the puck antenna.
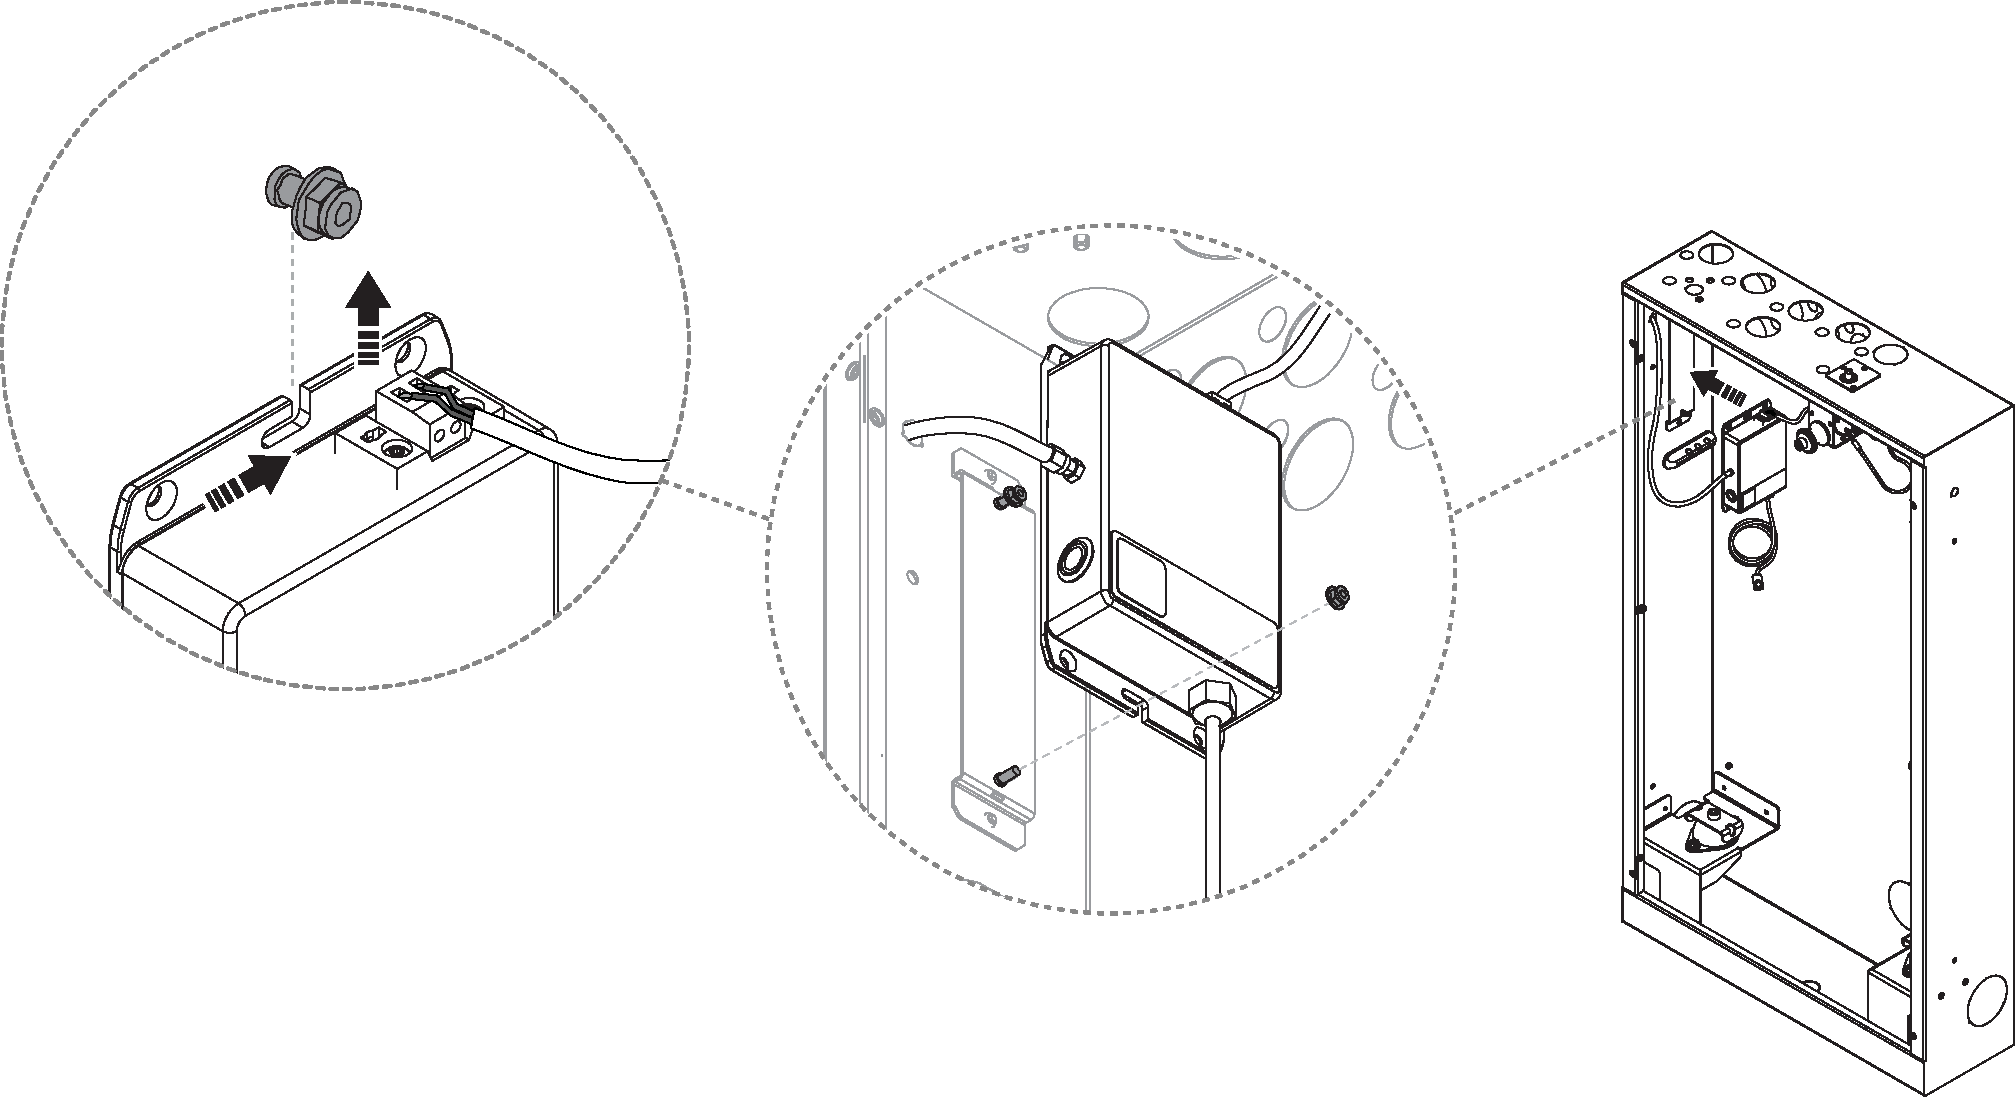
Mount the amplifier in the Wall Box by loosening the nut from the lower bracket and threading the amplifier into the upper bracket. Attach the lower nut and tighten.
Fixture Installation completed. The next step is to install the Orbital Shower Core, Control Dial, shower head, and hand shower (including the diverter and hand shower holder). See the Technology Installation Manual for details.
|