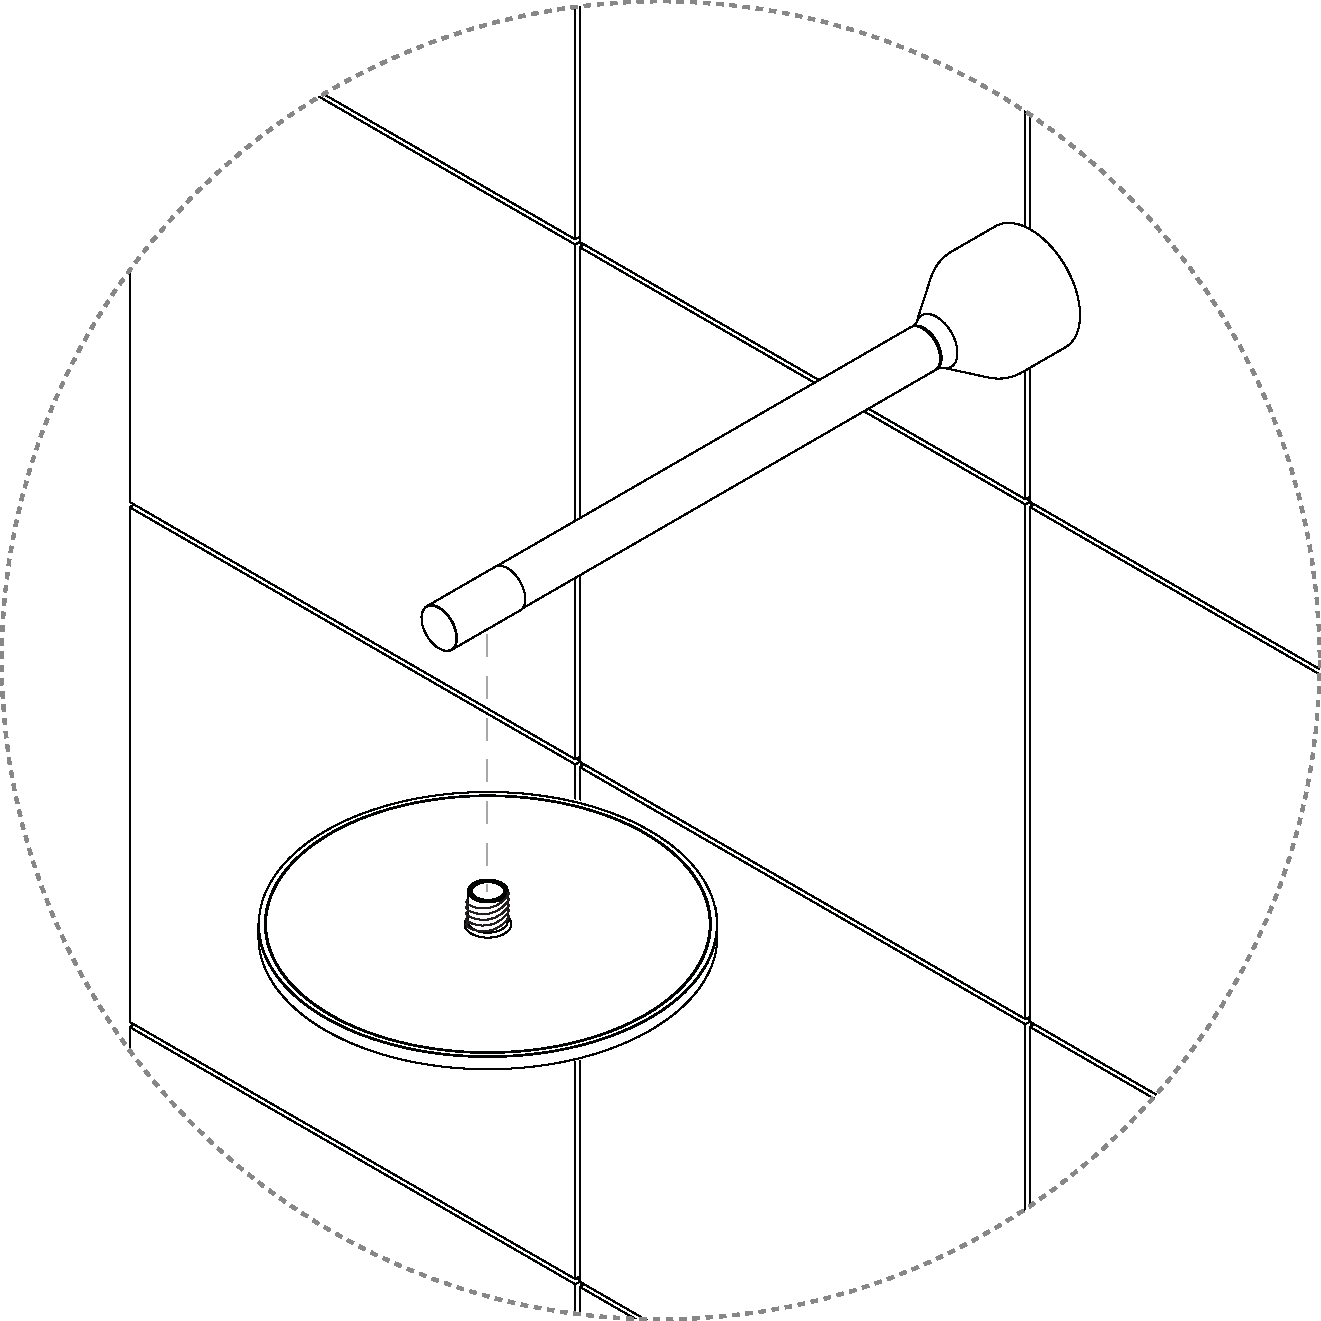
Installing the metallic shower head
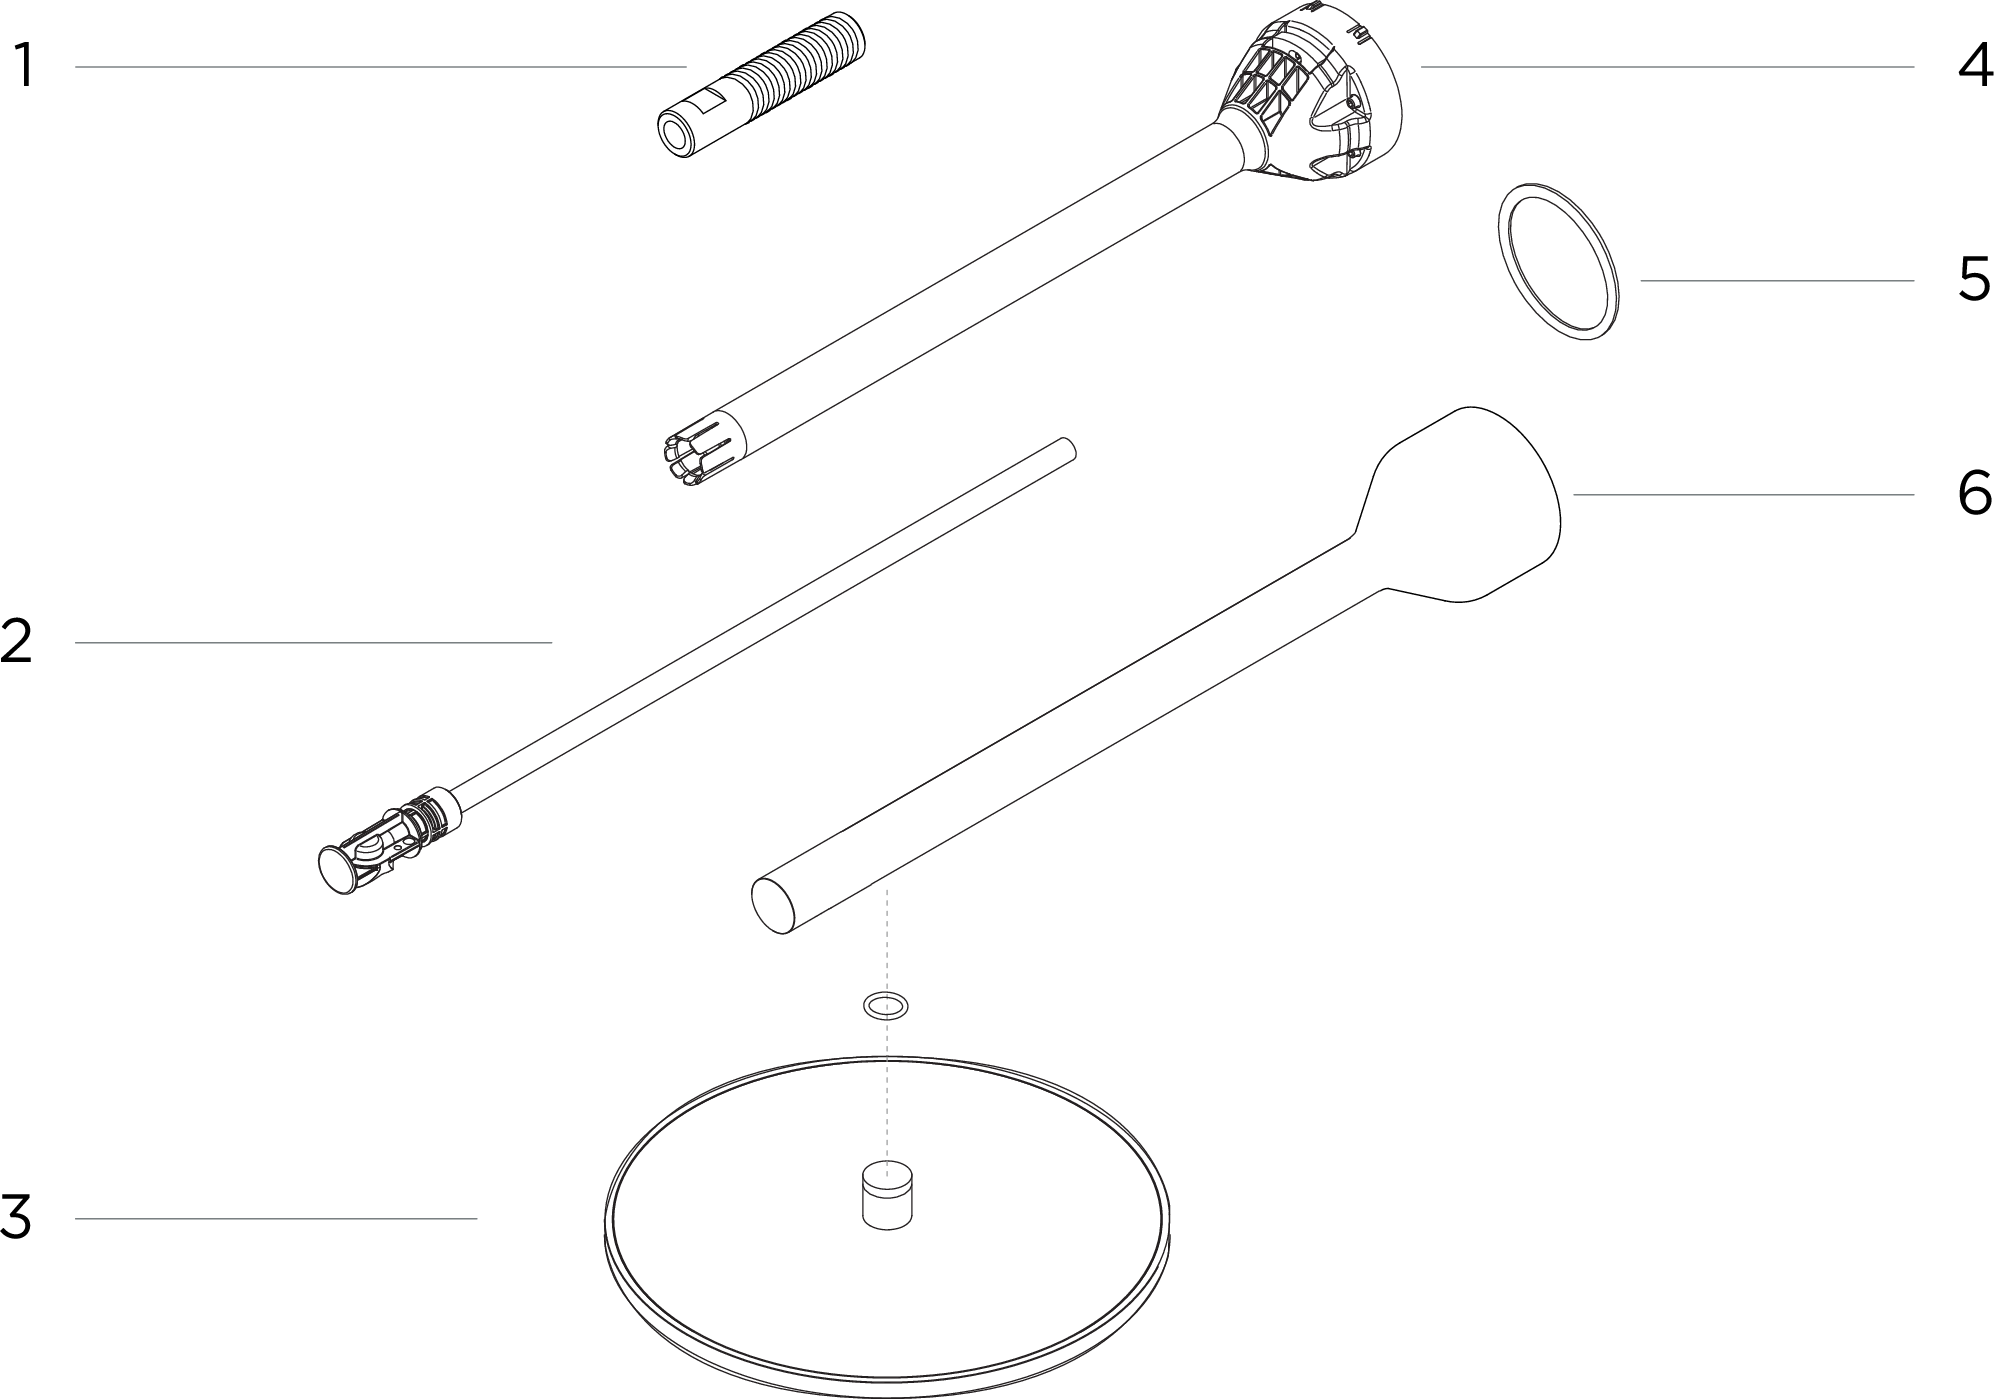 |
Threaded adapter
Head shower internal PEX pipe with gasket
Head shower arm insert with support ring
Metal cover
Shower head
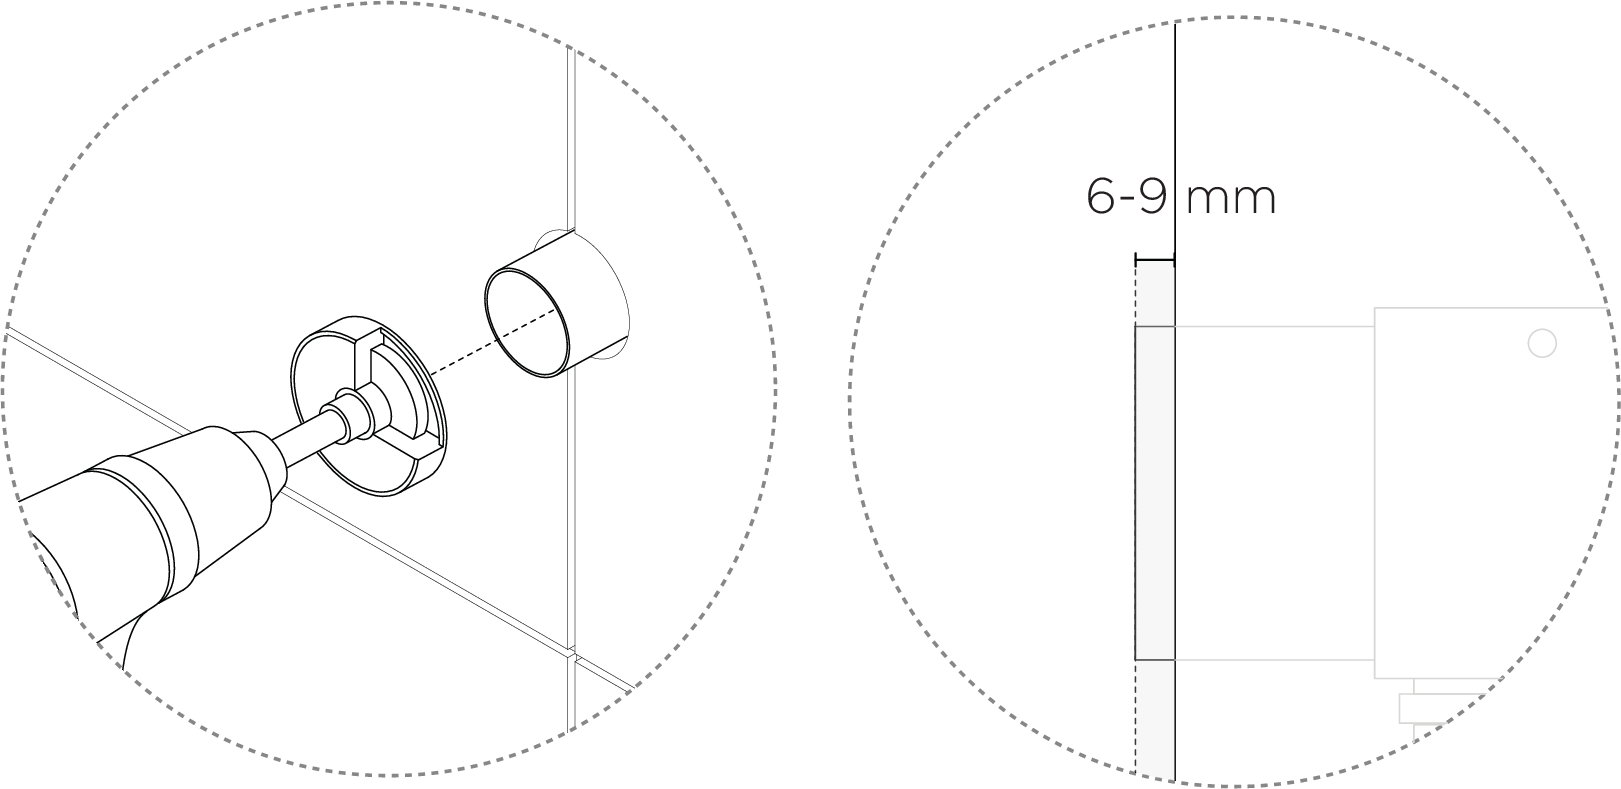
Cut the wallbox UNI Push so that it protrudes 6-9 mm. We recommend using the LK Wallbox Cutter UNI.
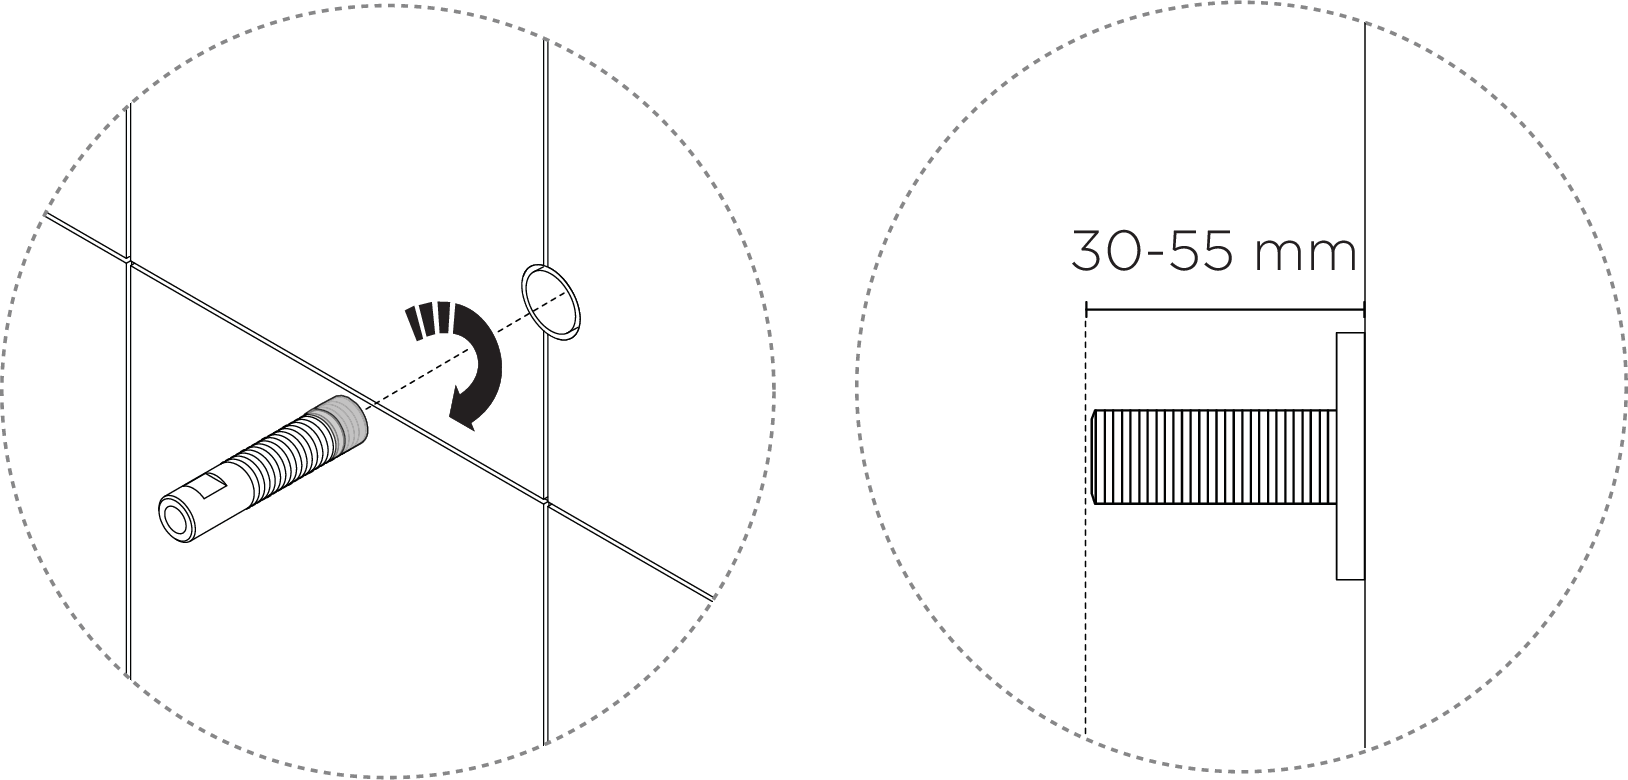
Fit the threaded adapter into the UNI Push wallbox, so that it protrudes 30-55 mm from the wall surface. Cut it if needed.
Note
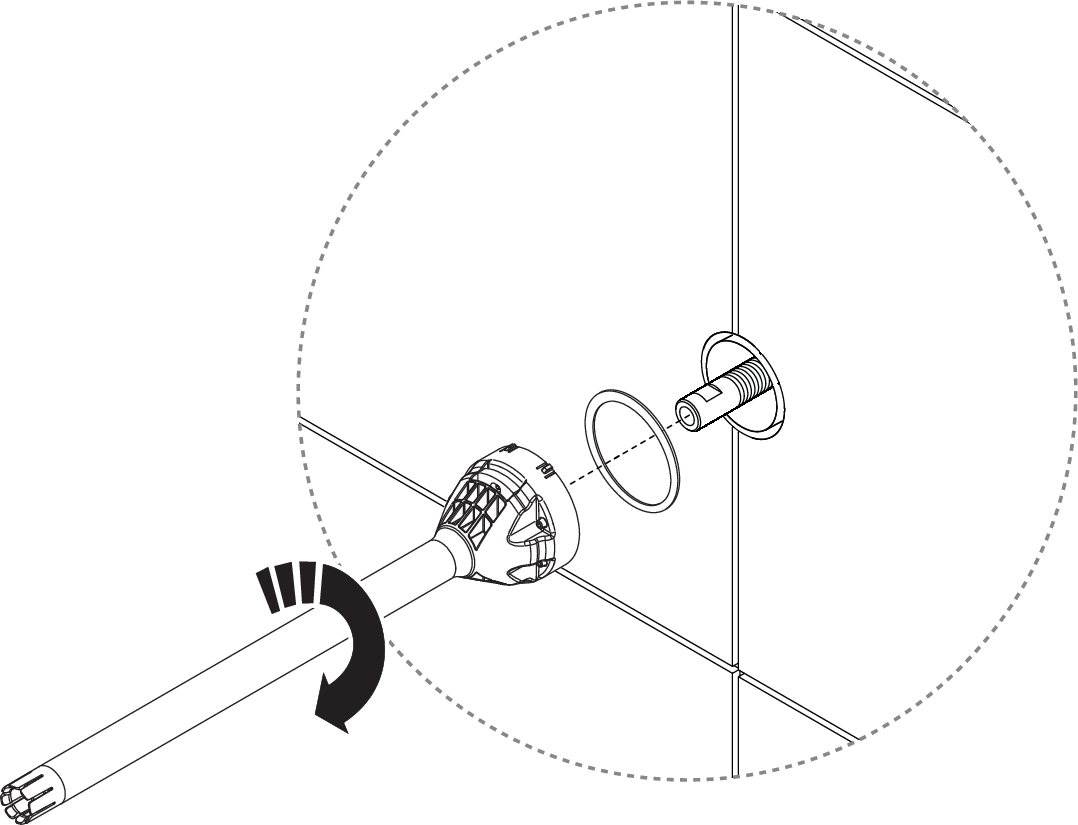
Cover the end of the threaded adapter with thread sealant to avoid leakage.
Fit the head shower arm insert onto the adapter and screw it in fully until it meets the wall.
Caution
Ensure the support ring is in place with the rubber side facing the wall. When the head shower arm is screwed on, the support ring should be fully recessed and not protrude from the base.
If the arm angle needs adjustment, loosen it about half a turn from the wall, then use the set screws to adjust the angle.
Note
The head shower will add some weight. Adjust the angle of the arm slightly upwards to compensate for the added weight.
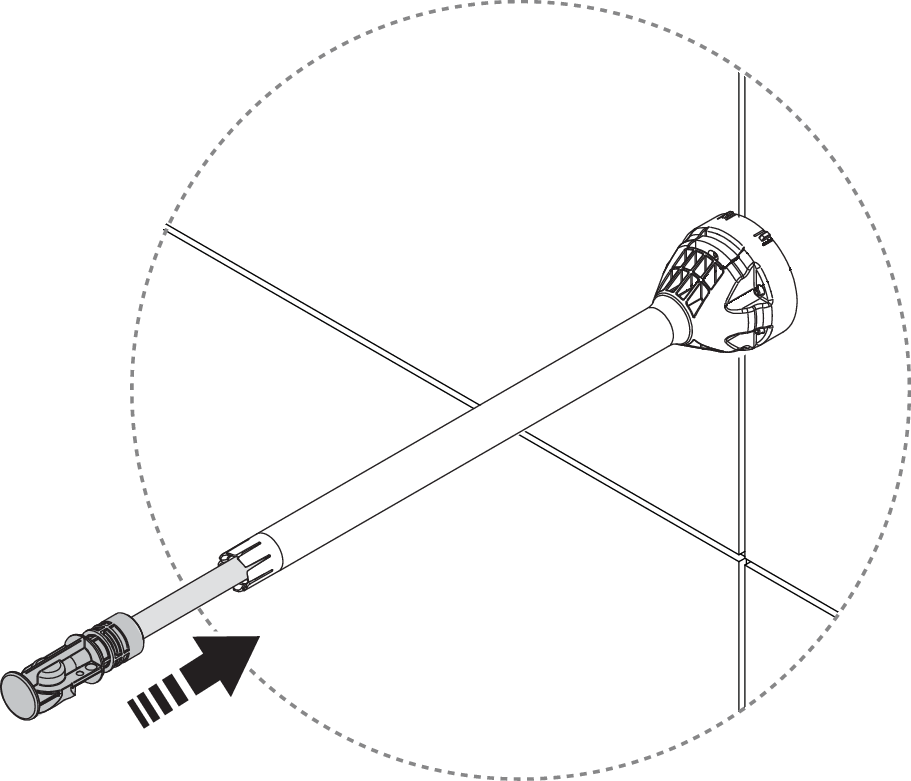
Push the PEX pipe into the shower arm insert.
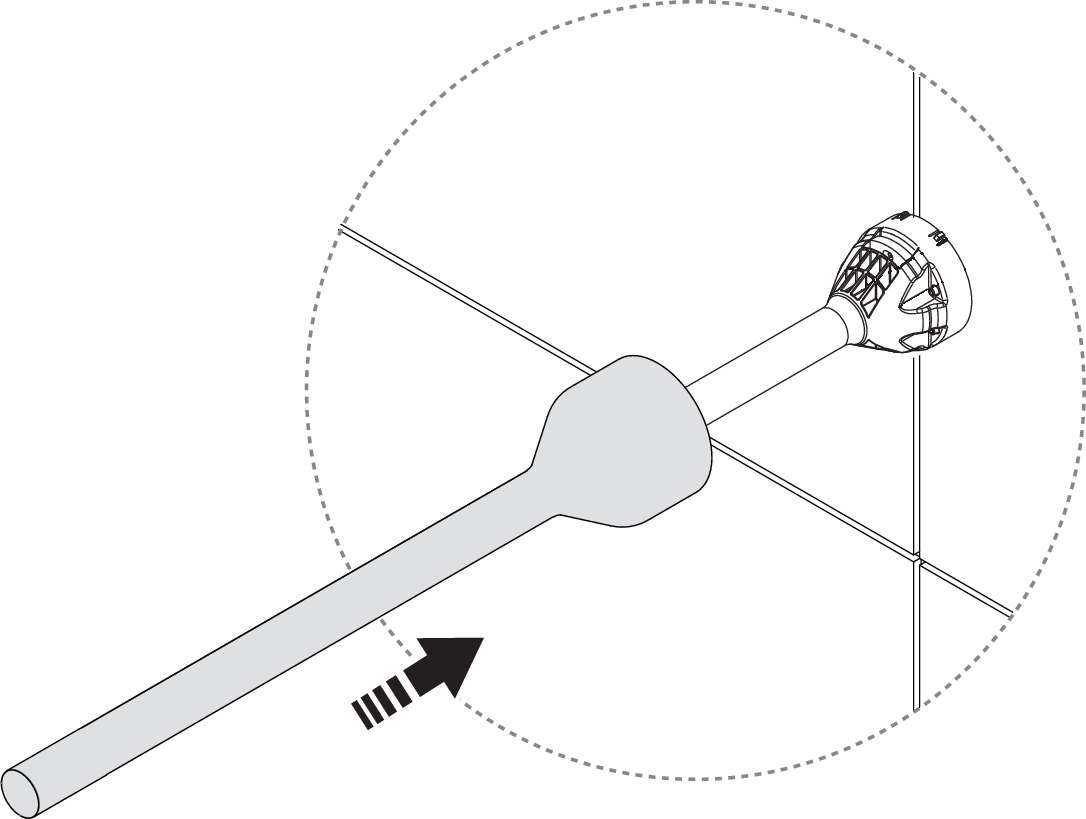
Fit the metal cover over the shower arm insert.
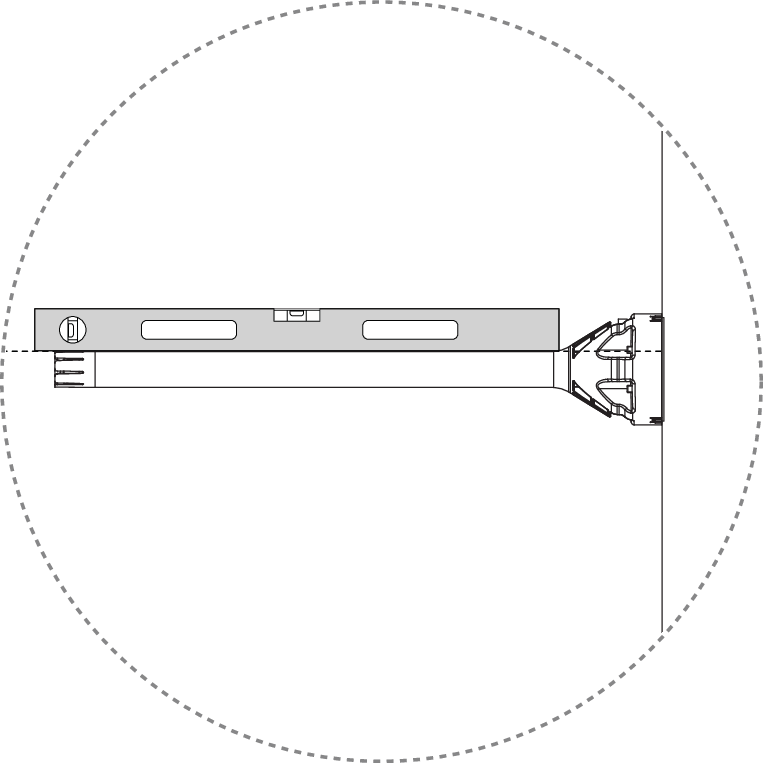
Fit the shower head onto the shower head arm. Check the angle with a spirit level.
Caution
Make sure the gasket is in place, not to cross thread, and not to overtighten.