11. External components - 60 CC
This instruction shows how to swap the diverter (60 CC version), head- and hand shower. Follow the instructions in detail, and don't hesitate to reach out if you have any questions - support@orbital-systems.com.
Use the kit below to swap the diverter, head shower and hand shower. These kits are available in several color variants.
Diverter body |
Diverter wall plate |
Twin washer |
3 mm hex key tool (Allen key) |
Screw, set, M6 x 8 |
Screw ST4.2 x 50mm A2, TX 20 |
Screw ST4.2 x 45mm A2, TX 20 |
Screw ST4.2 x 38mm A2, TX 20 |
Shower head |
Head shower arm |
Threaded adapter |
Hand shower with hose |
Hand shower holder - wall plate |
Hand shower holder - cover |
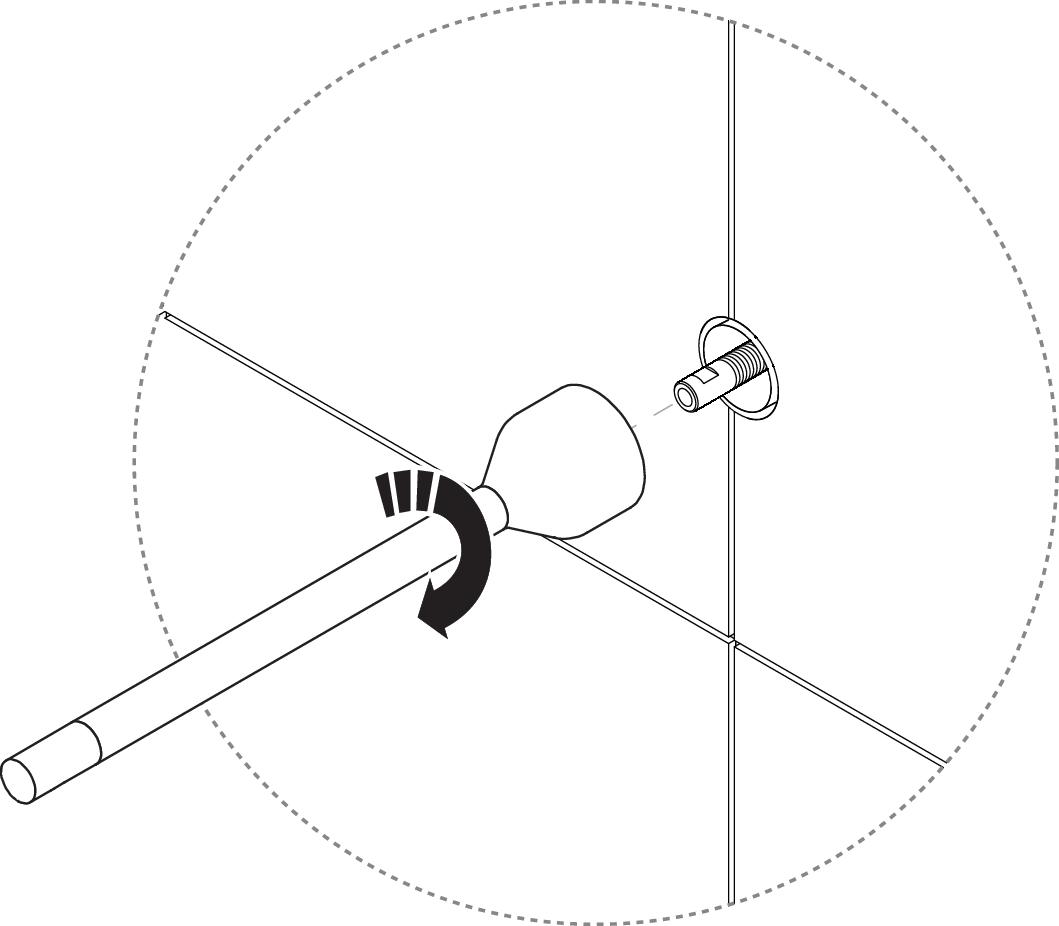
2 mm hex key tool (Allen key) |
M4x8 Set screw |
Screw ST4.2 x 50mm A2, TX 20 |
Screw ST4.2 x 45mm A2, TX 20 |
Screw ST4.2 x 38mm A2, TX 20 |
Dismantle external components
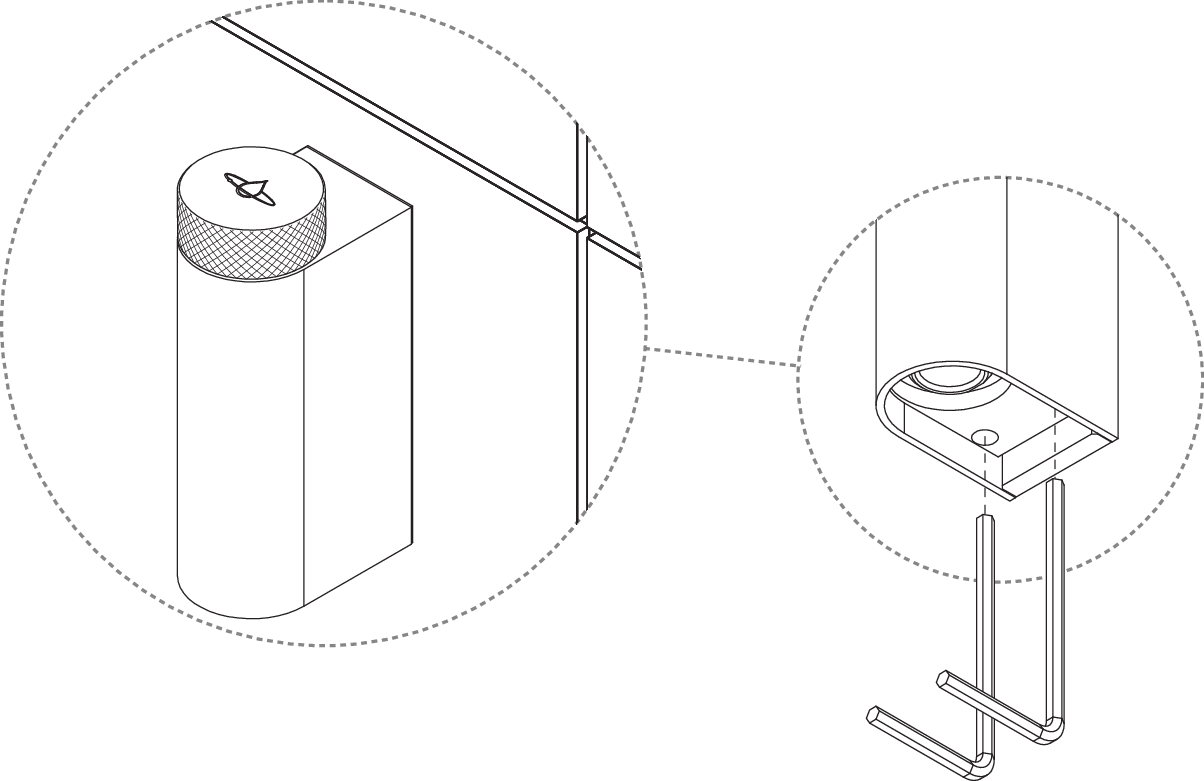
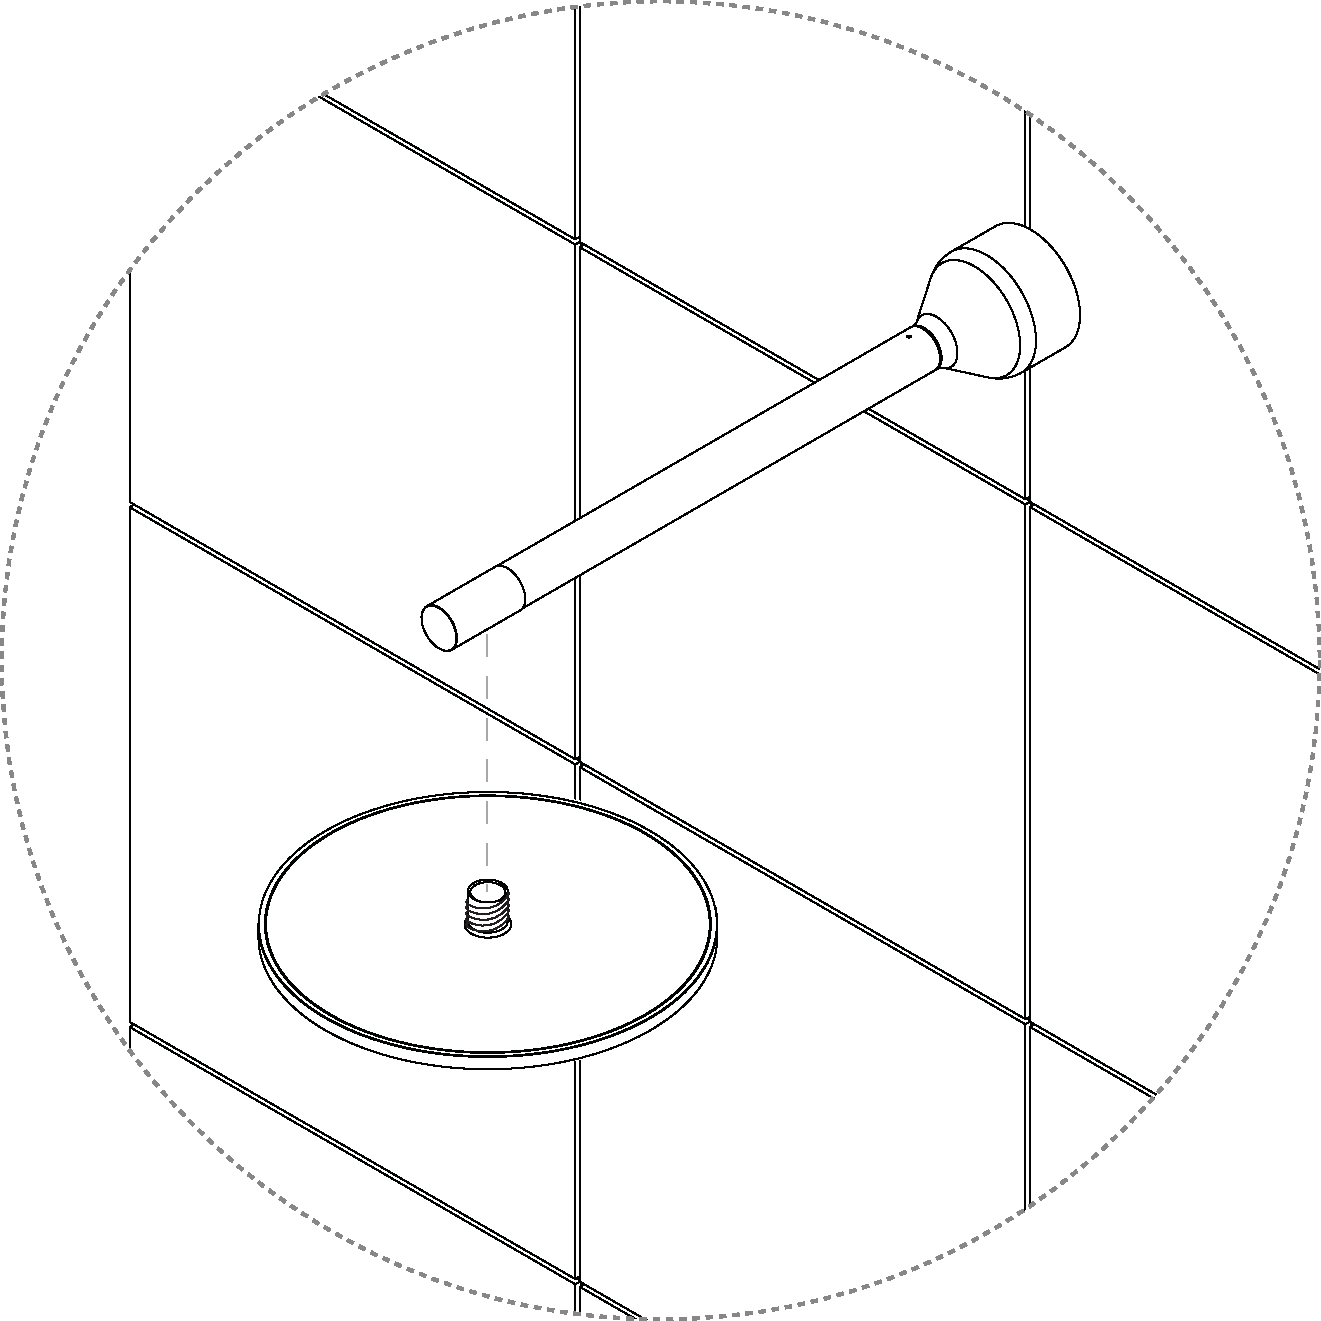
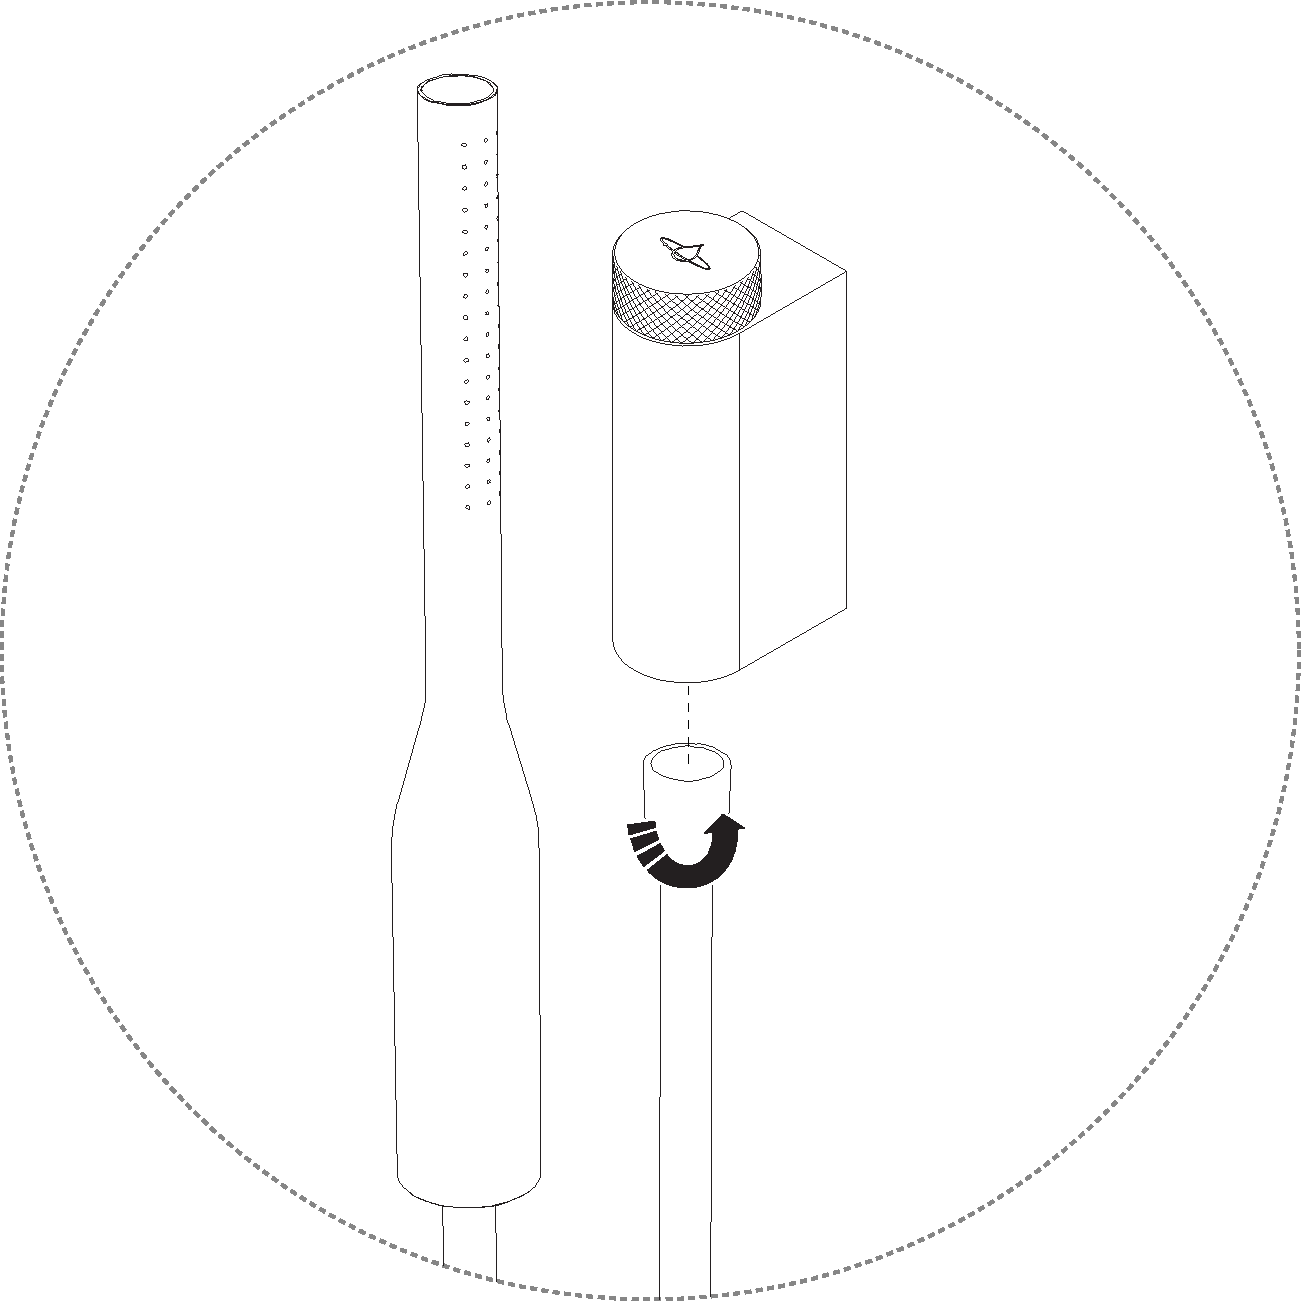
Unscrew the shower head.
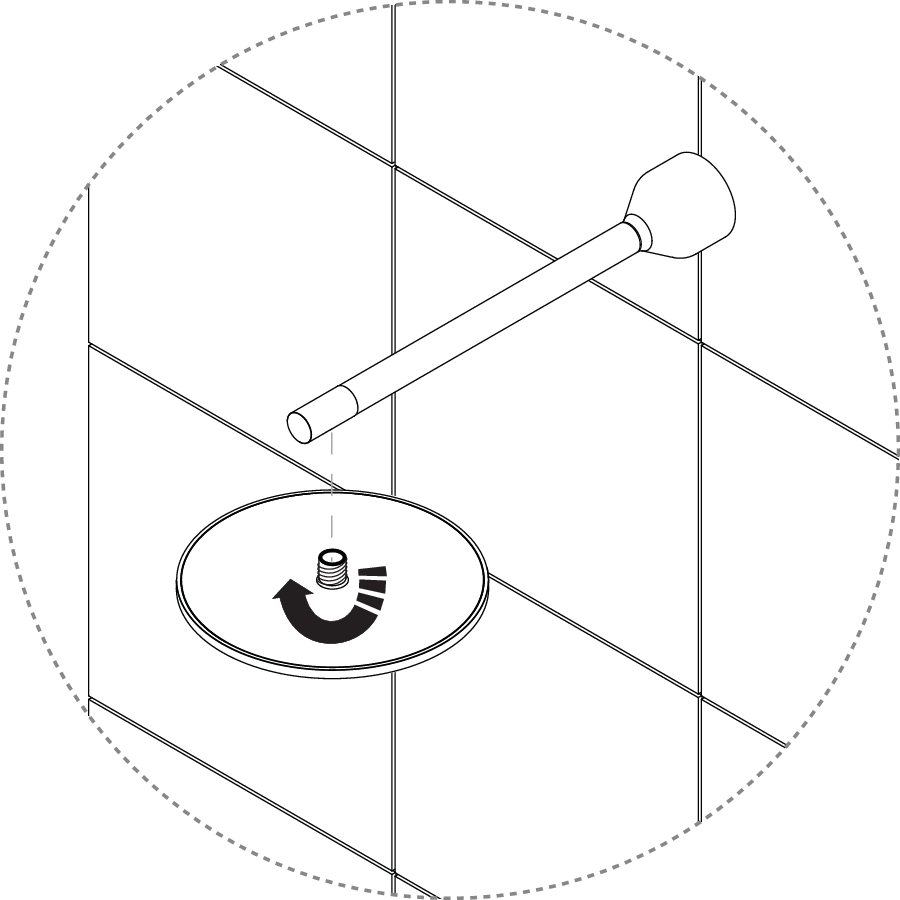
Screw down the shower arm.
Screw down the threaded adapter.
Note
If the threaded adapter is undamaged, it should be reused and does not need to be replaced, unless otherwise specified in the work order. This step and step 1 under "Install external components" only apply when replacing the threaded adapter.
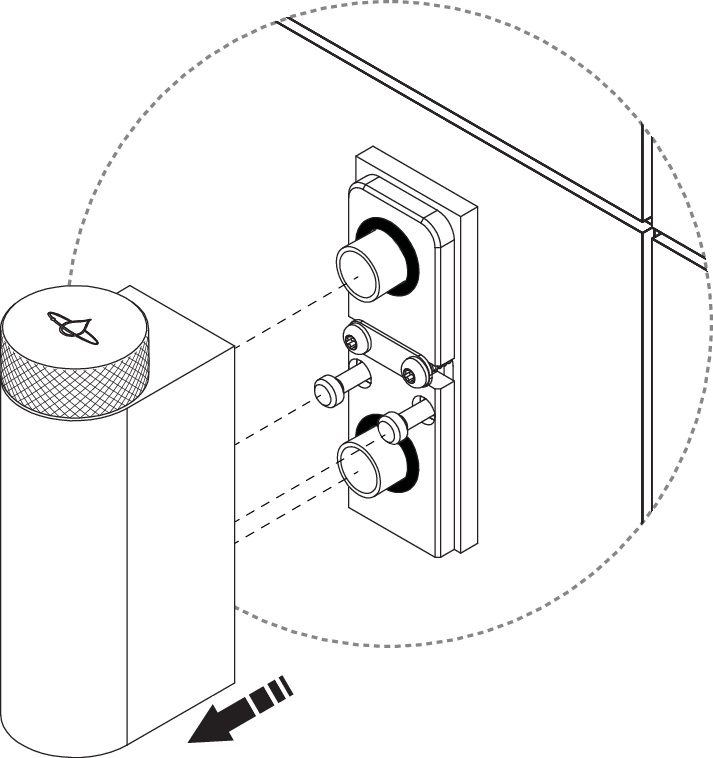
Disconnect the hand shower from the diverter.
Loosen the screws on the bottom to release the diverter.
Caution
Hold the diverter to minimize the risk of falling.
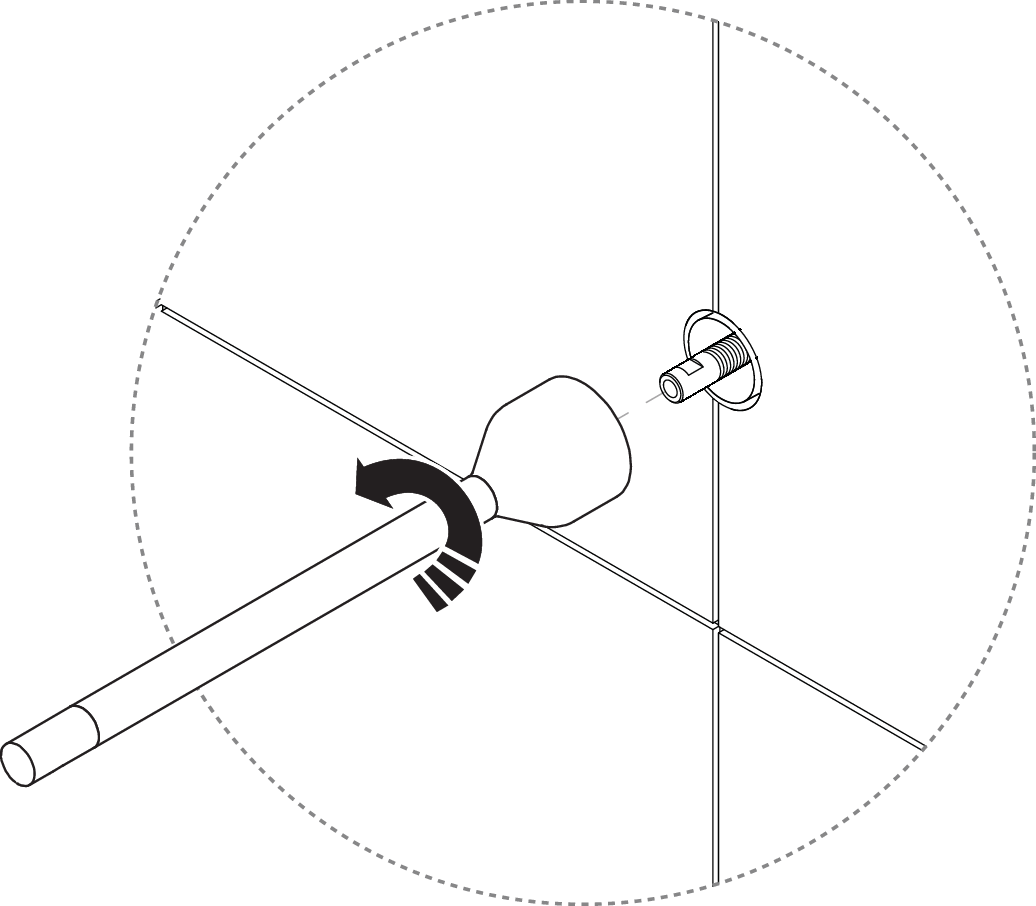
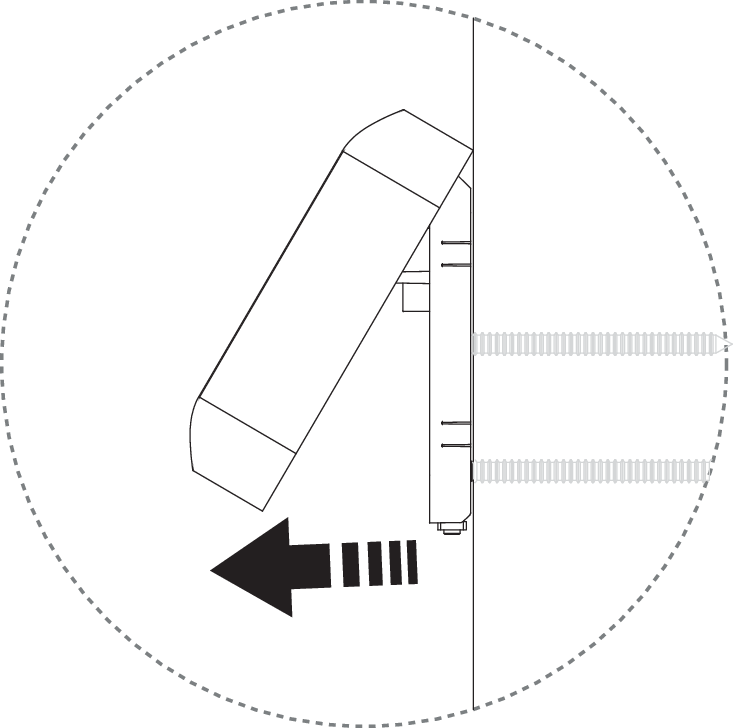
Loosen the diverter body.
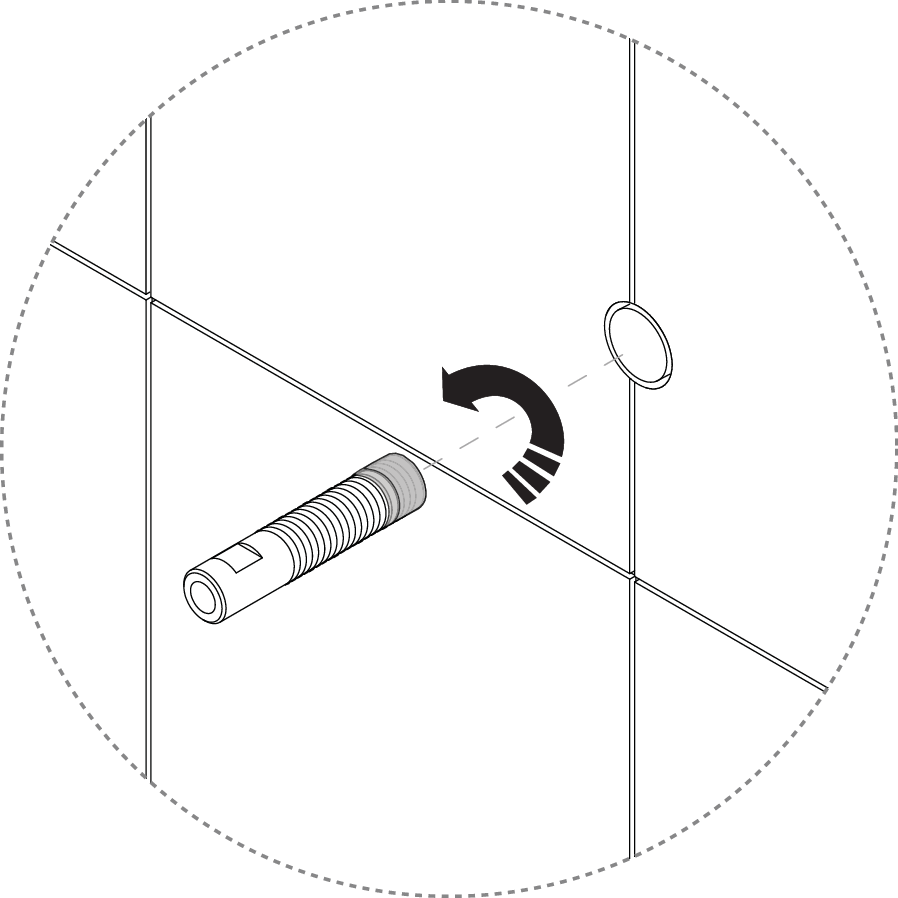
Screw down the wall plate.
Note
If the wall plate is undamaged, it should be reused and does not need to be dismantled, unless otherwise specified in the work order. This step and steps 4-5 under "Install external components" only apply when replacing the wall plate.
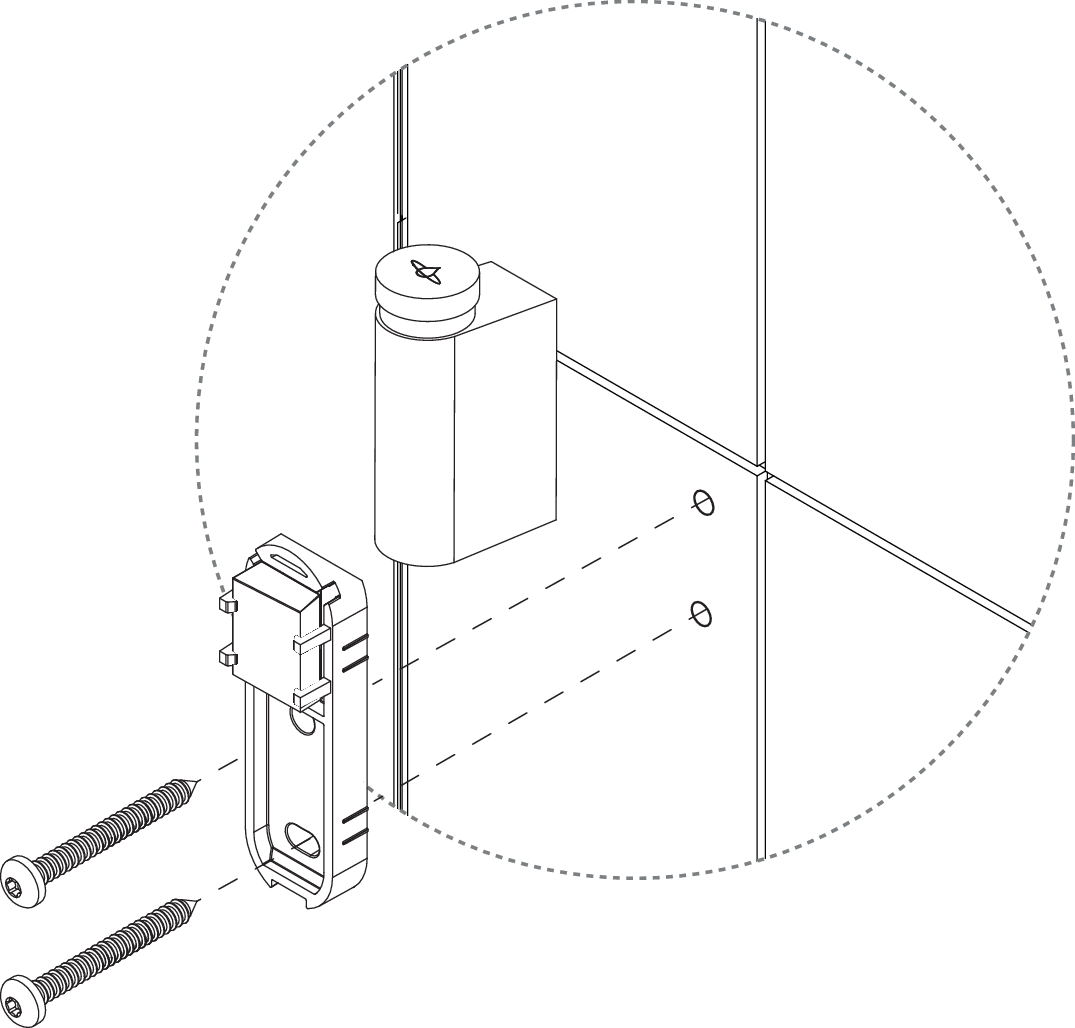
Unscrew the hand shower holder. The screw is on the underside.
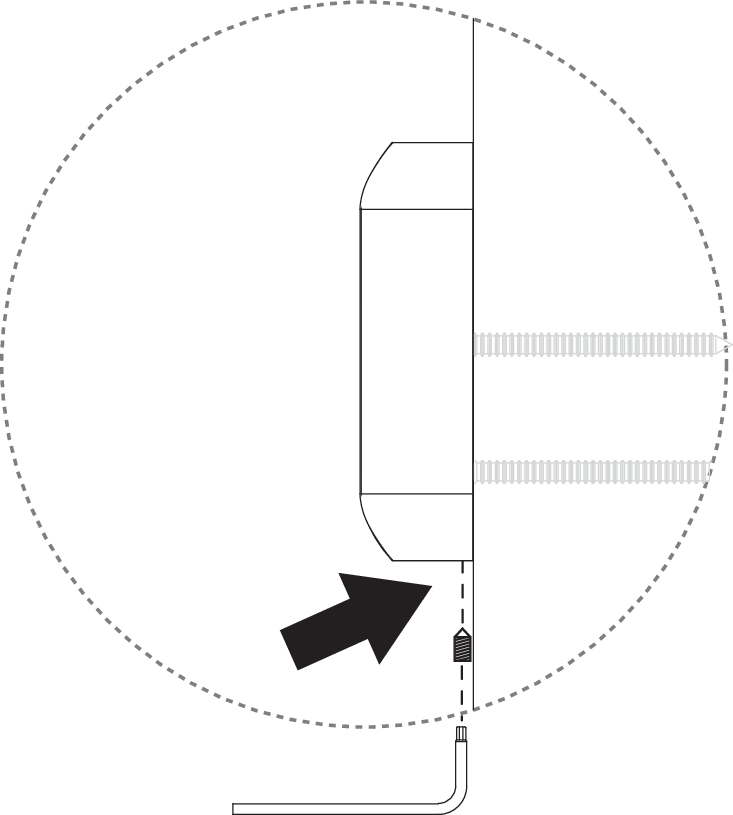
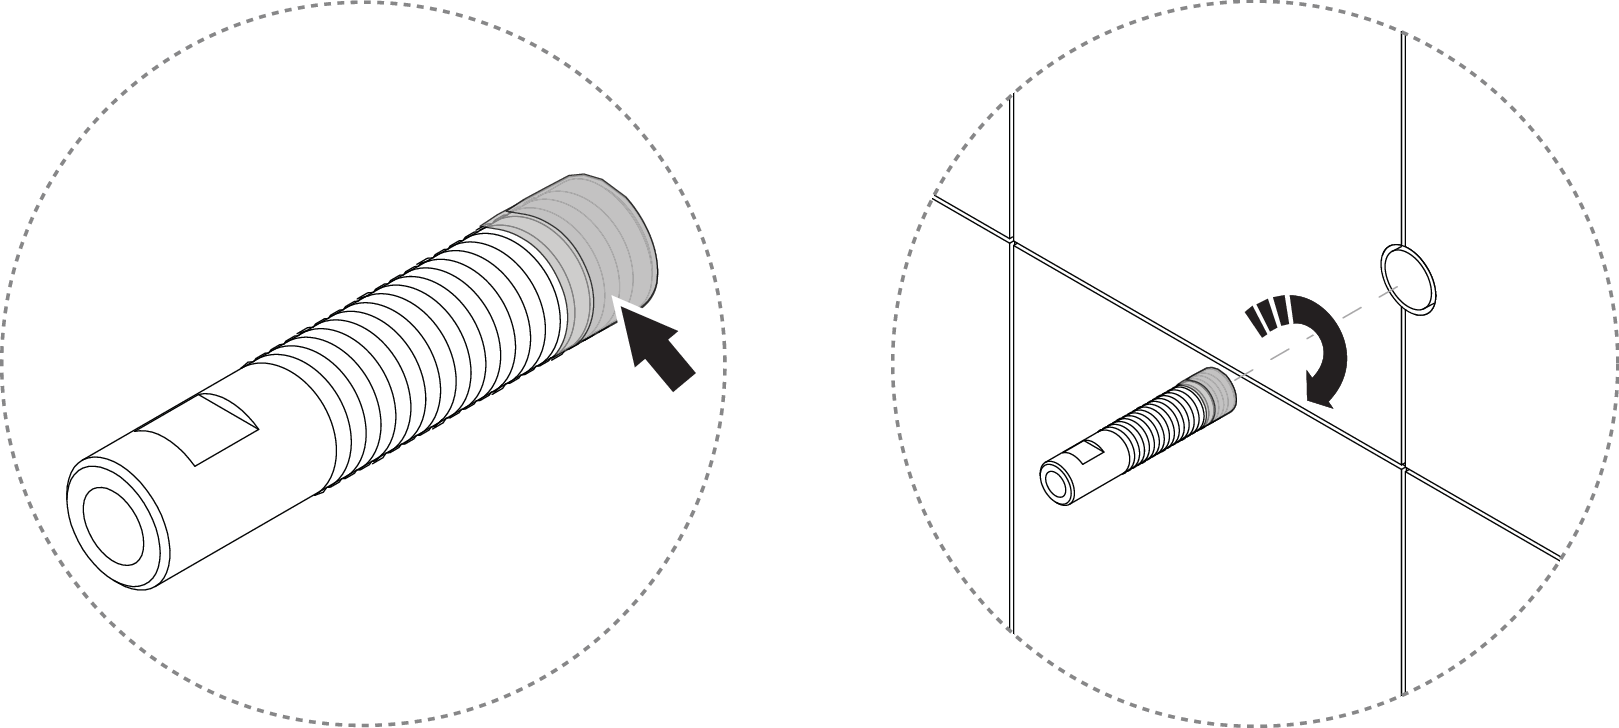
Loosen the sleeve.
Screw down the wall plate.
Note
If the wall plate is undamaged, it should be reused and does not need to be dismantled unless otherwise specified in the work order. Therefore, this step and steps 7-8 under "Installing external components" only apply when replacing the wall bracket.
Install external components
If the threaded adapter and wall brackets are in good condition, they should be reused and do not need to be replaced unless otherwise specified in the work order.
Steps 1, 4, 5, 7 and 8 only apply when replacing these parts.
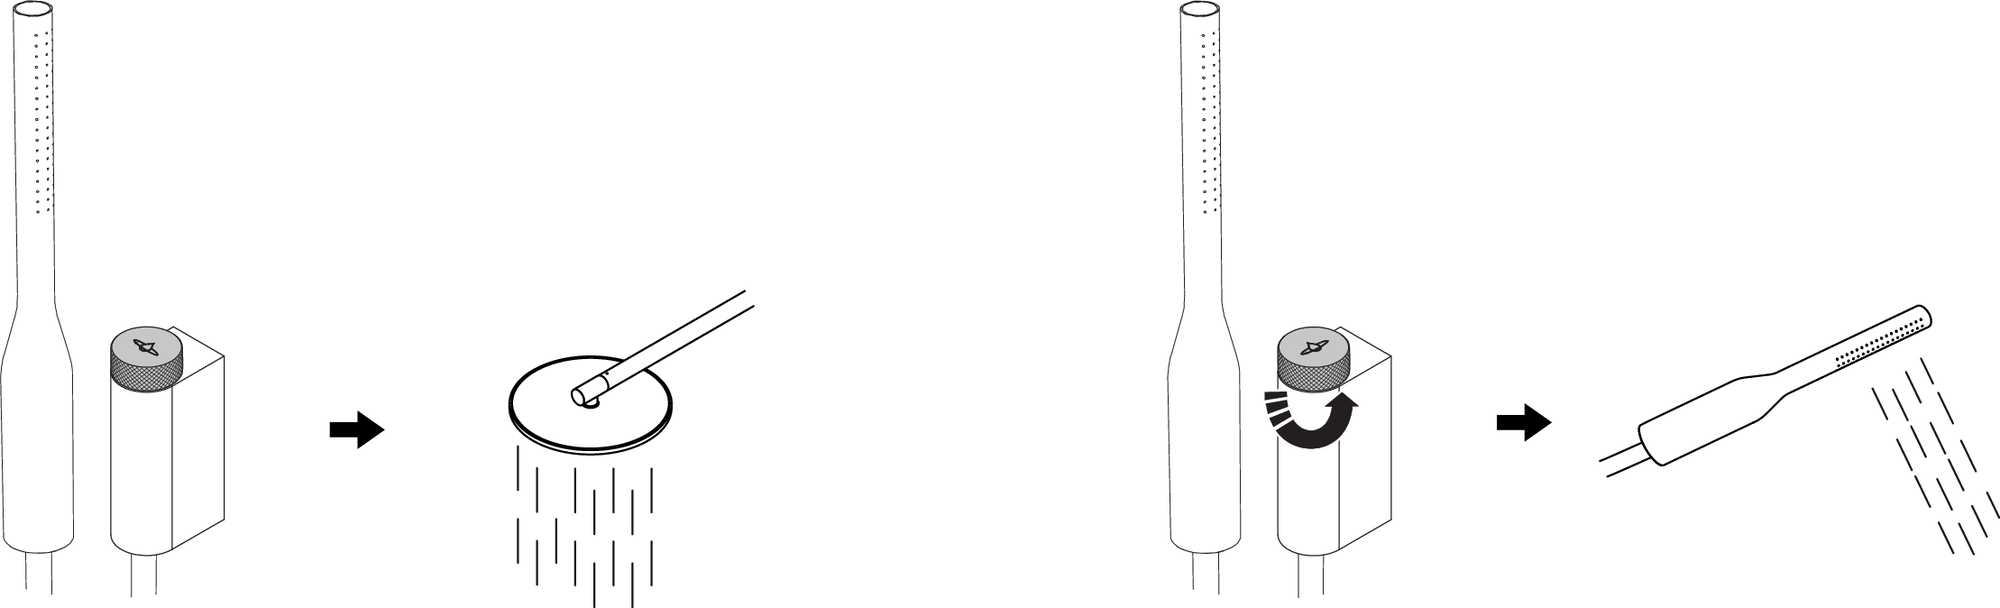
Fit the threaded adapter. Cover the end with thread sealant to prevent leakage.
Install the shower arm.
Caution
Apply fitting grease to the end of the PEX pipe.
Check that the gasket is in place and fit the shower head.
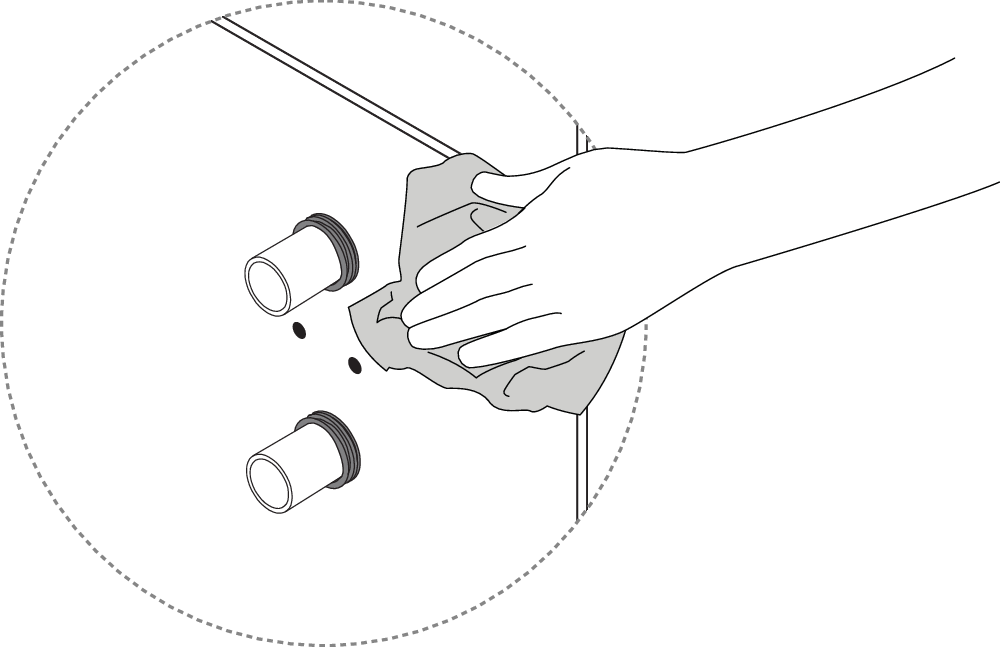
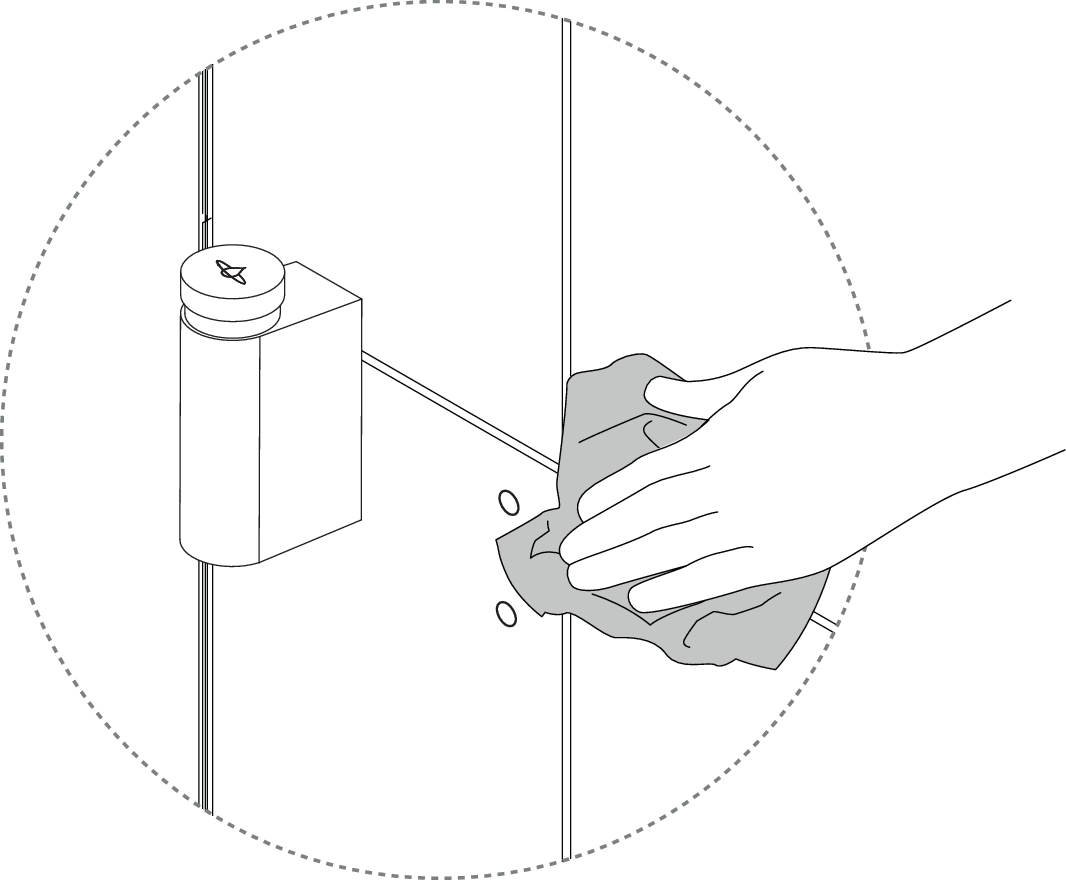
Clean the surface behind the diverter wall plate.
Fit the new wall plate.
Caution
Fill the holes with wet room silicone. The mount must be horizontal.
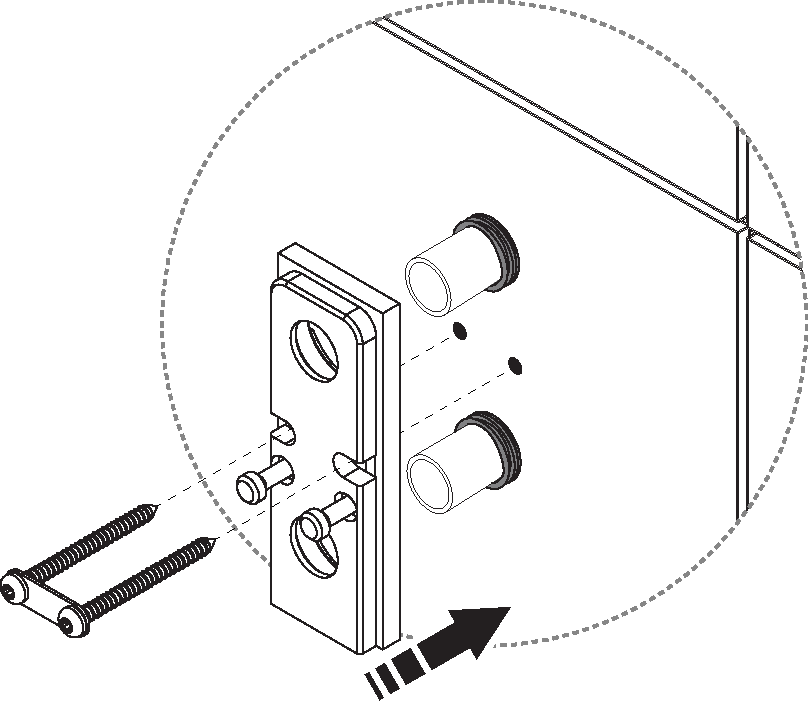
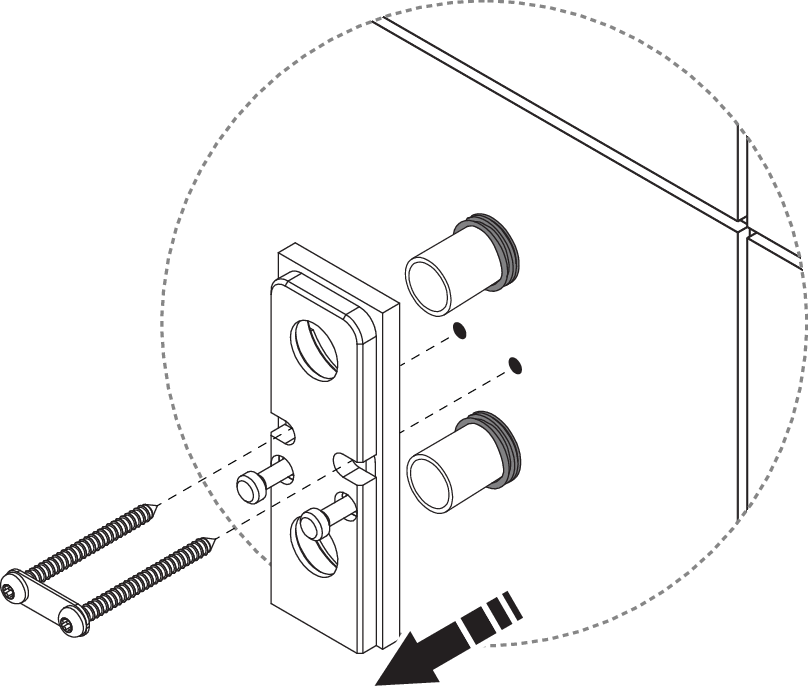
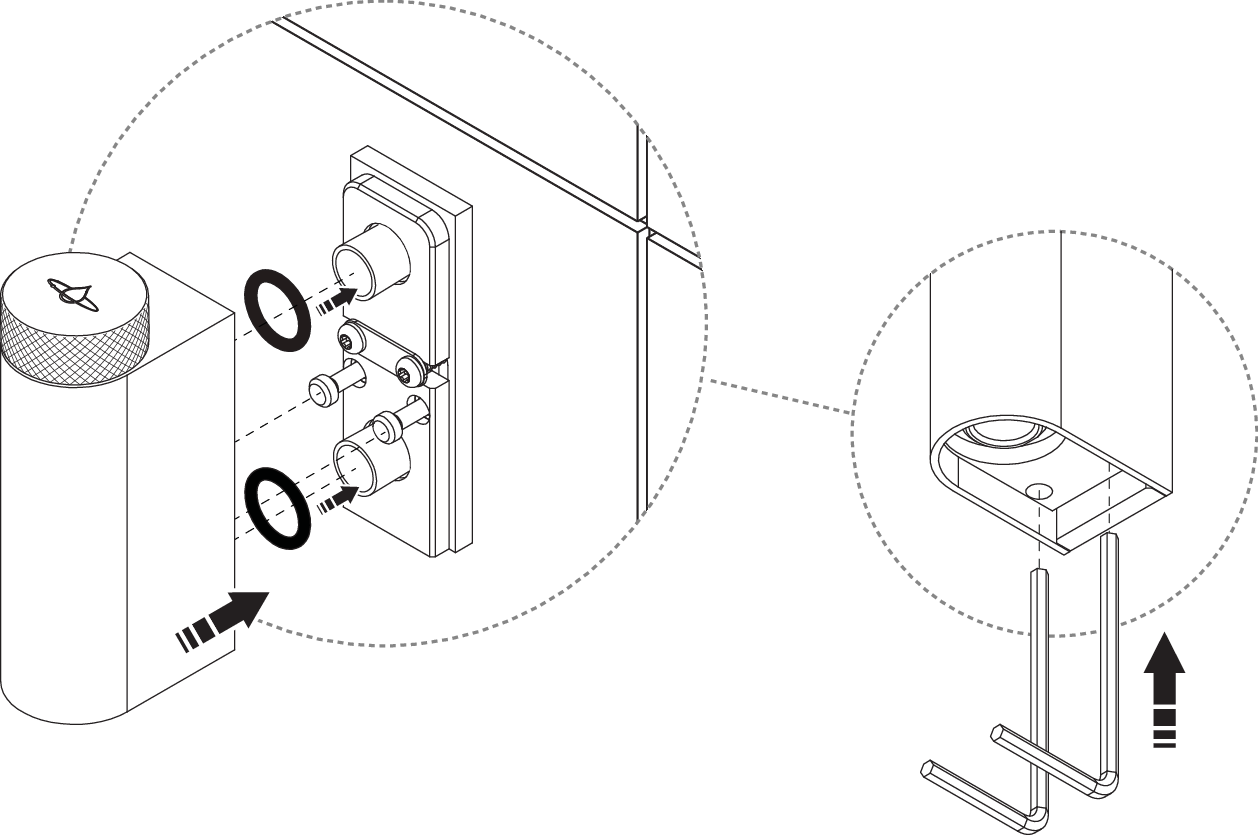
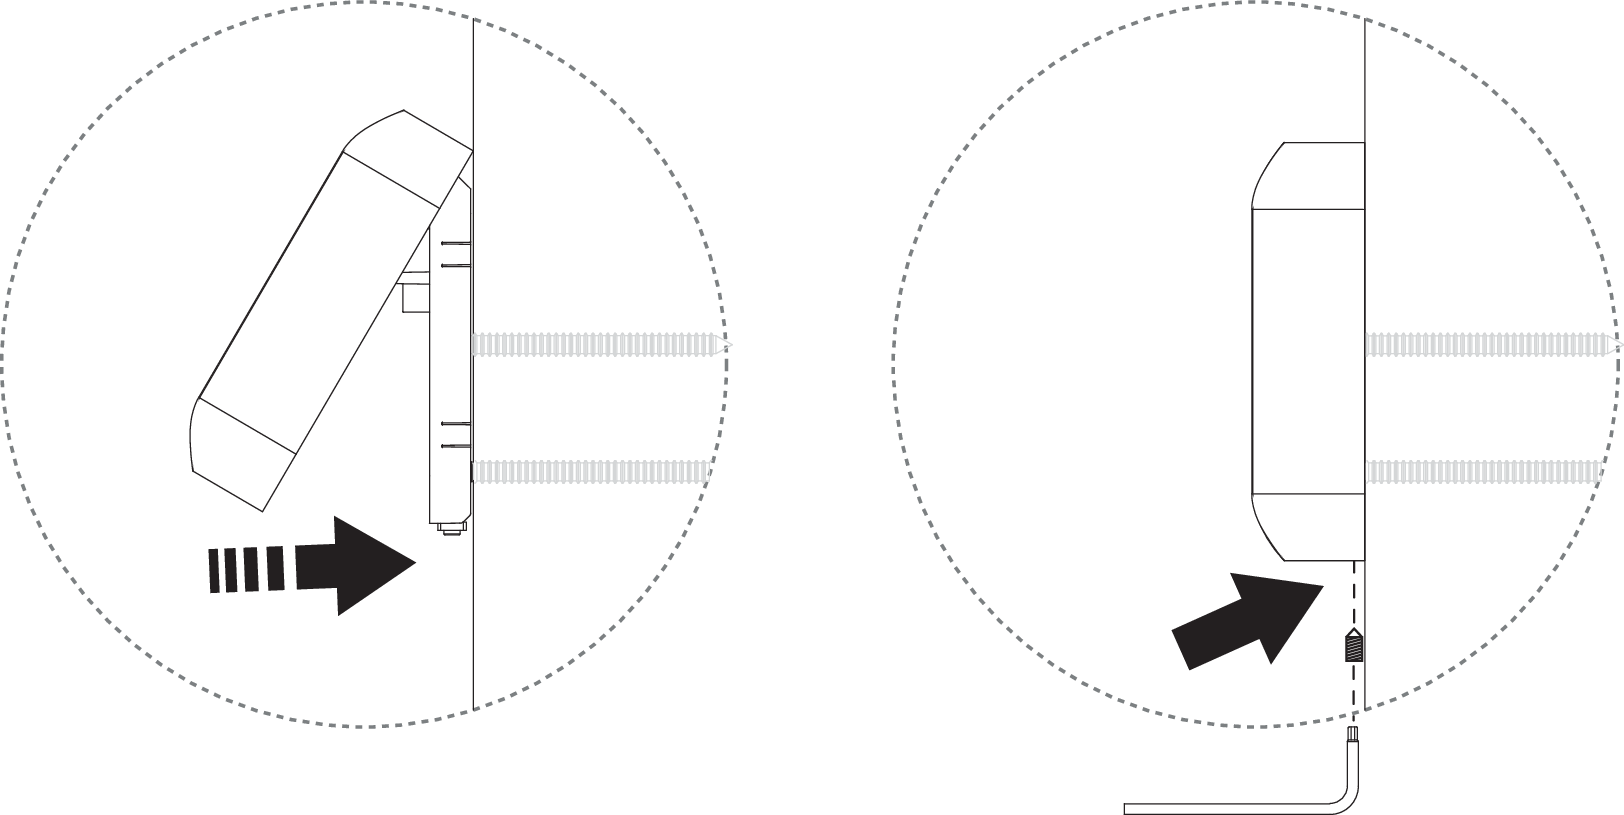
Mount the diverter body on the wall bracket by tightening the screws on the underside.
Caution
Apply fixture grease to the o-rings.
Clean the surface under the wall plate.
Install the new wall bracket.
Caution
Fill the holes with wet room silicone. The bracket must be mounted horizontally.
Mount the hand shower holder on the wall bracket. The screw must not be overtightened.
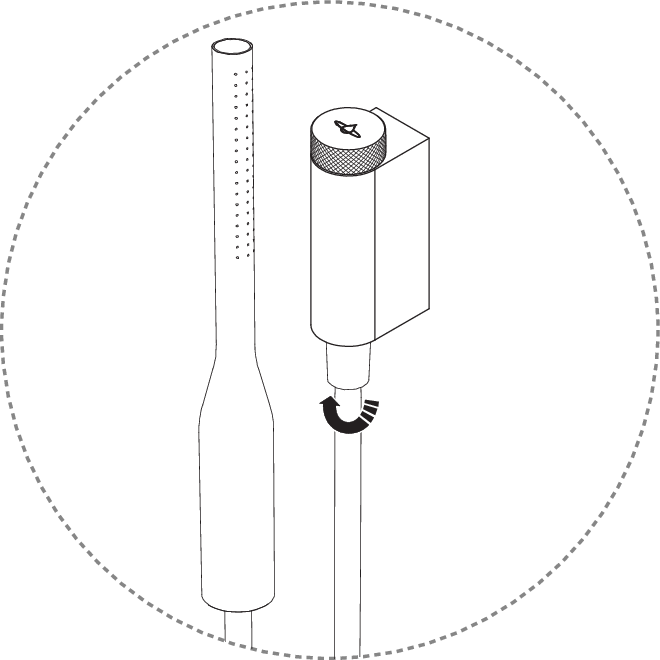
Install the hand shower hose.
Caution
Make sure the gasket is in good condition and has no damage.
Start the shower and let it run for a while. Switch between the head shower and hand shower, and ensure there is no leakage between:
a) Hand shower hose and diverter
b) Wall and shower arm
c) Head shower and shower arm
d) Diverter and wall plate
Turn off the shower.
Complete and submit the service report (found in the service request).
Recycle the parts and components that should not be reused.