3. Sensor Tank
This instruction shows how to swap the Sensor Tank without accessories. Follow the instructions in detail, and don't hesitate to reach out if you have any questions - support@orbital-systems.com.
Use the following kit to swap the Sensor Tank.
Sensor Tank |
Dismantle Sensor Tank
Turn off the power.

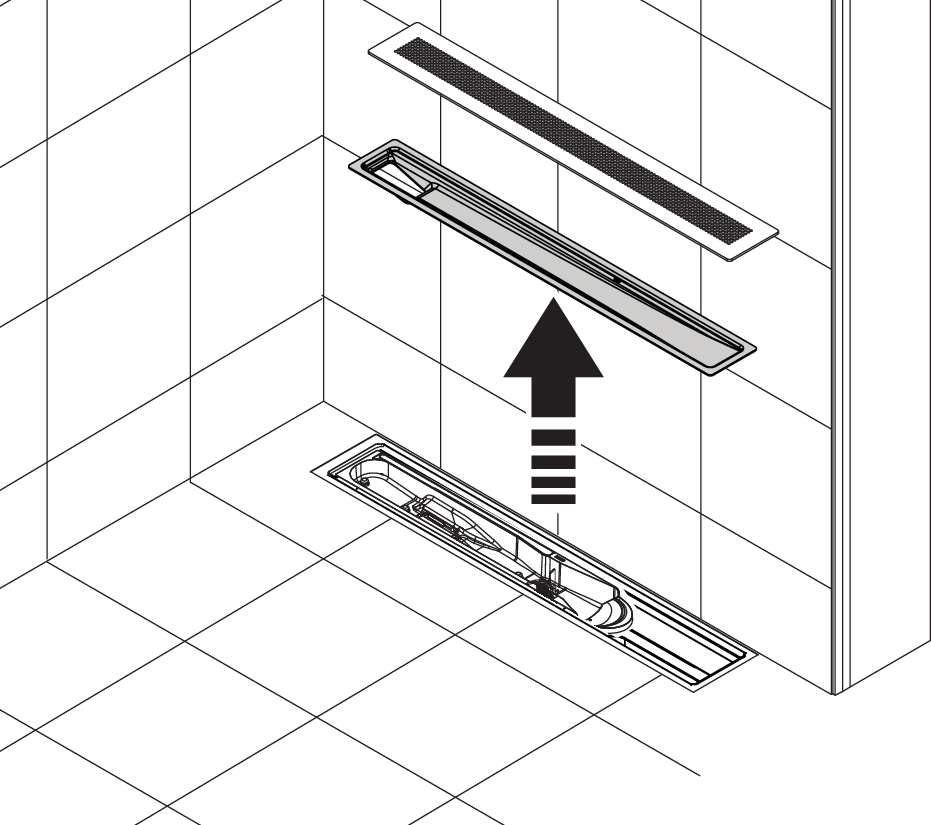
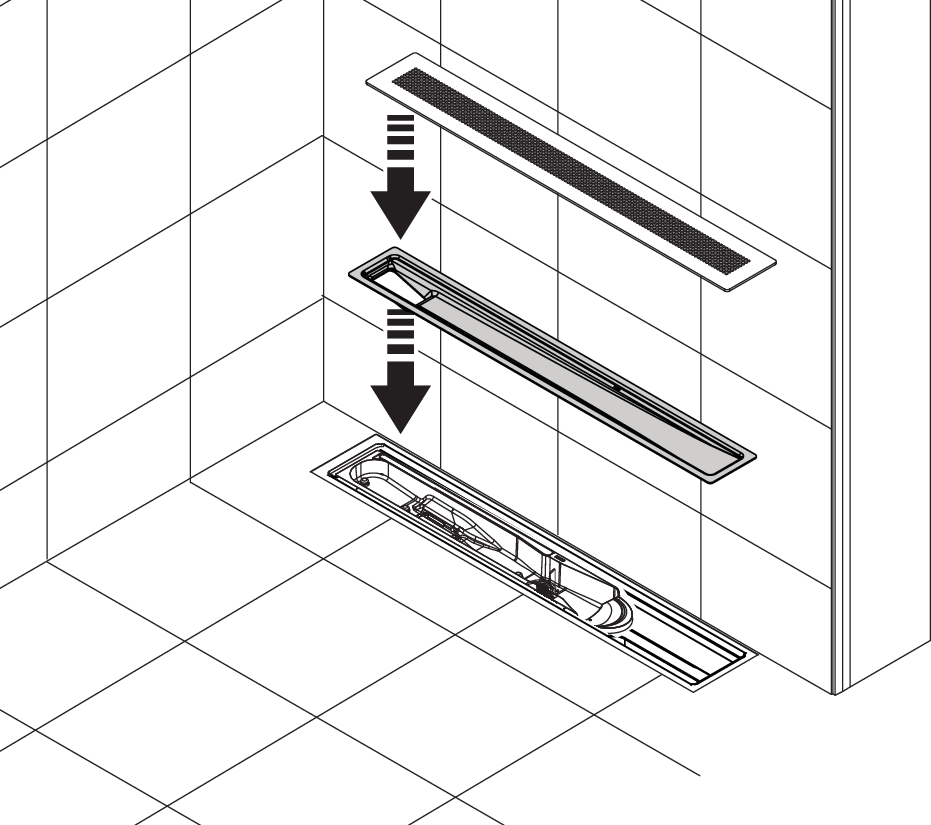
Lift the grate and Funnel.
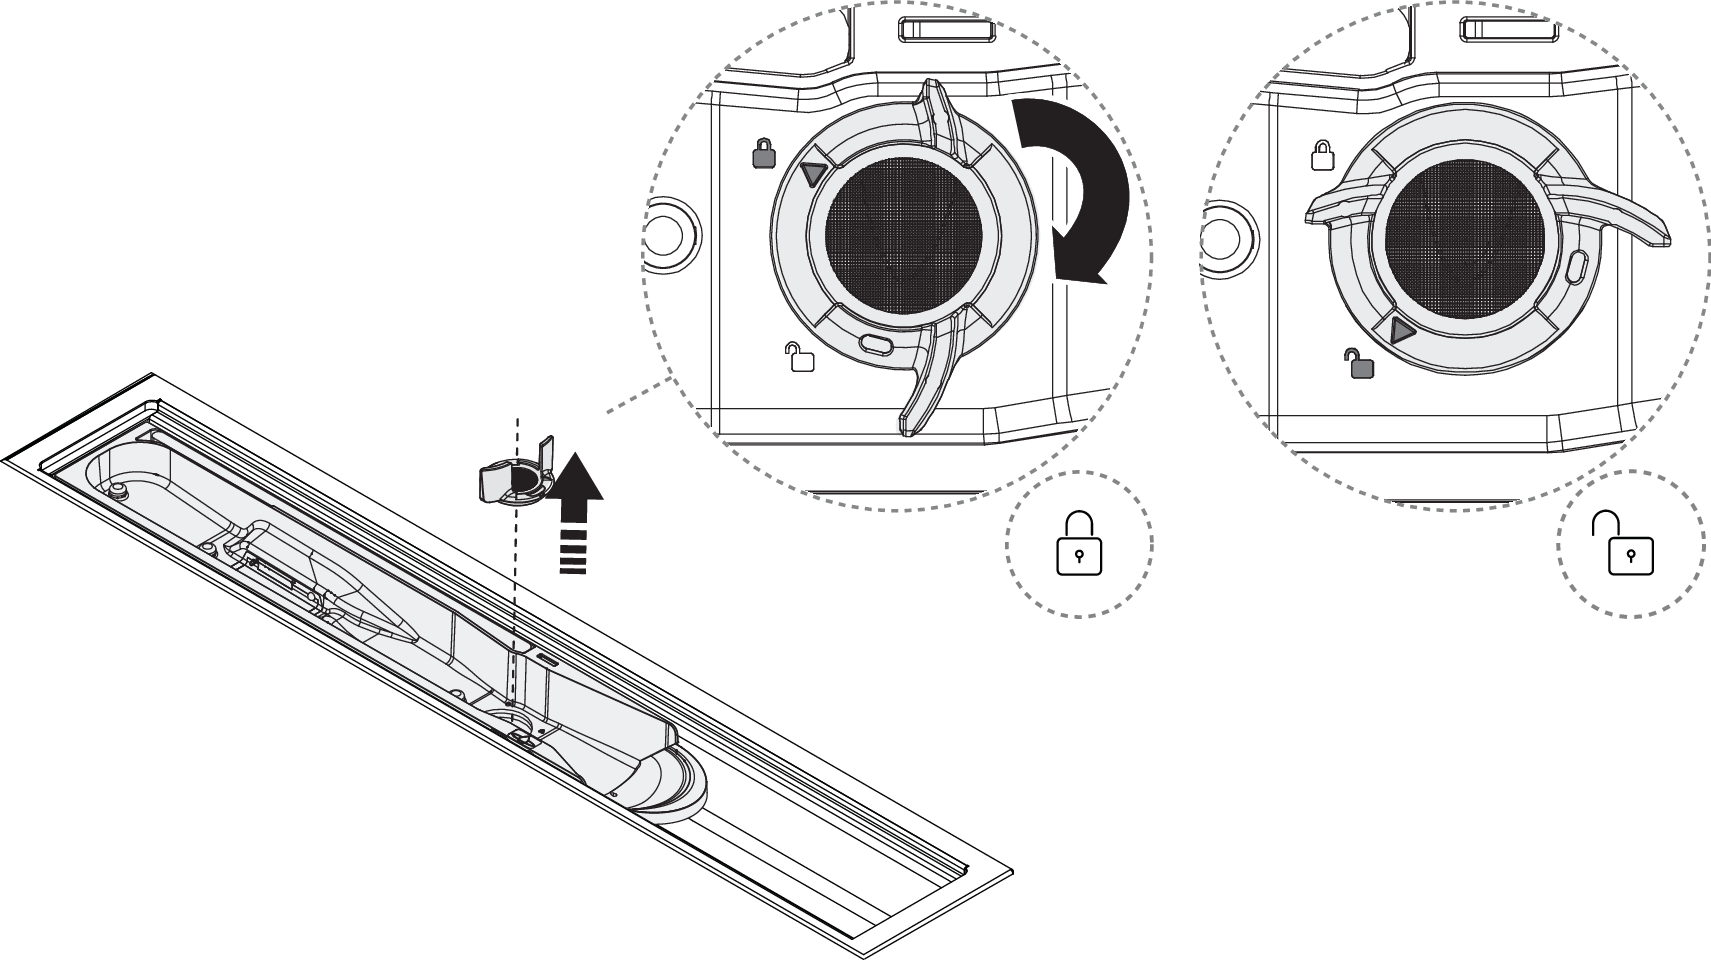
Unlock the Sensor Tank by turning the Sensor Tank Lock 90° counterclockwise.
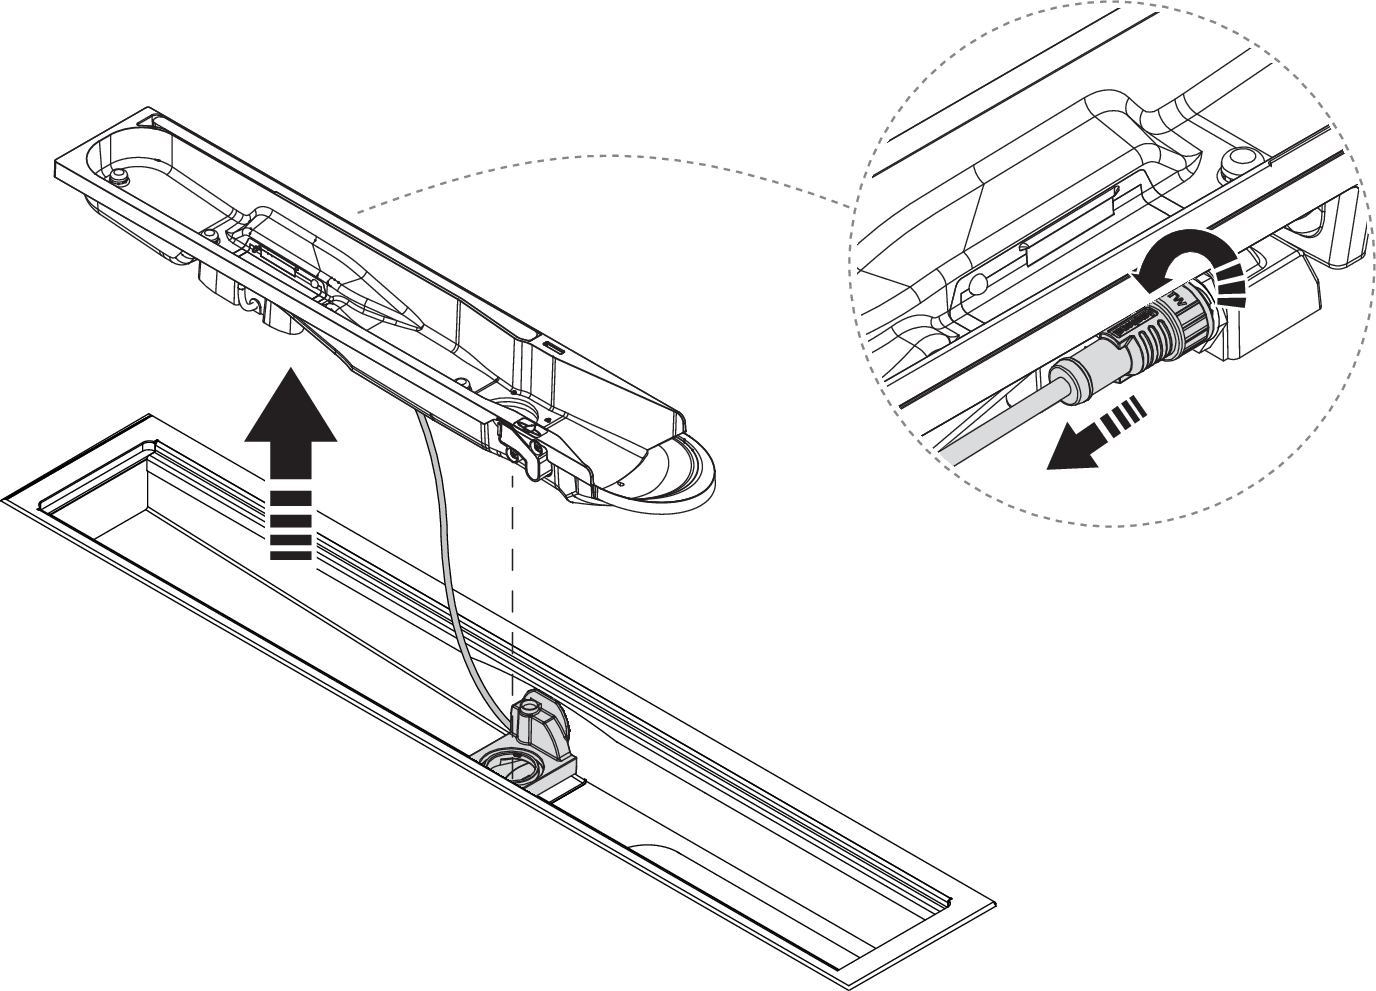
Lift the Sensor Tank and disconnect the sensor cable by unlocking the connector. Turn the connector flange 90° counterclockwise to unlock.
Install Sensor Tank
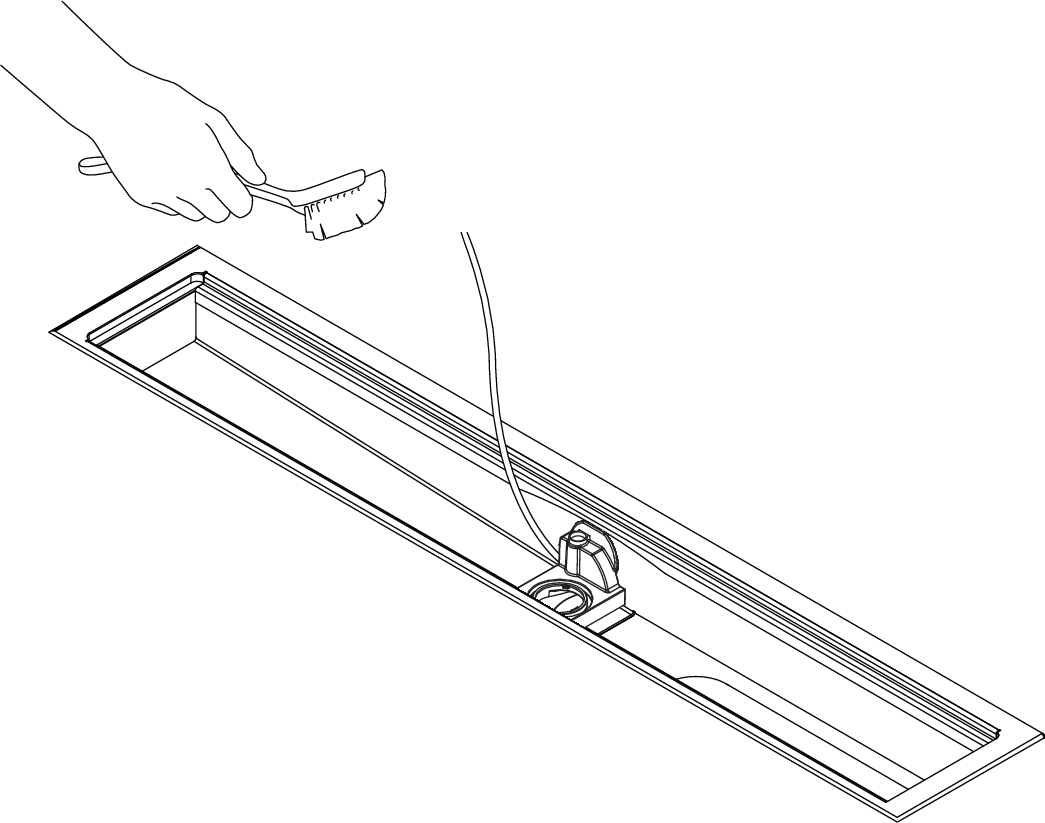
Clean the drain unit.
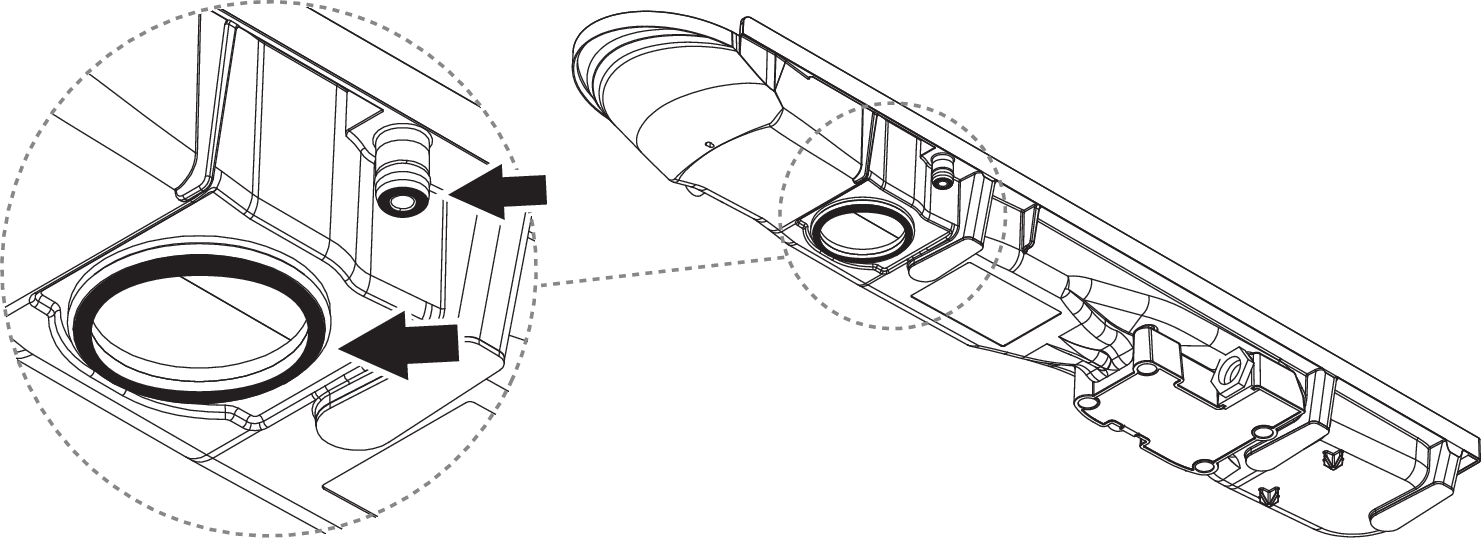
Apply grease to the Sensor Tank o-rings.
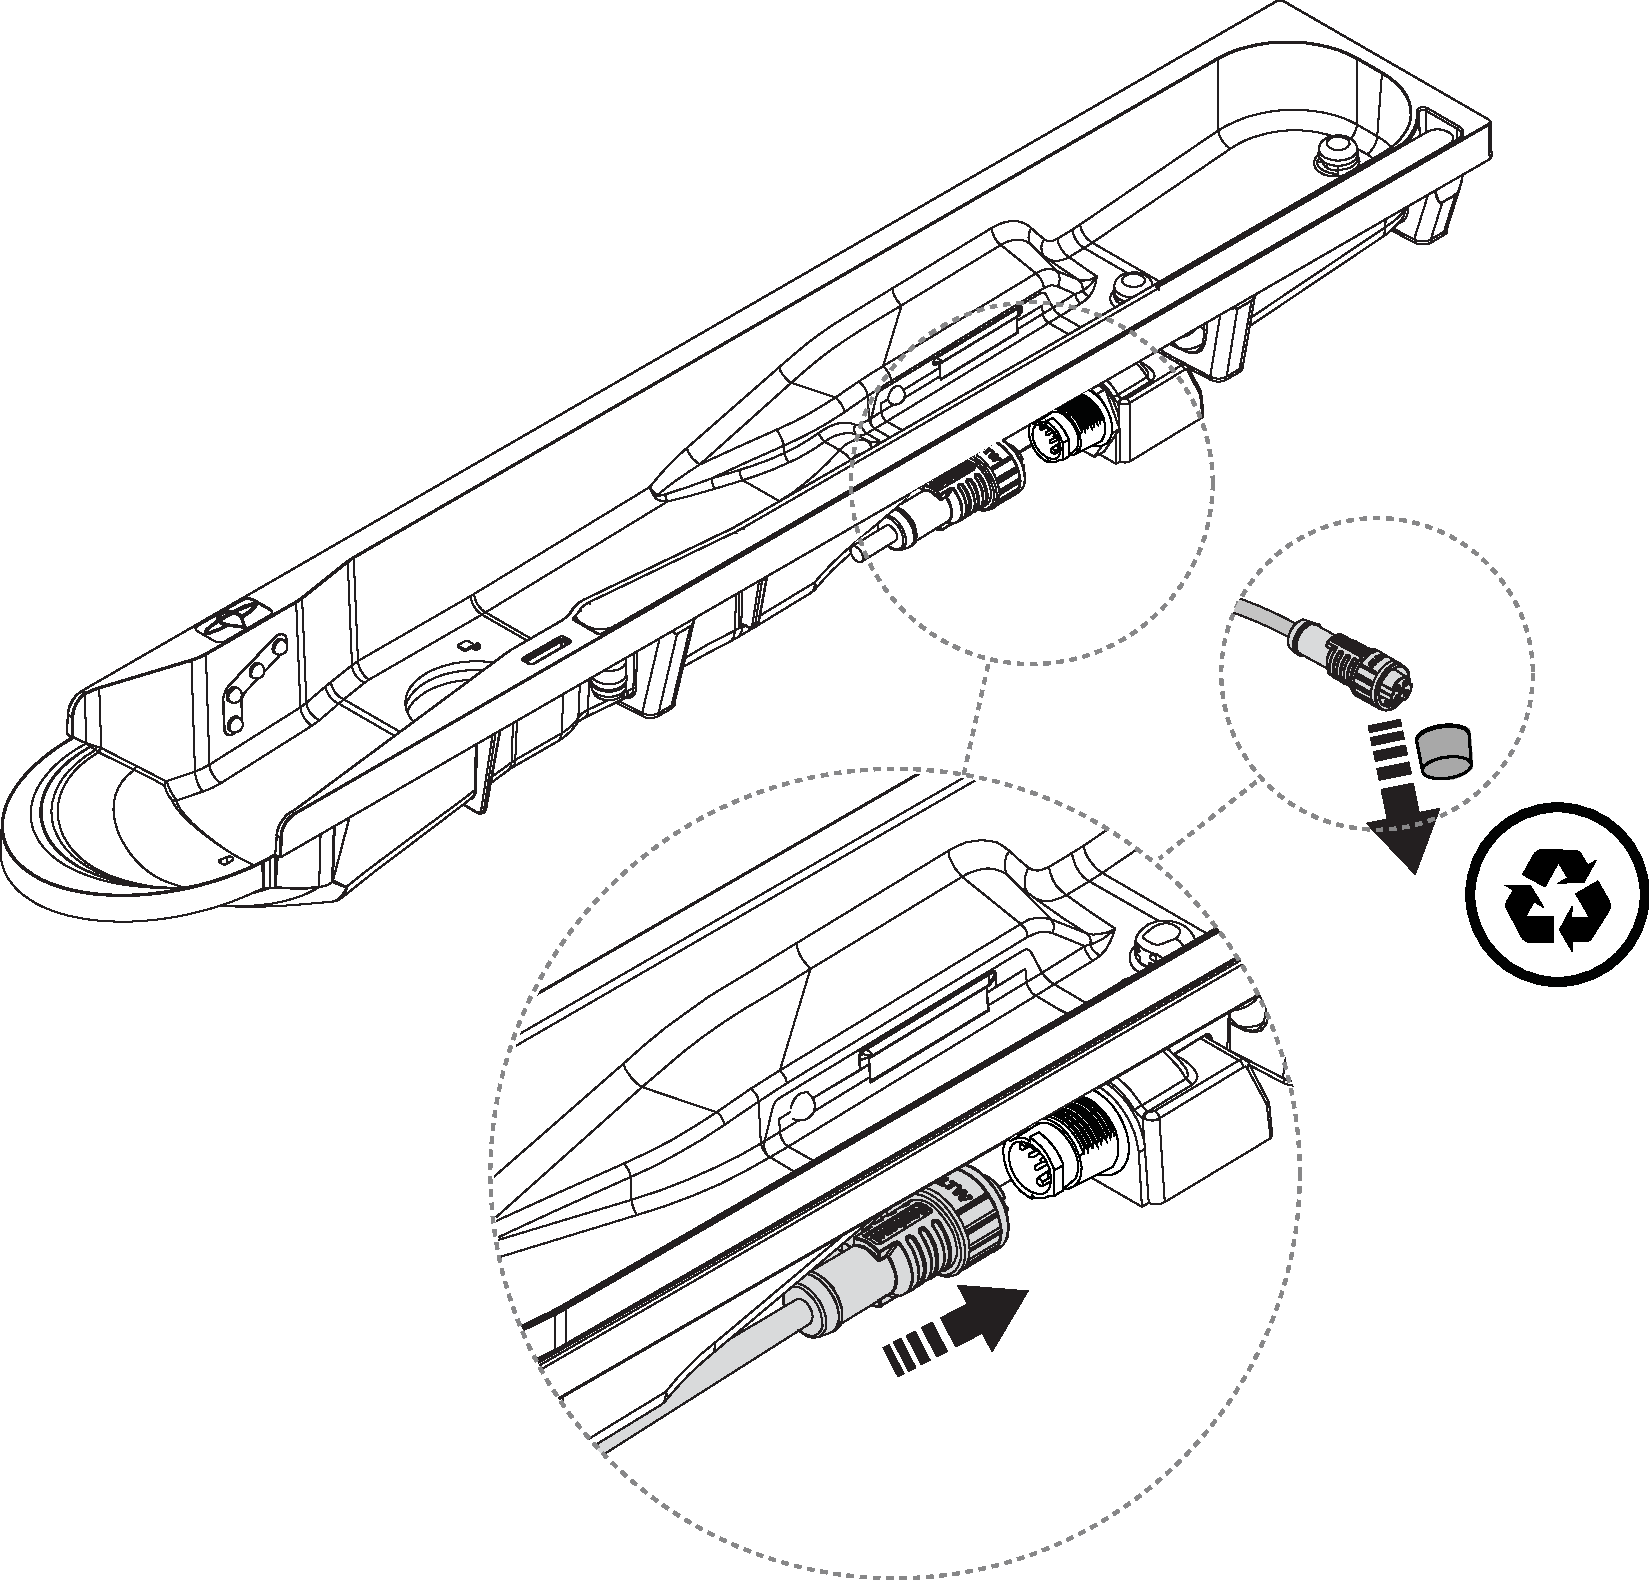
Remove the protective cap from the sensor cable, and connect the cable to the Sensor Tank.
Caution
Make sure to have correct alignment between the groove and the pin when connecting.
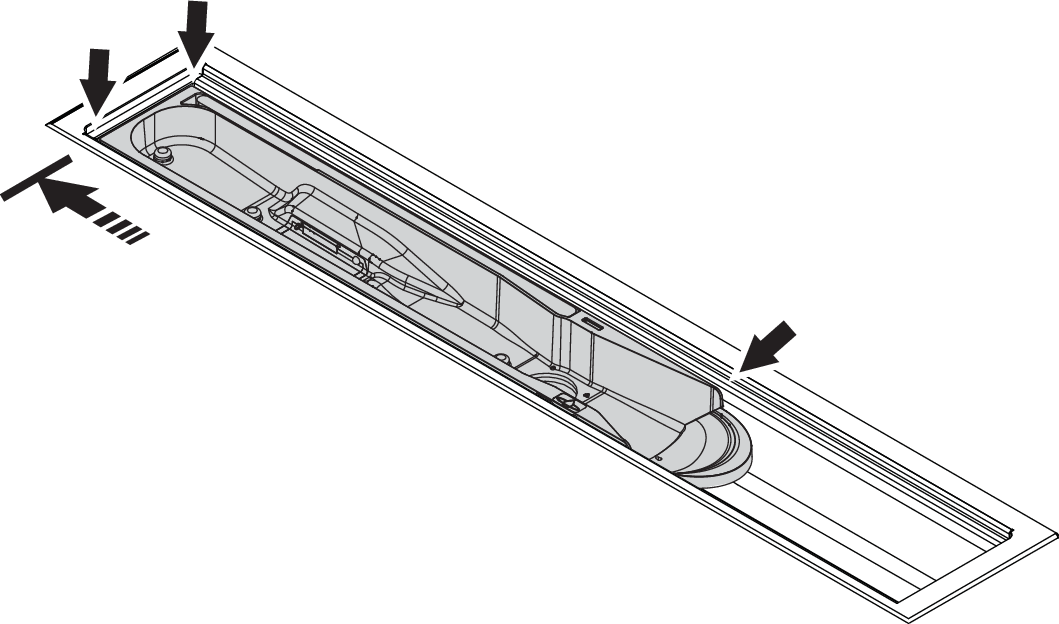
Insert the Sensor Tank to the drain unit.
Caution
Make sure the Sensor Tank is inserted correctly. Its edge should be fully pushed towards and at level with the edge of the drain unit.
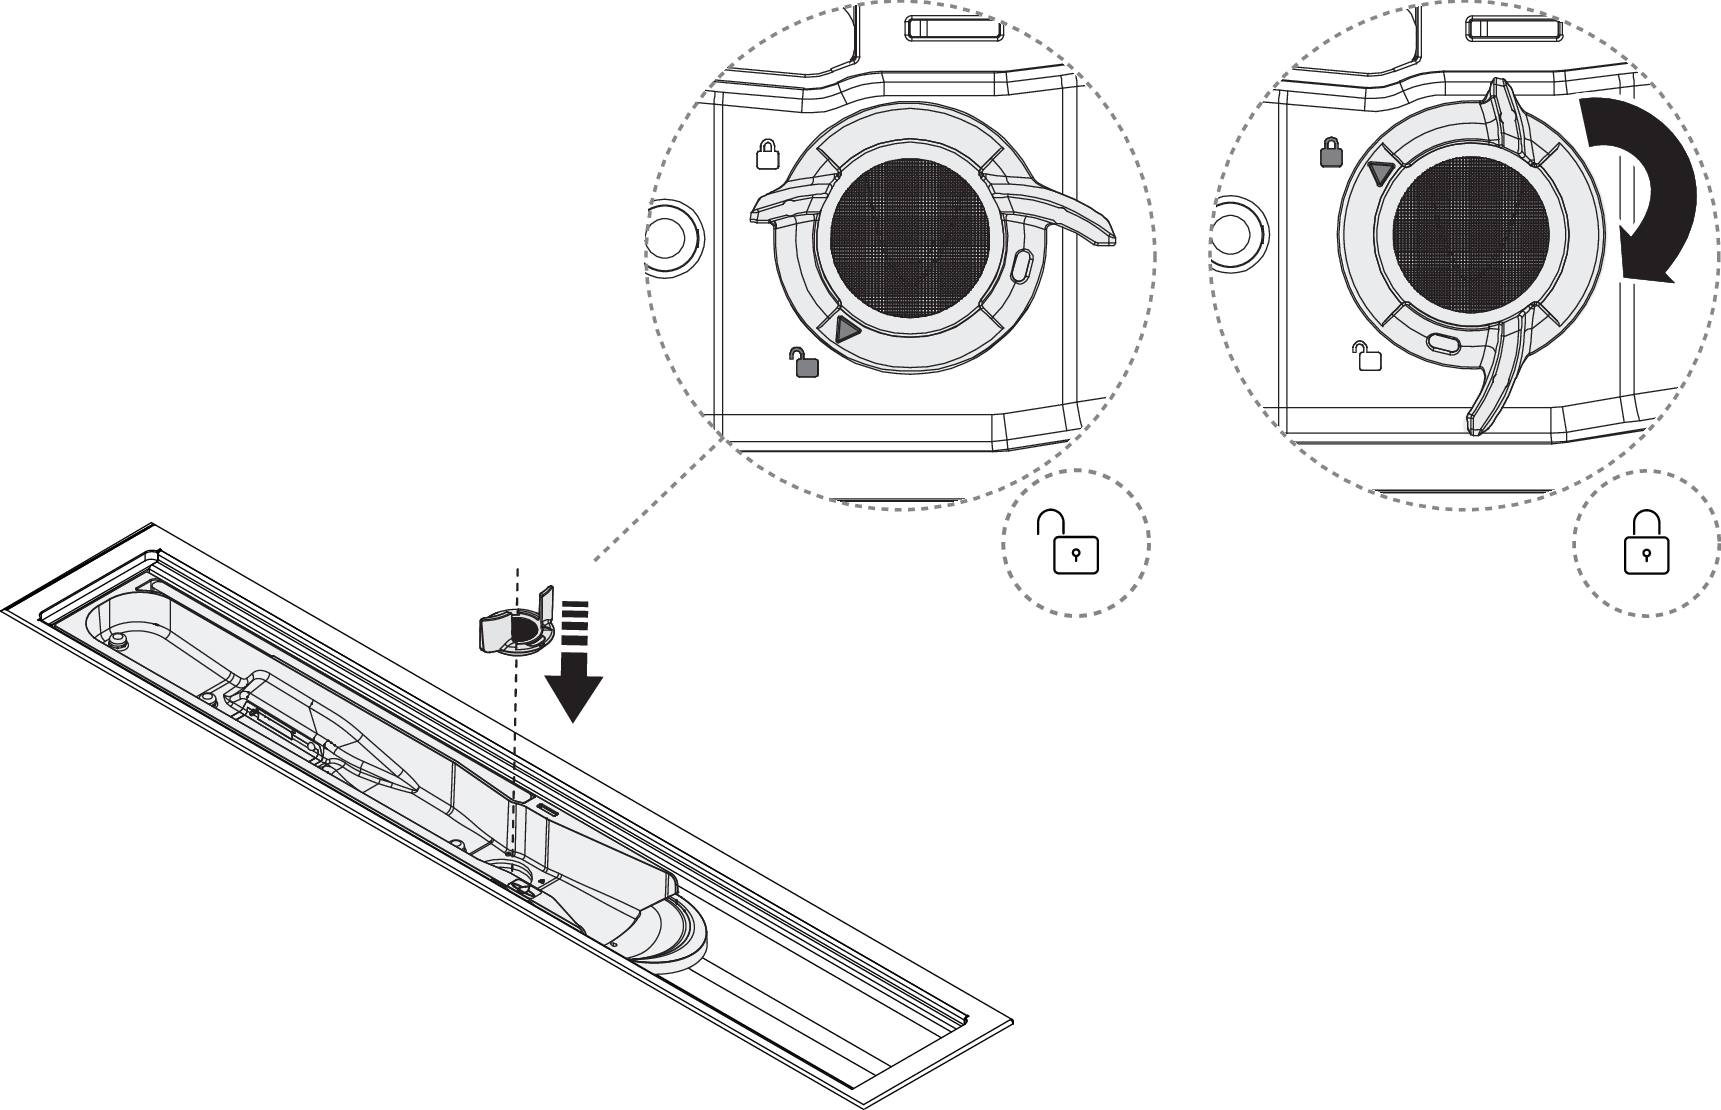
Lock the Sensor Tank in place by turning the Sensor Tank Lock 90° clockwise.
Place the Funnel and grate back in place.
Note
Place the Funnel with the hole oriented to the left! Placing the hole oriented to the right will disable recirculation.
Turn on the power.

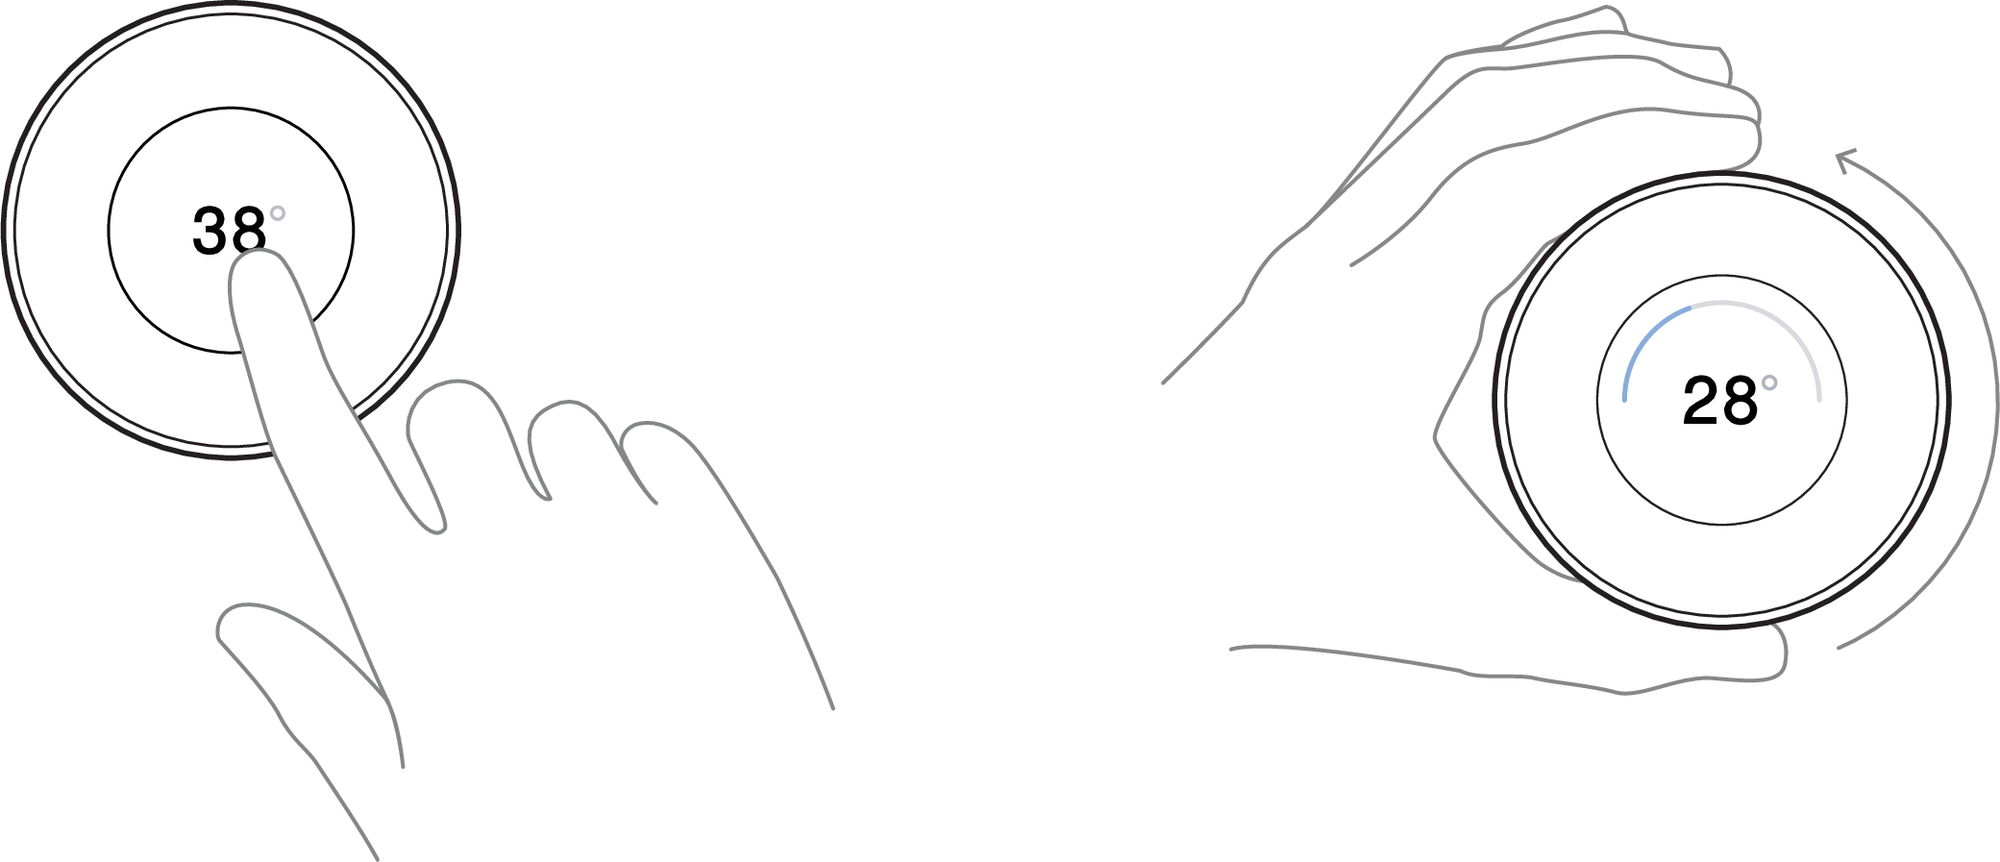
Start the shower to validate the Sensor Tank replacement. Set the temperature to 28°C. The shower should start recycling and show a count on the Control Dial within 5 minutes without increased noise level.
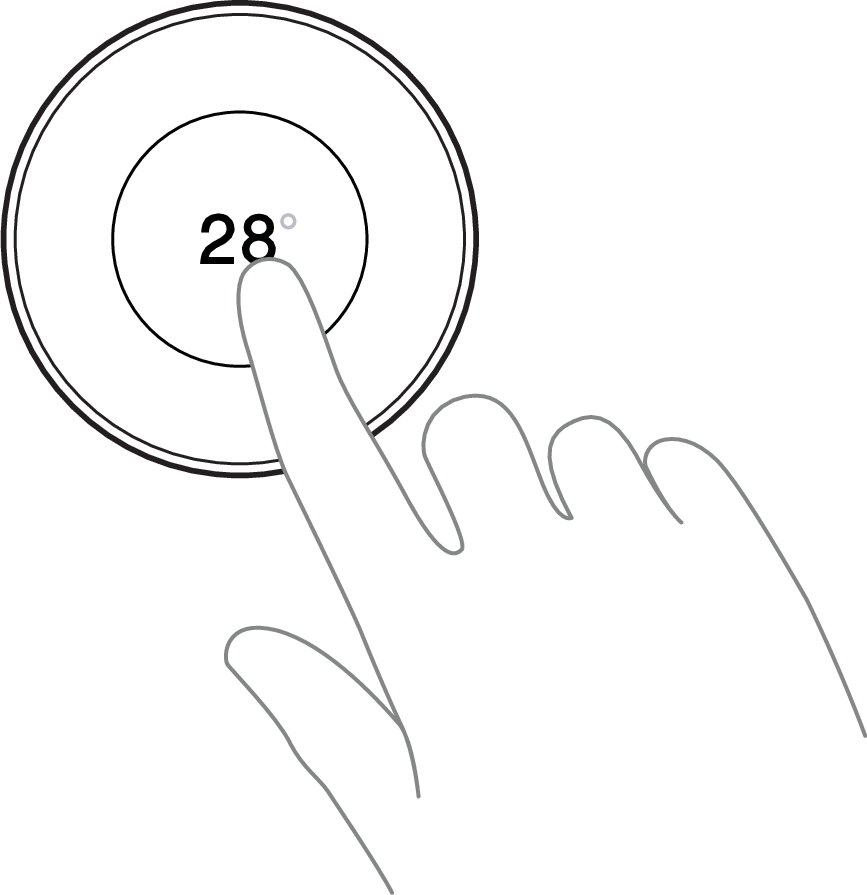
Turn off the shower.
Complete and submit the service report (found in the service request).
Recycle the parts and components that should not be reused.
