Clean the drain
Needed tools: Cleaning agents
Caution
Do not use any corrosive detergents or abrasive pads/cloths as it might damage the Sensor Tank.
 | Clean the drain notification shown in the Control Dial. The notification will stay on the screen until it has been dismissed (swipe downwards), or until the Status center has been opened. |
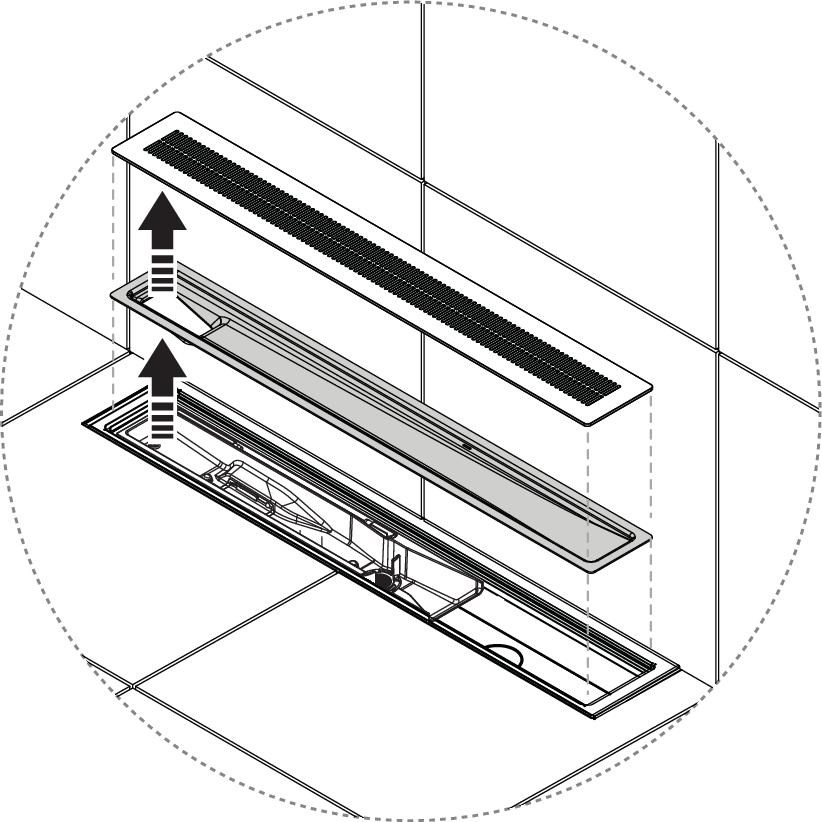
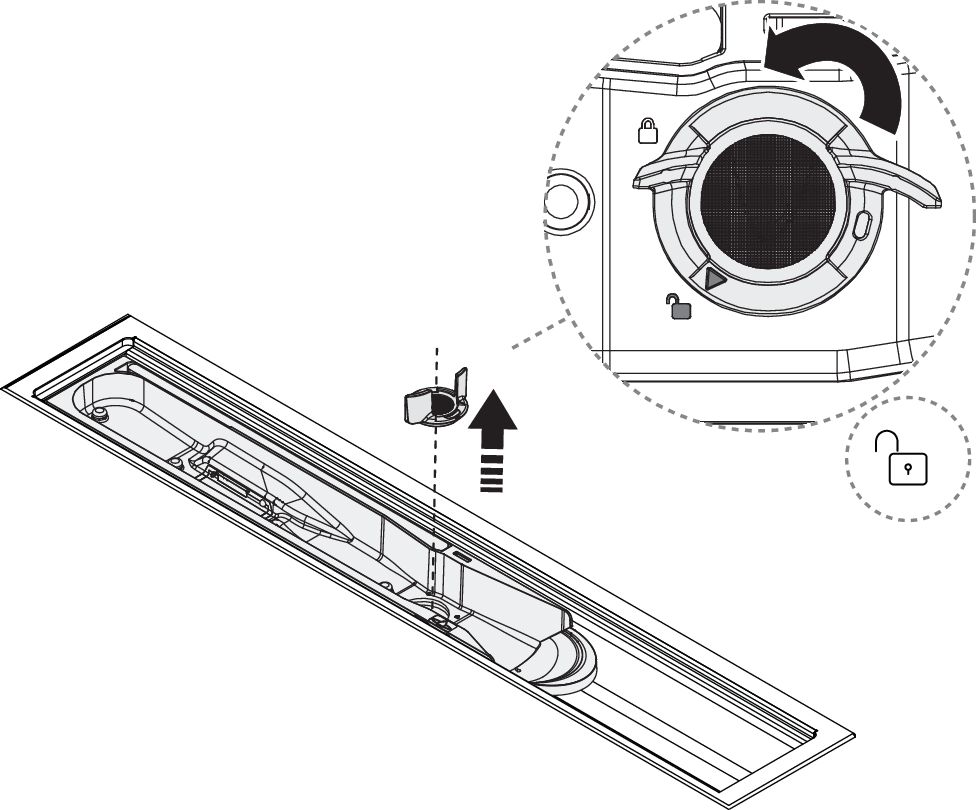
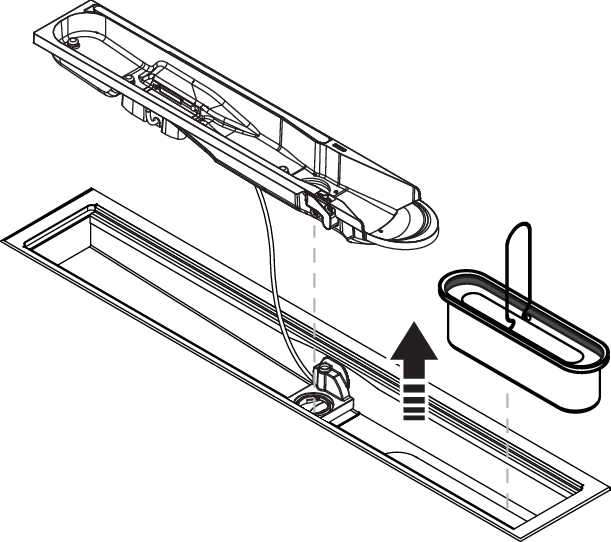
Lift the Sensor Tank straight up. Tilting or angling it may damage the connector on the back.
Use non-abrasive cleaning agents only. Make sure to clean all surfaces of each component, including the drain unit.
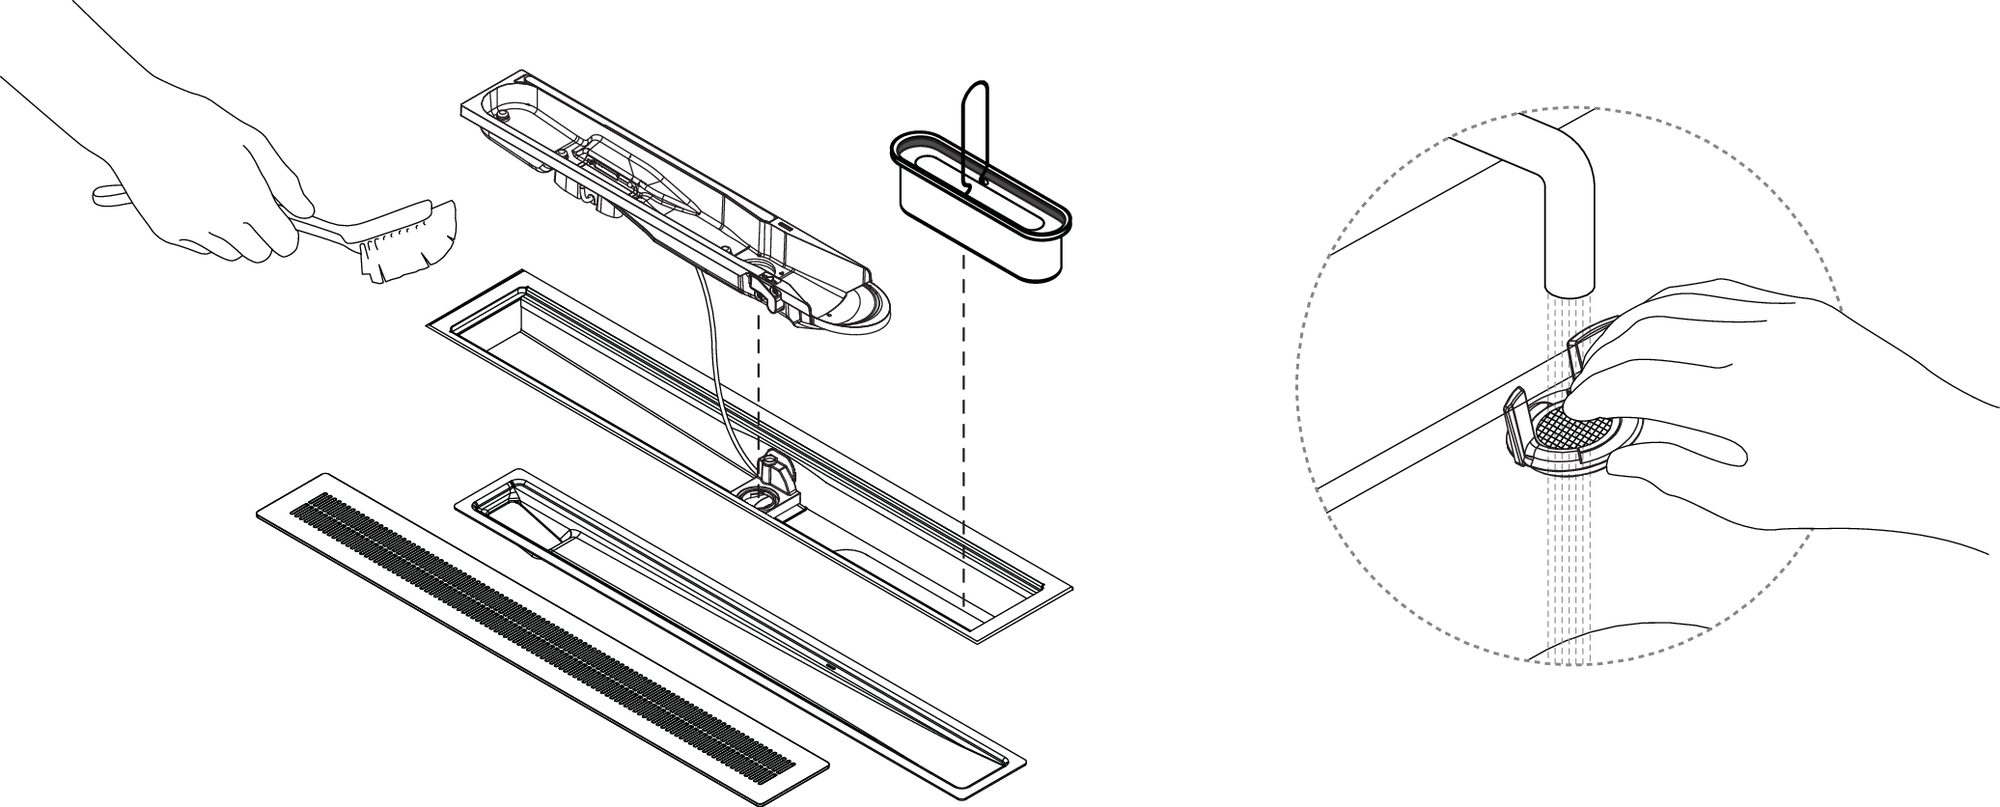
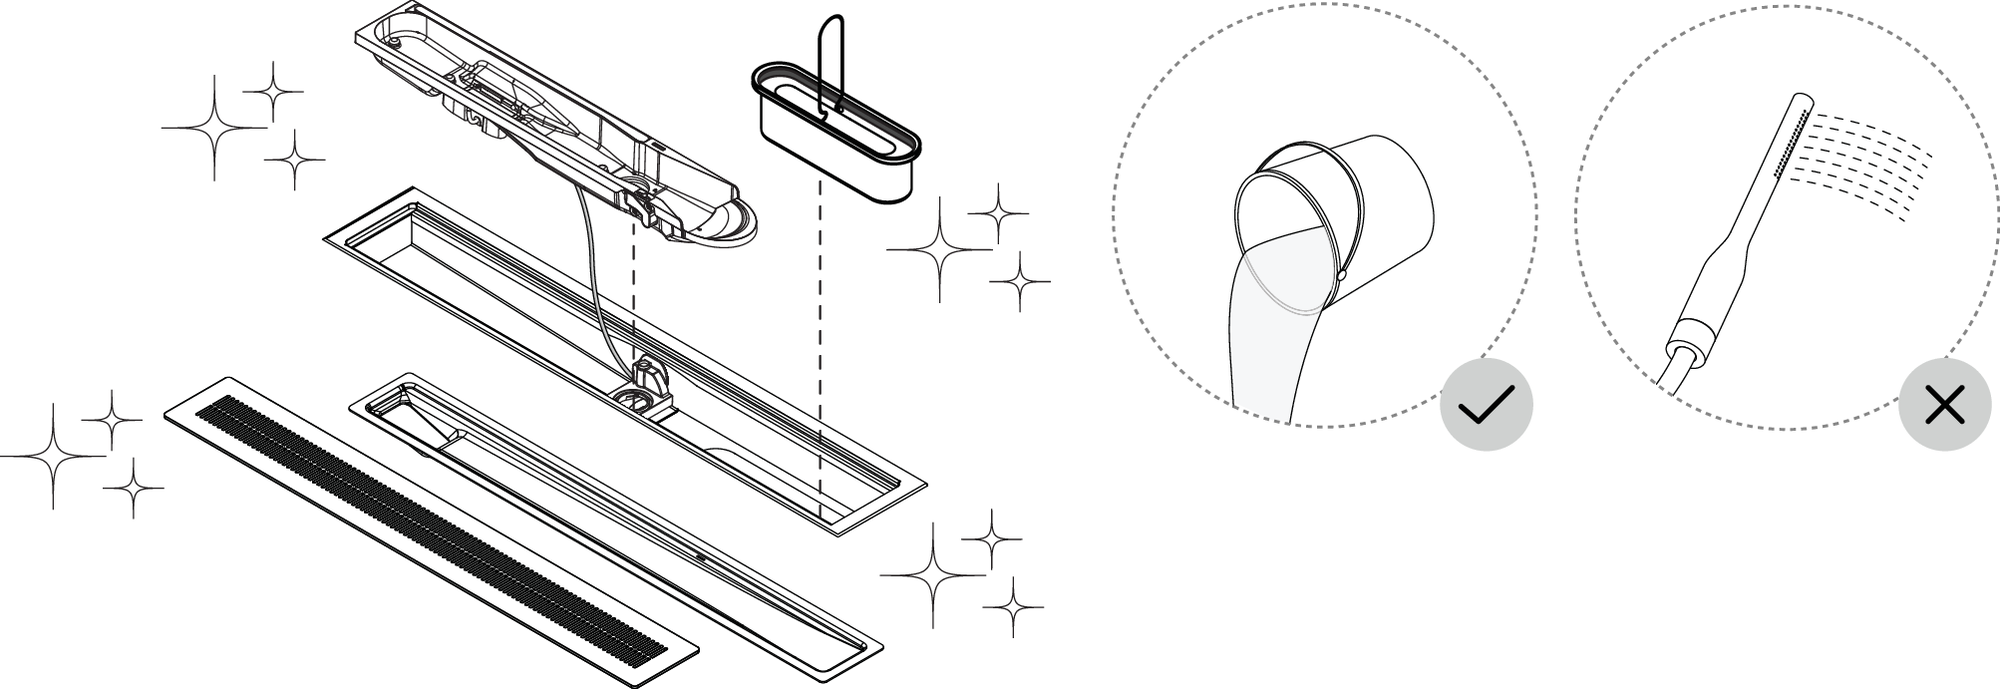
Rinse thoroughly with water. Use water from an other source than the shower.
Notice
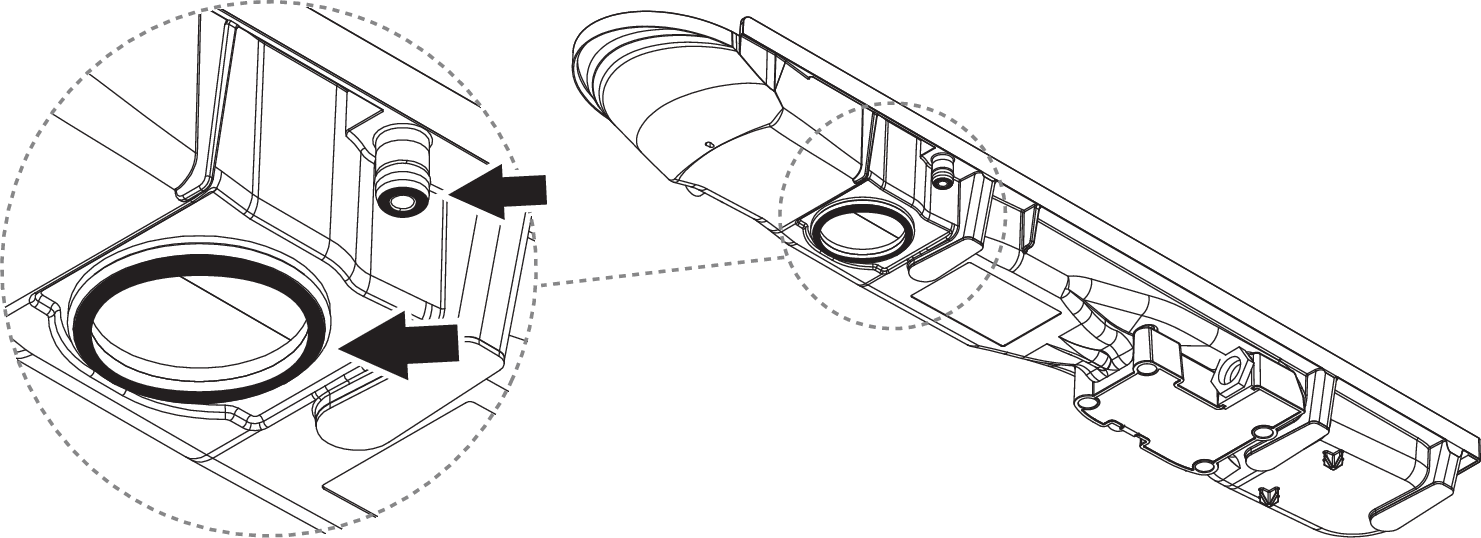
Make sure the O-ring is correctly mounted before reassembly of the Sensor Tank.
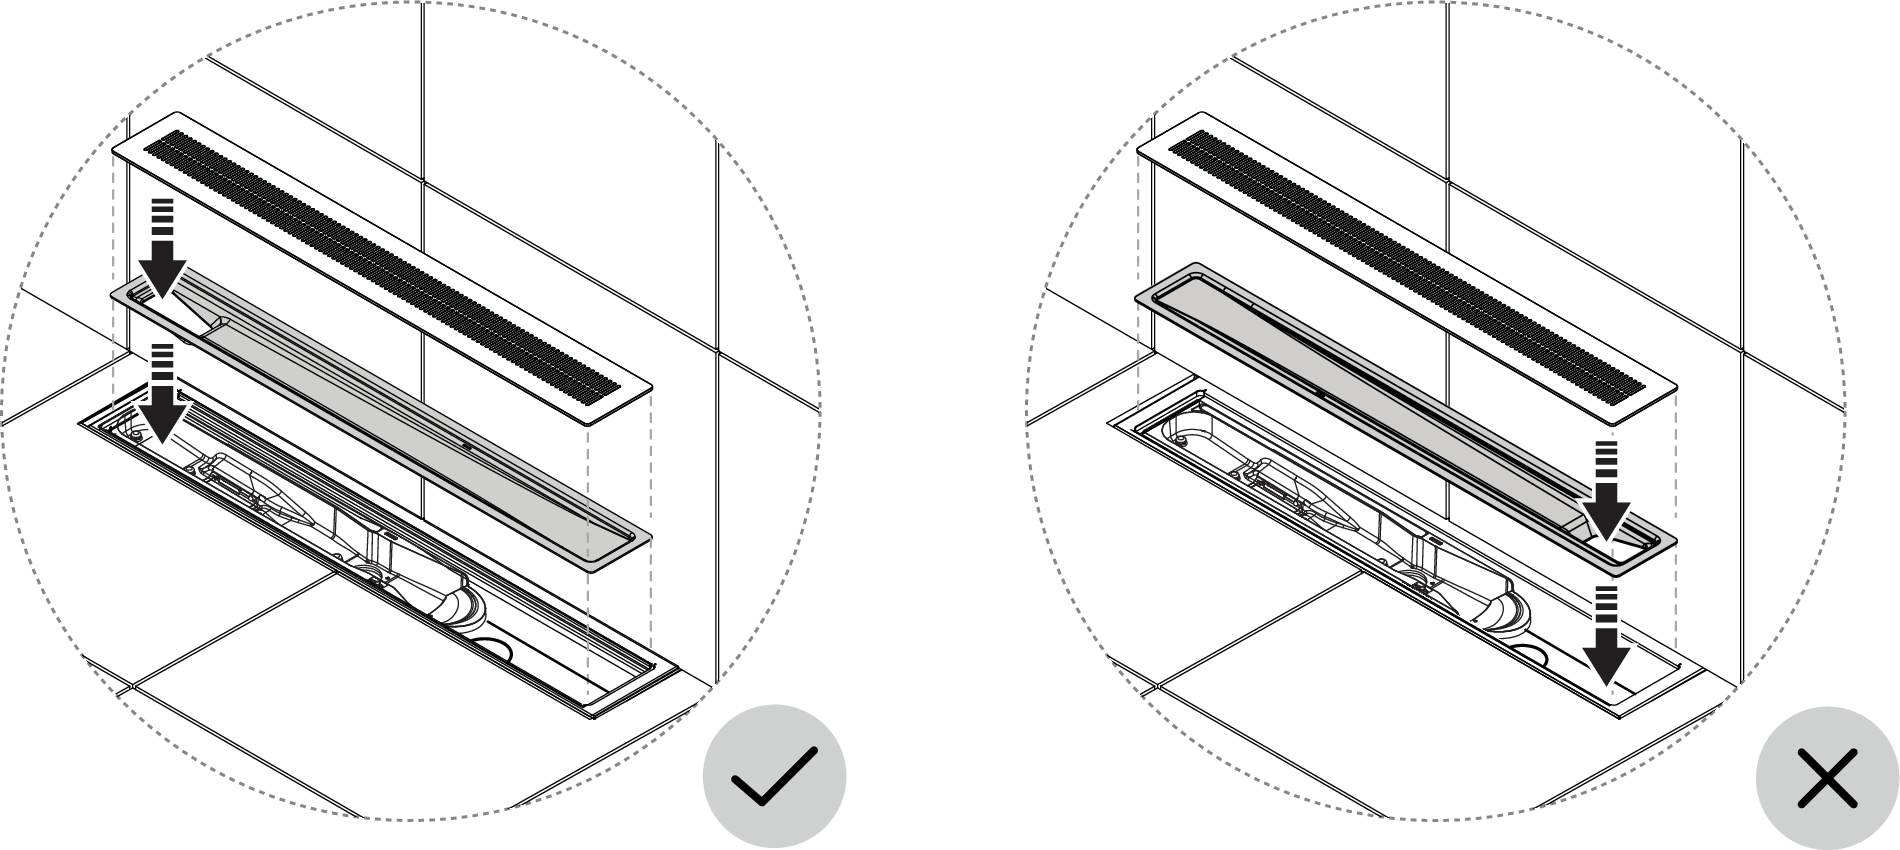
Insert the Sensor Tank straight down. Tilting or angling it may damage the connector on the back.
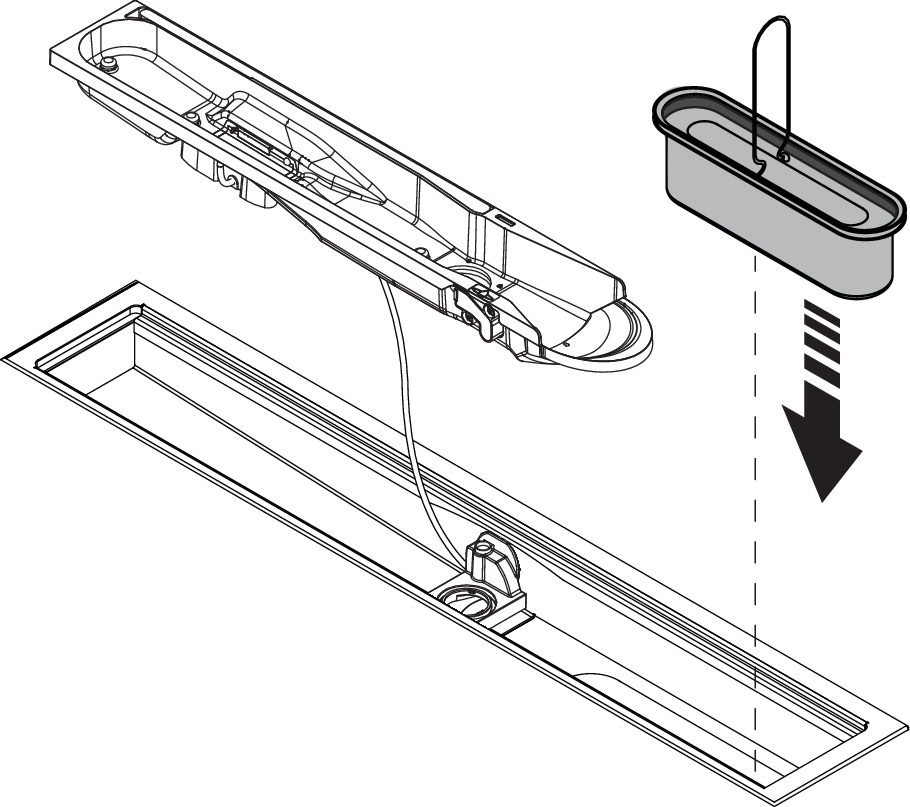
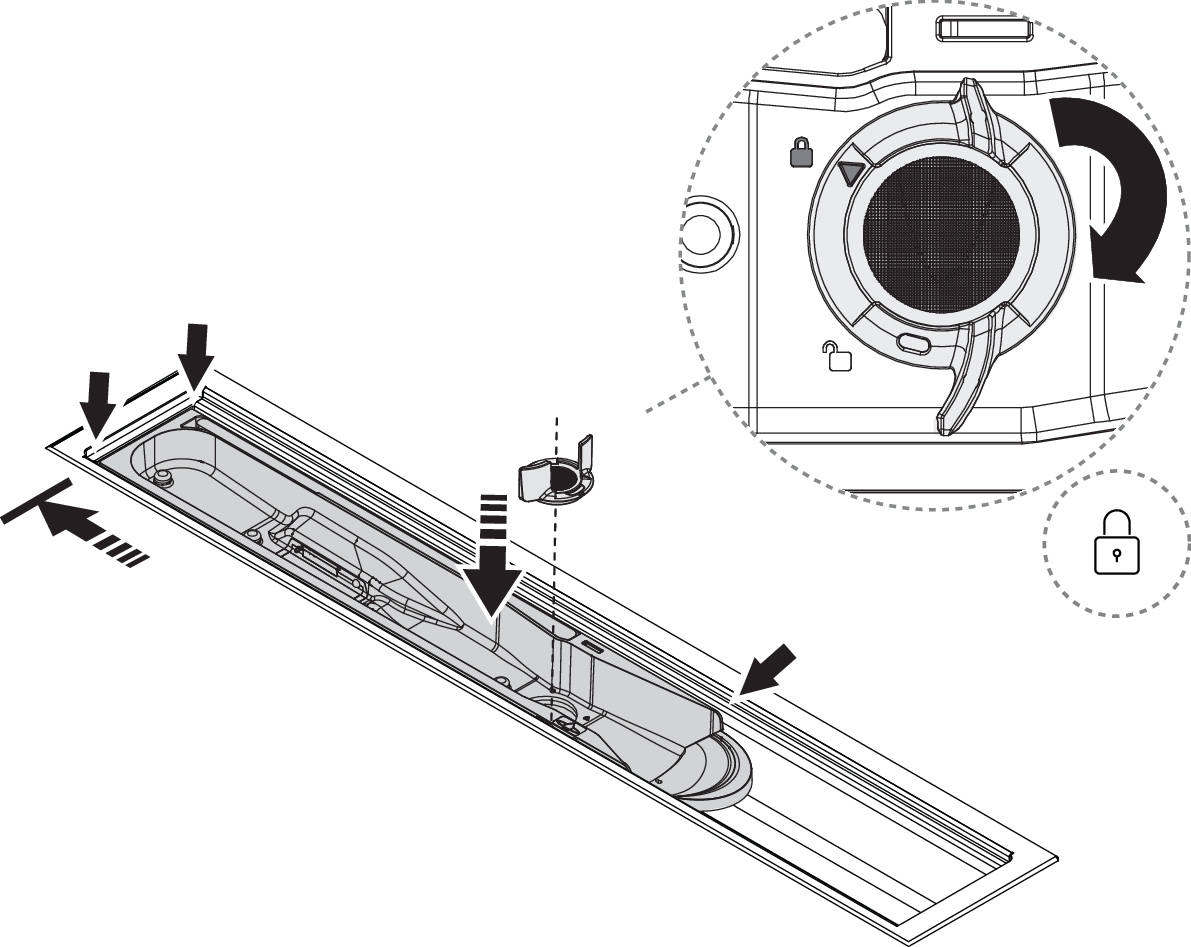
Insert Sensor Tank. Lock the Sensor Tank in position with the Sensor Tank lock by turning it 90 degrees.
Caution
Make sure the Sensor Tank is inserted correctly. Its edge should be fully pushed towards the drain unit's edge.
Notice
Place the Funnel with the hole oriented to the left! Placing the hole oriented to the right will disable recirculation.