Apply Waterproofing Membrane
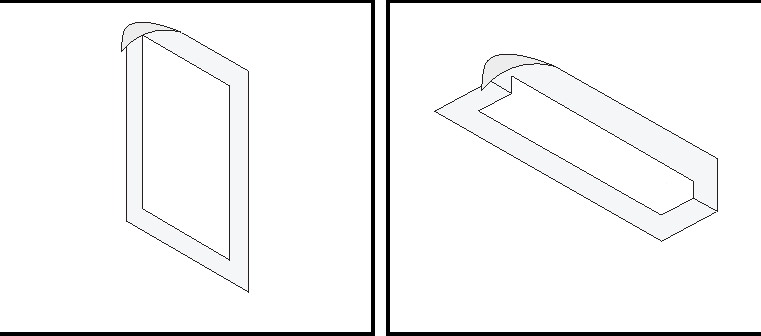 |
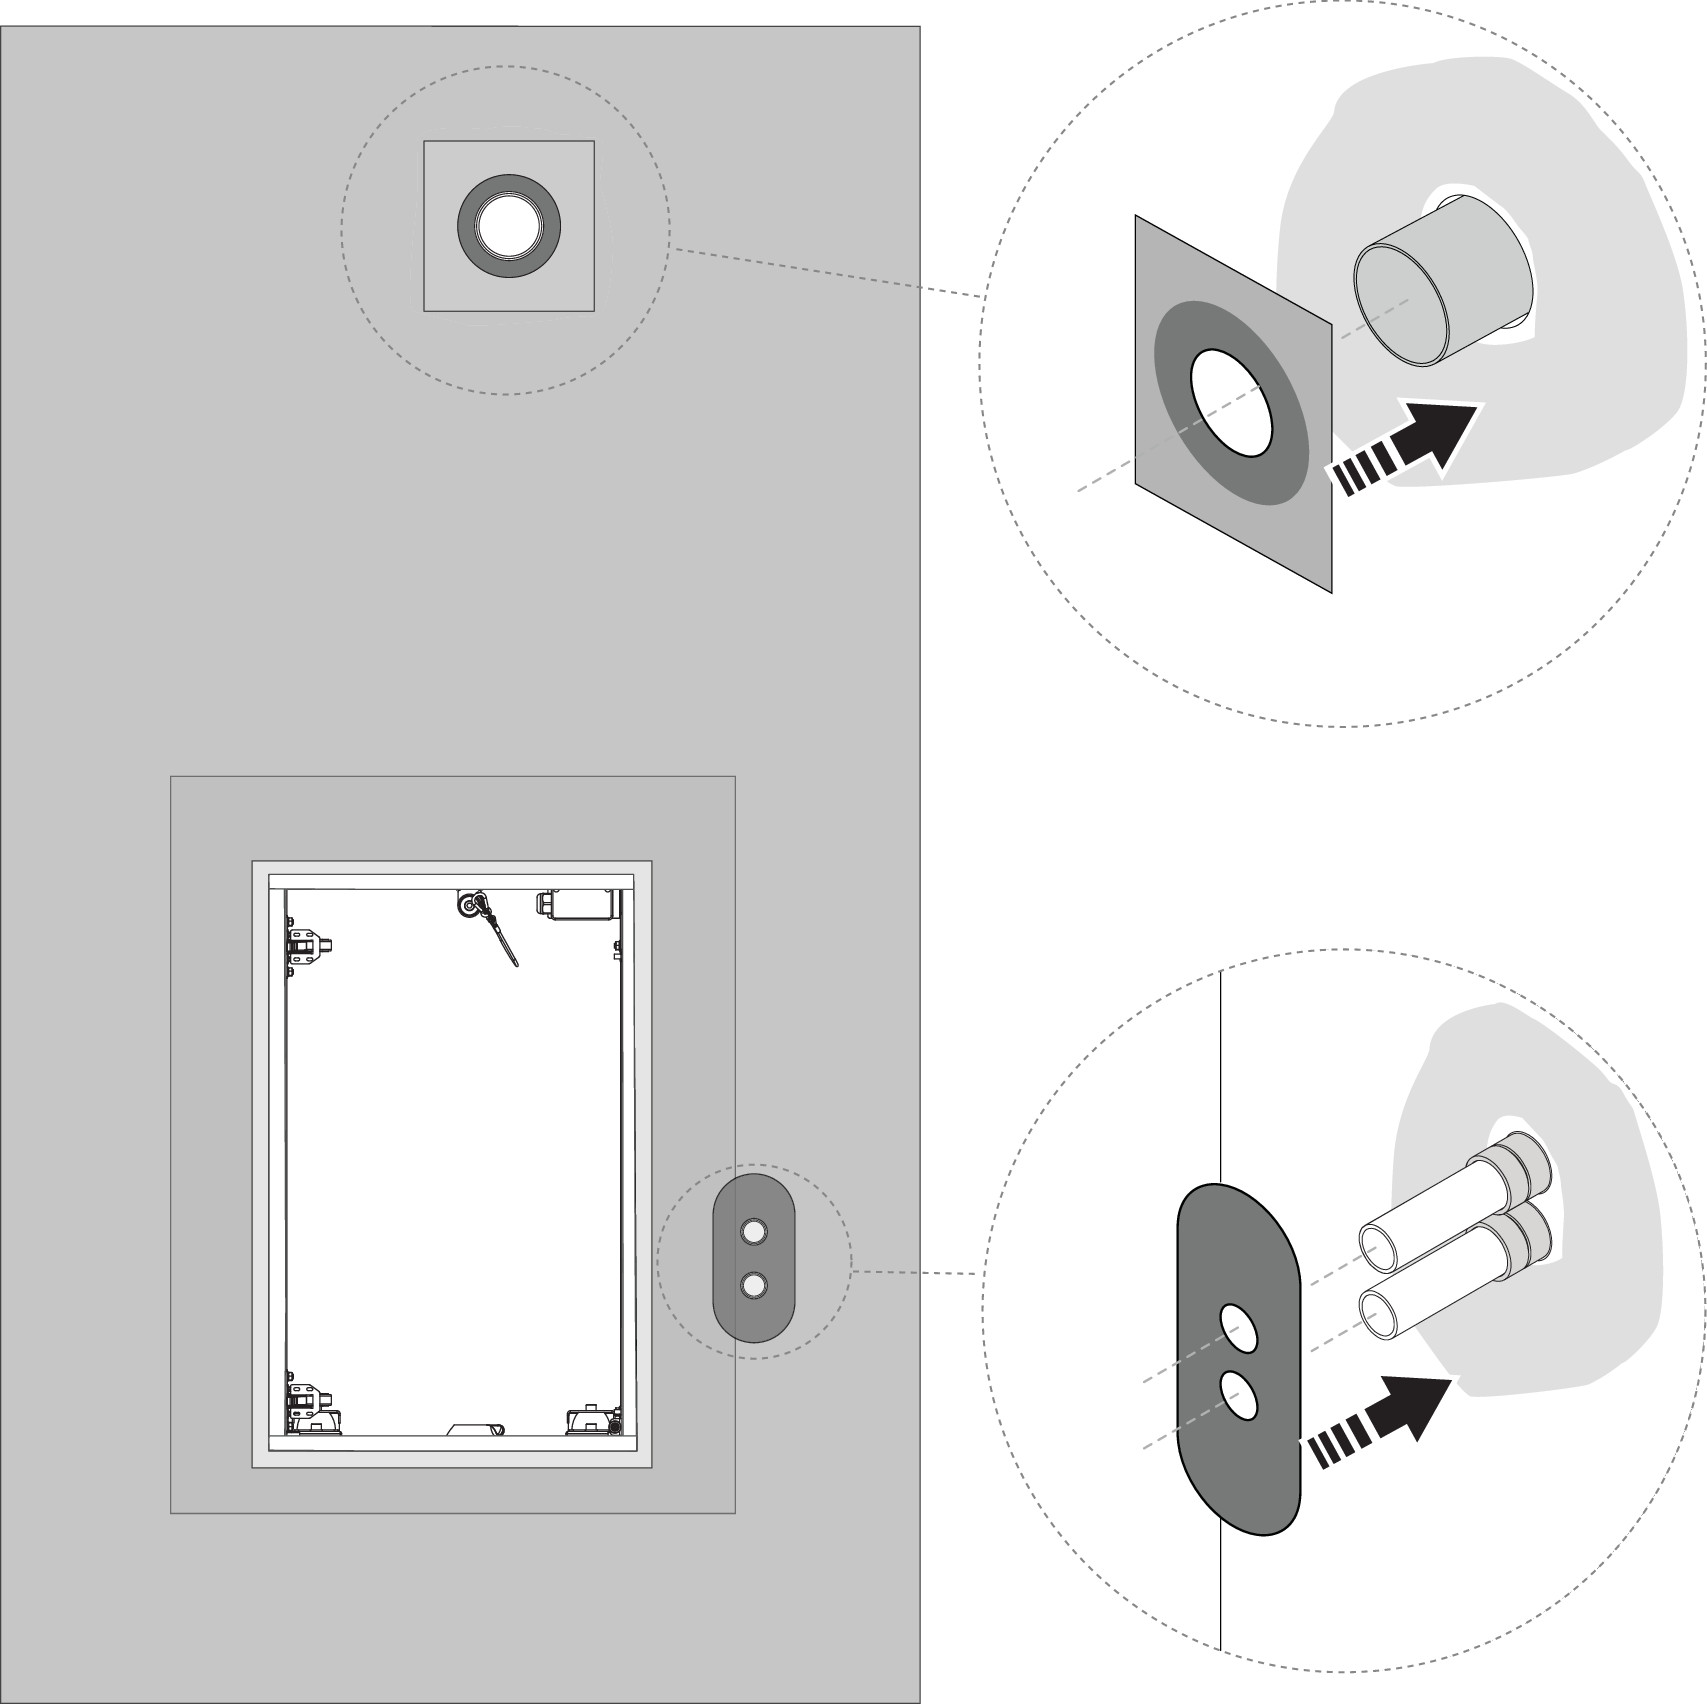
Waterproofing Conduit Membrane for Diverter
Waterproofing Conduit Membrane for Shower Head
Waterproofing membrane shall be applied around 2 penetrations in the wall and on the metal flanges of the Wall Box and the drain unit.
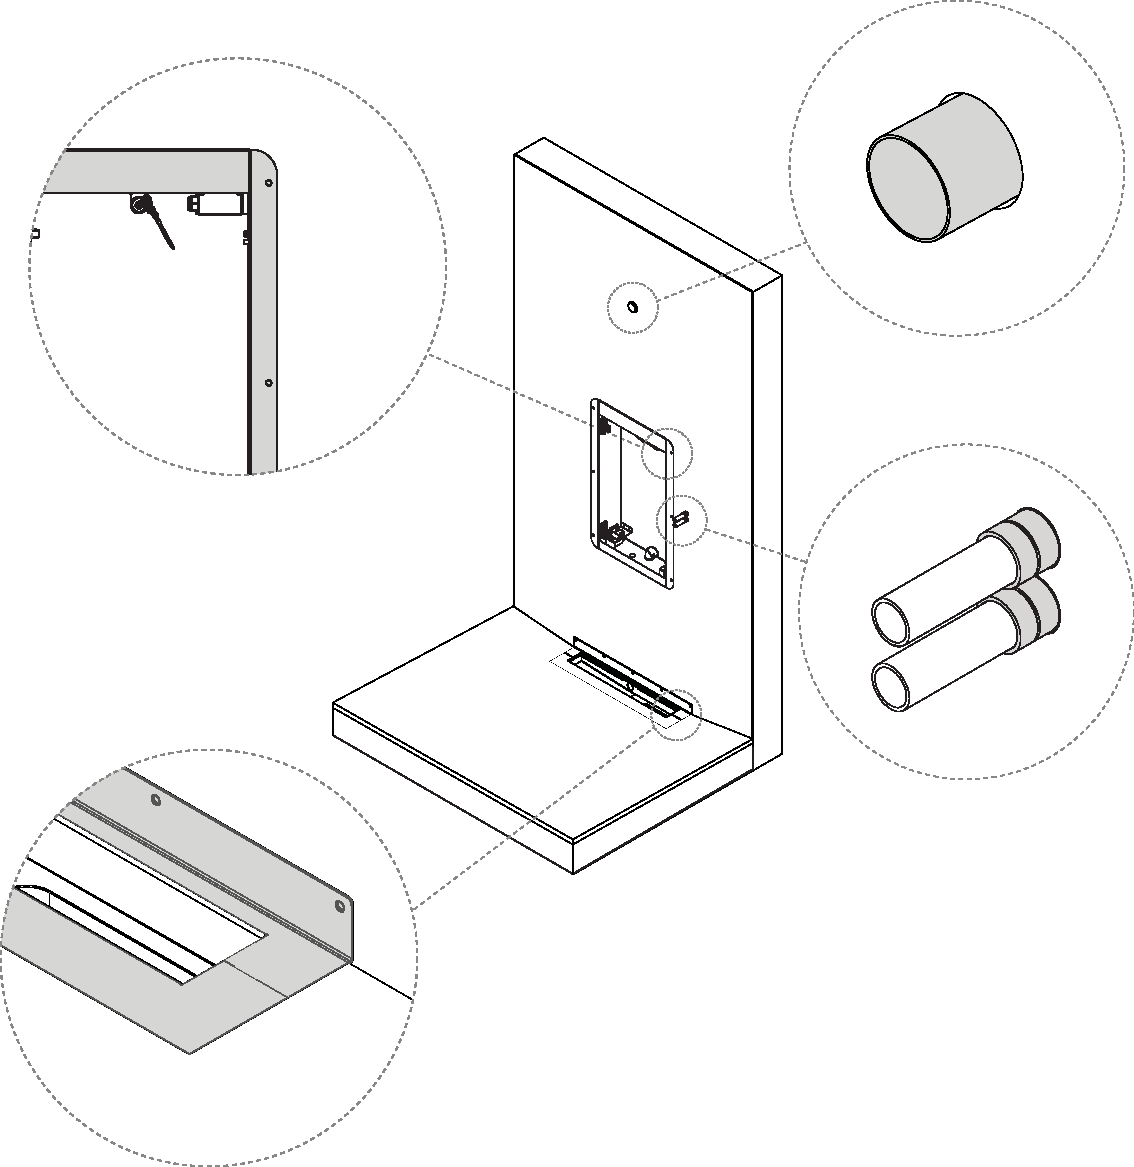 |
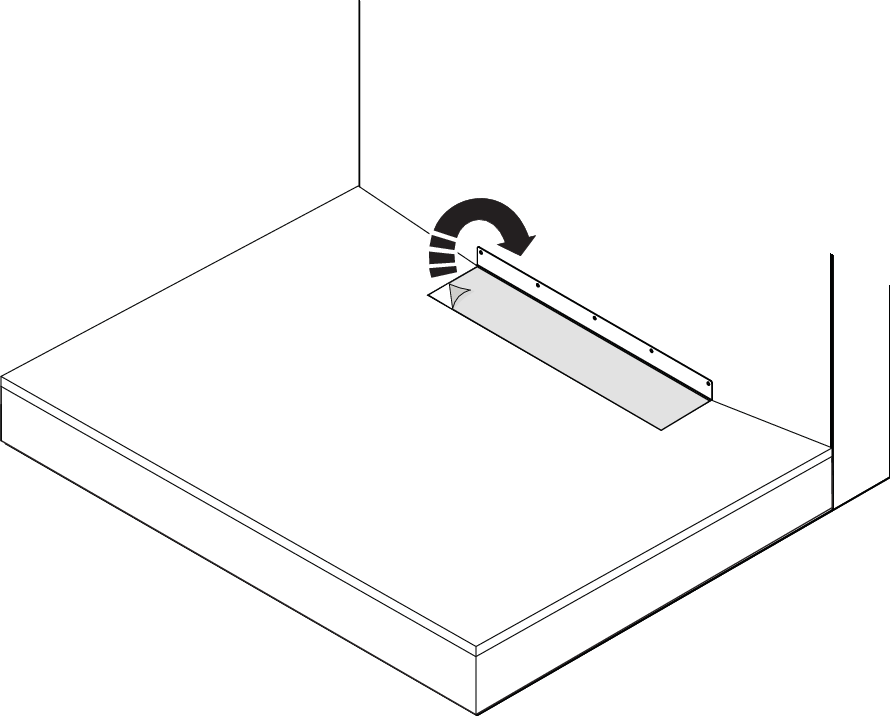
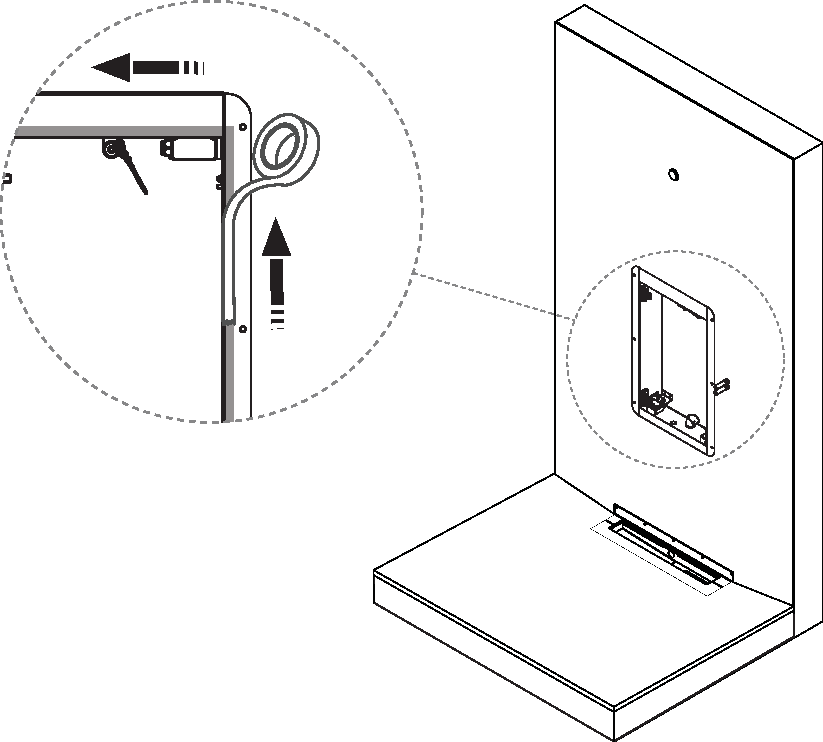
Remove the protective cover from the drain unit.
Roughen the metal surface of the drain unit and the Wall Box and clean them with the included cleaning wipe.
Notice
To achieve optimal bonding, all surfaces should be clean and free of adhesion reducing substances (e.g. dust, acid, grease).
Mask the black lacquered part of the Wall Box flange with tape.
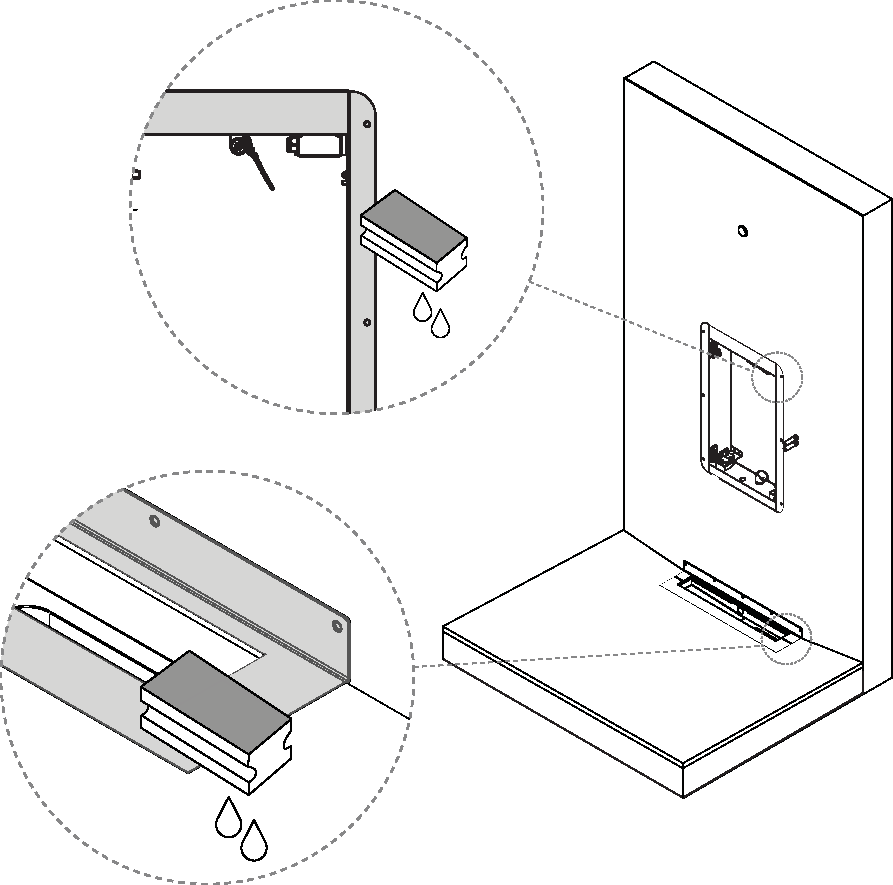
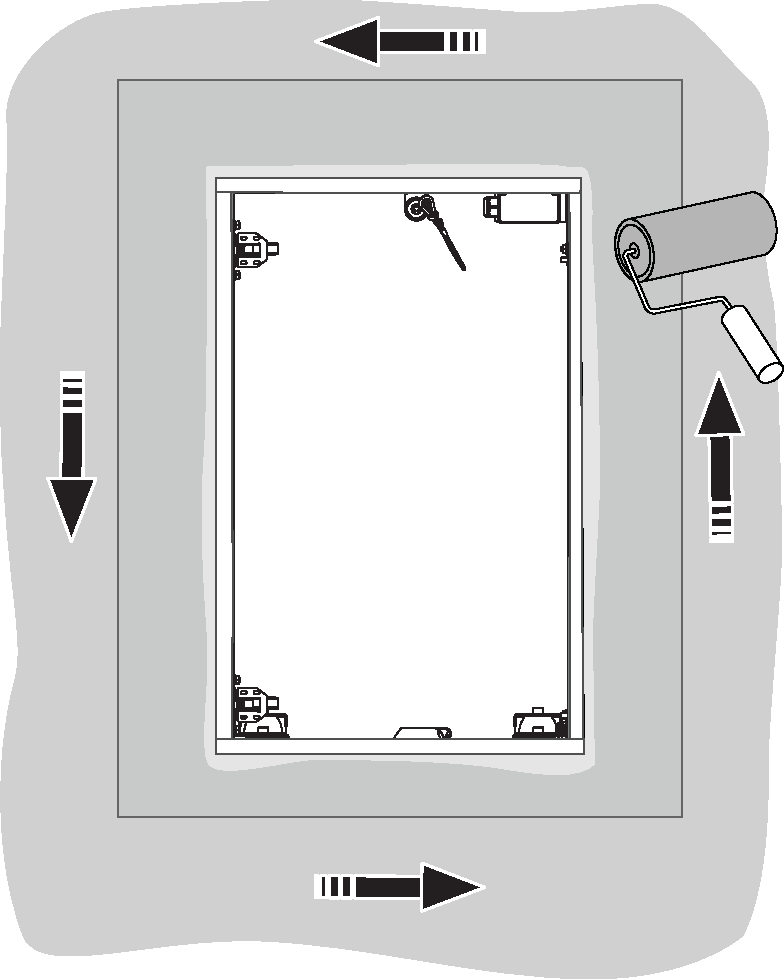
Apply waterproofing glue on the metal flanges of the Wall Box and drain unit.
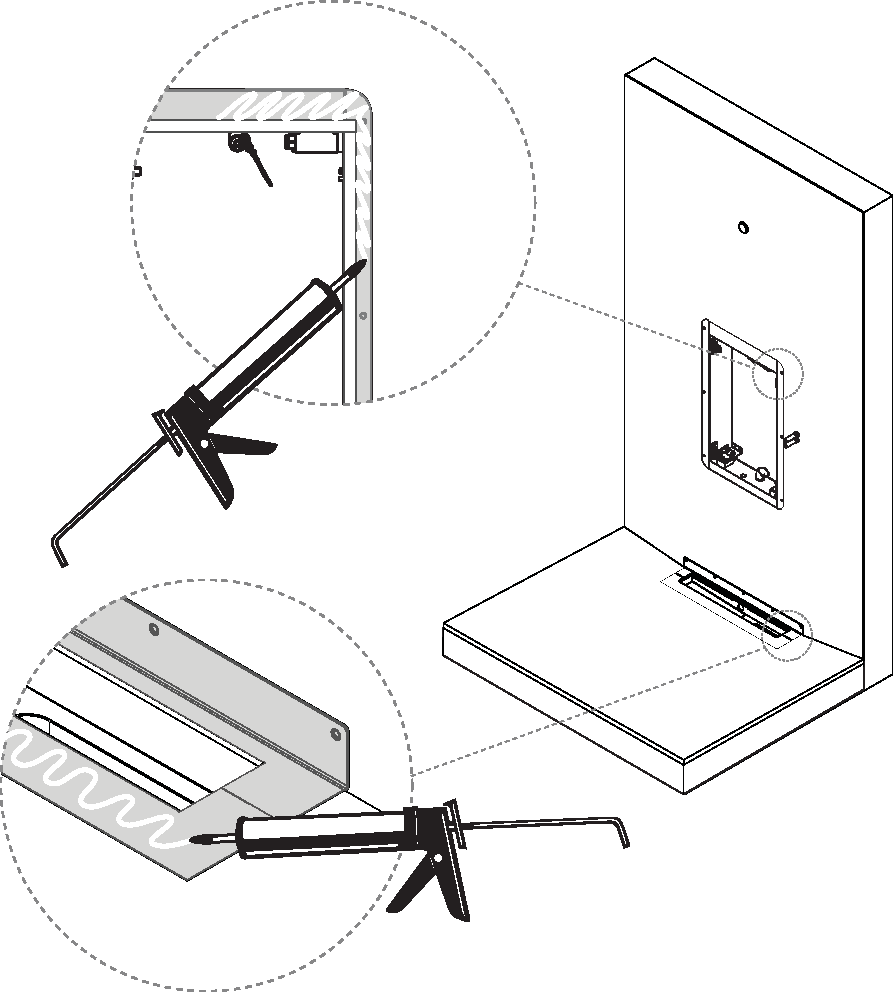
Spread the waterproofing glue with a fine-toothed glue spreader or brush.

Apply liquid membrane to the floor- and wall surfaces which the Drain Waterproofing Membrane and the Wallbox Waterproofing Membrane are going to cover.
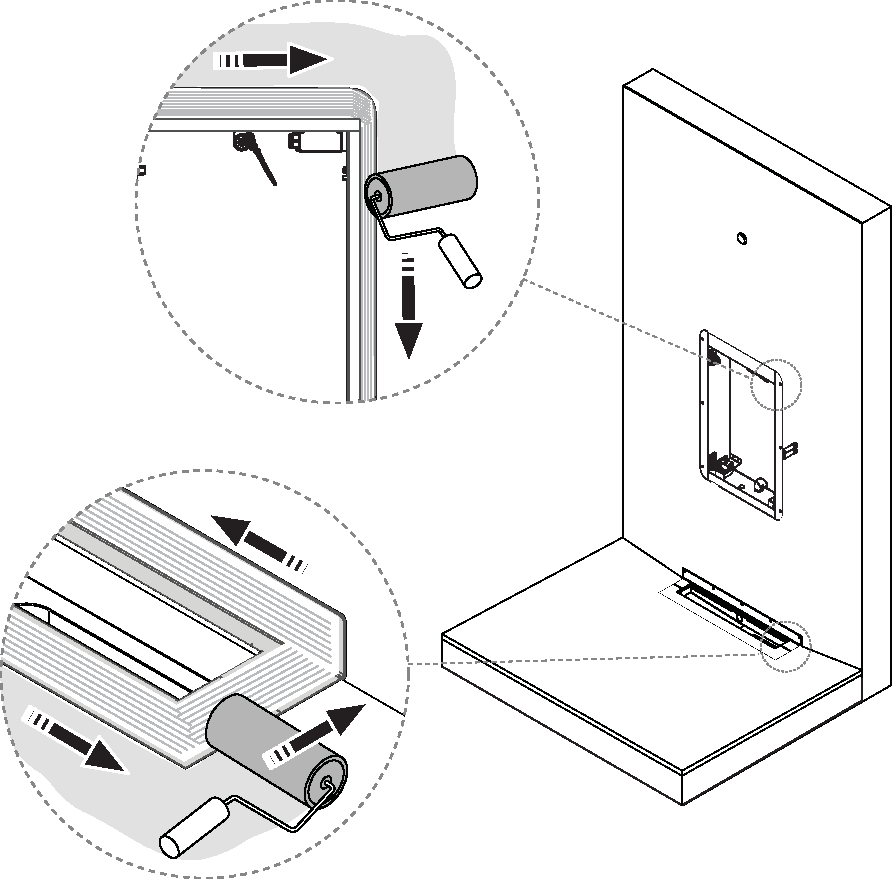
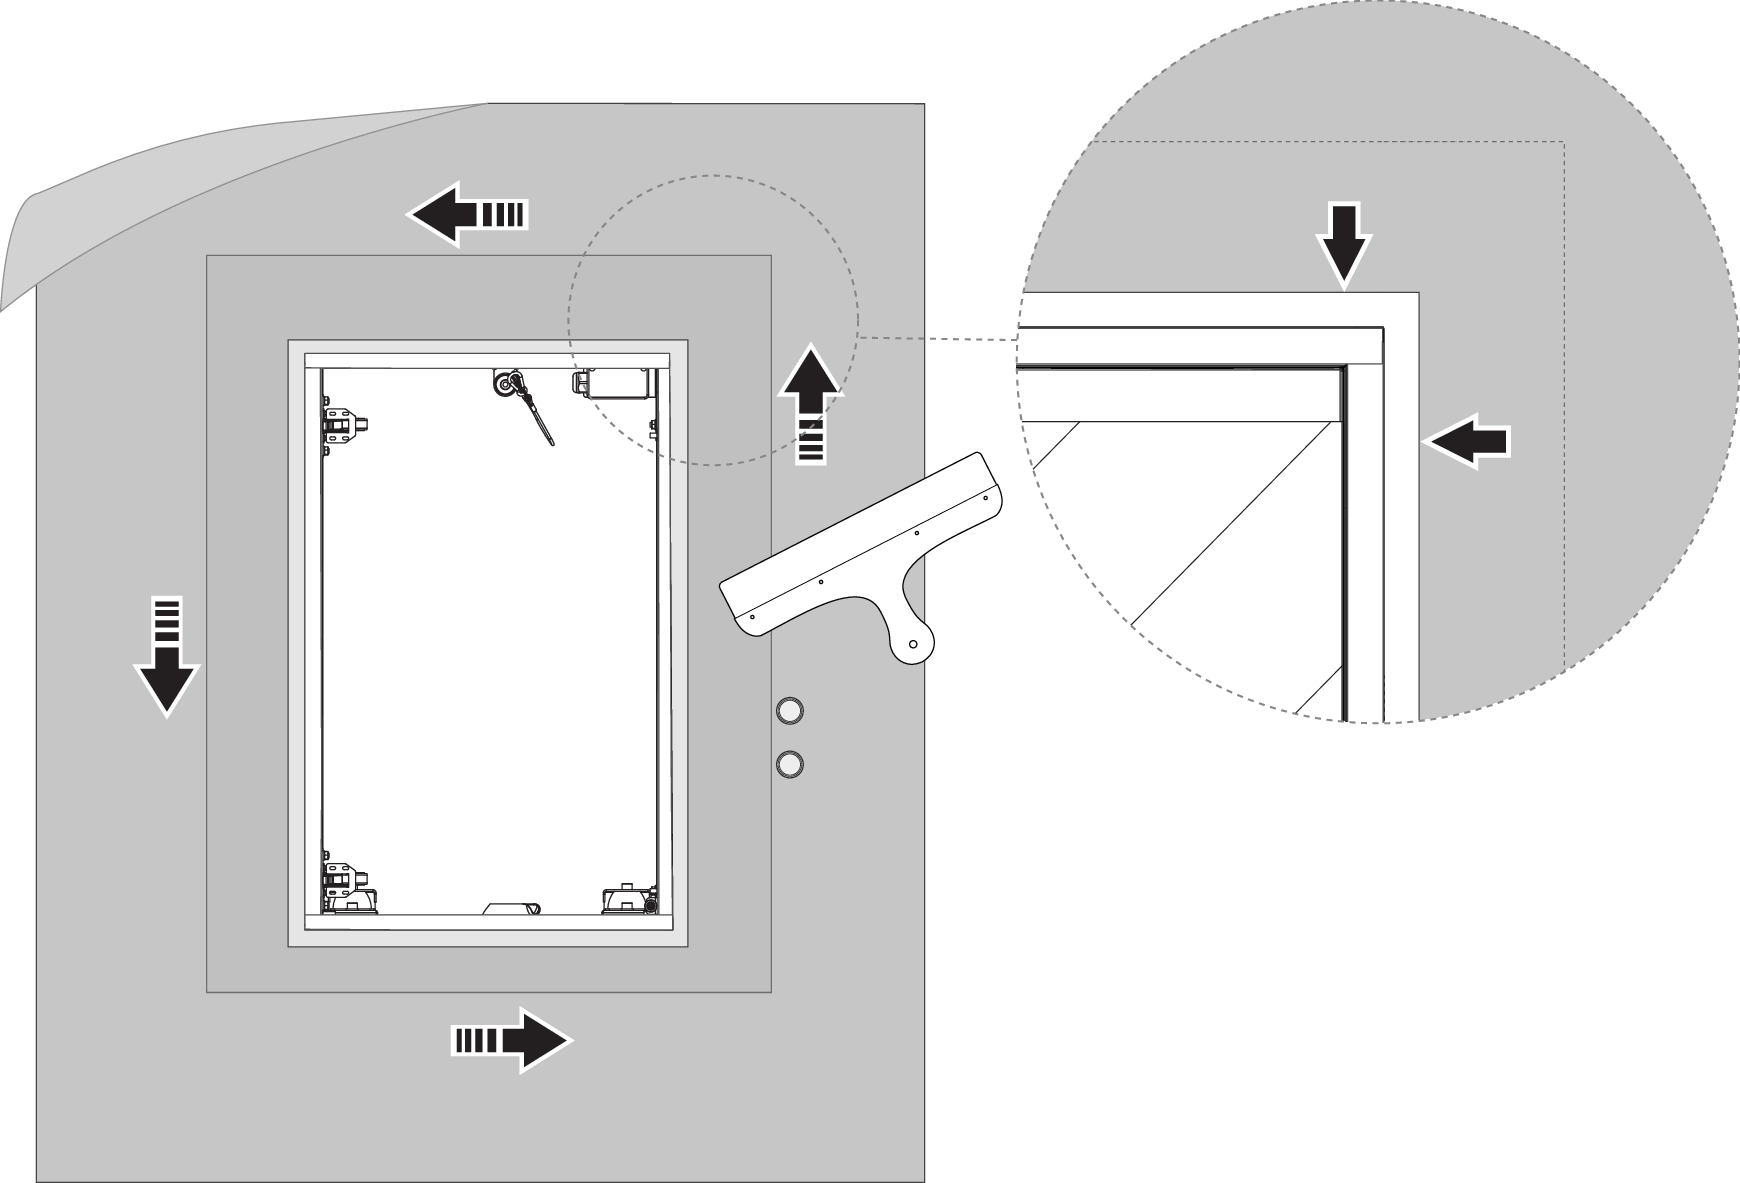
Apply the Wall Box Waterproofing Membrane around the Wallbox and the Drain Waterproofing Membrane around the drain unit. When mounting the Drain Waterproofing Membrane, make sure to cover both the floor and the wall. Firmly apply pressure and remove air pockets using a smoothing tool. Make sure no blisters or creases occur.
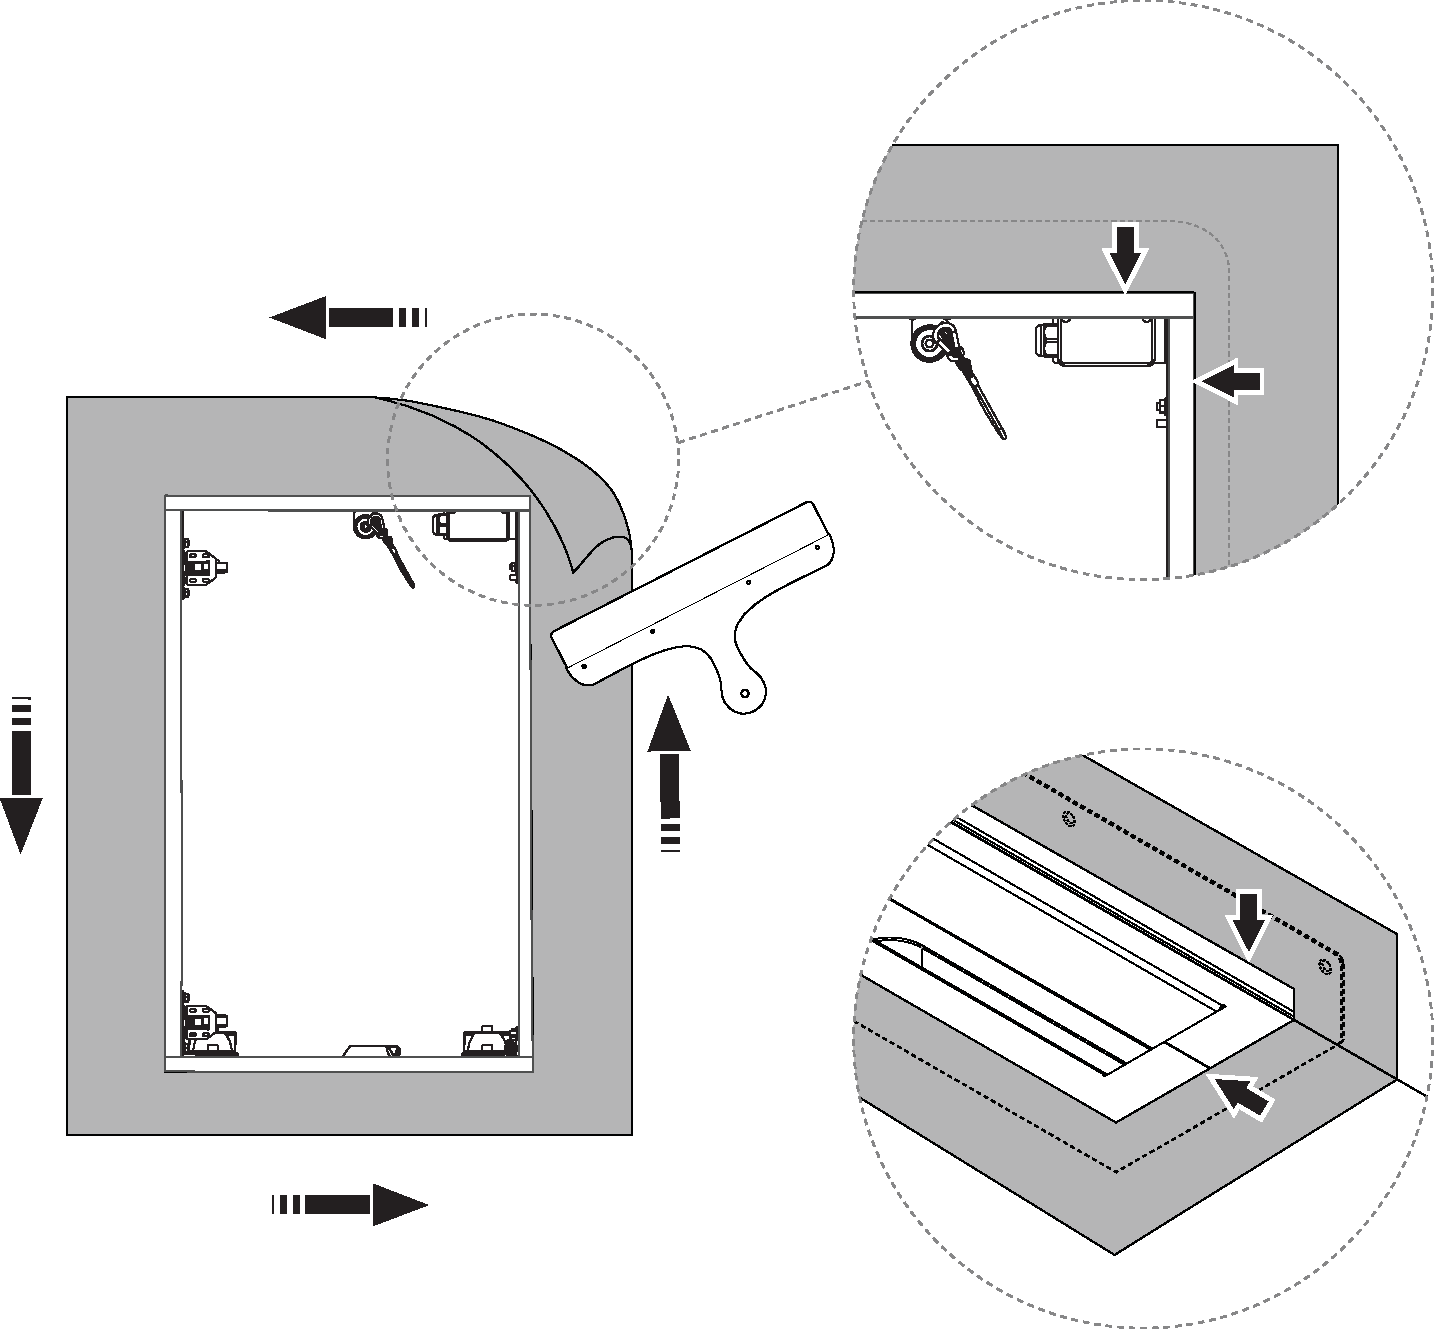
Apply liquid membrane on top of the Wall Box Waterproofing Membrane and to the additional wall surface.
Carefully mount the Waterproofing Membrane and overlap by at least 50 mm. Close the joints with a liquid membrane.
Apply waterproofing conduit membrane according to the chosen manufacturer to seal the conduits coming out of the wall.
Remove the tape from the flange of the Wall Box.

Make sure remaining surfaces are being waterproofed according to chosen waterproofing membrane manufacturer and industry rules.