Connect all components
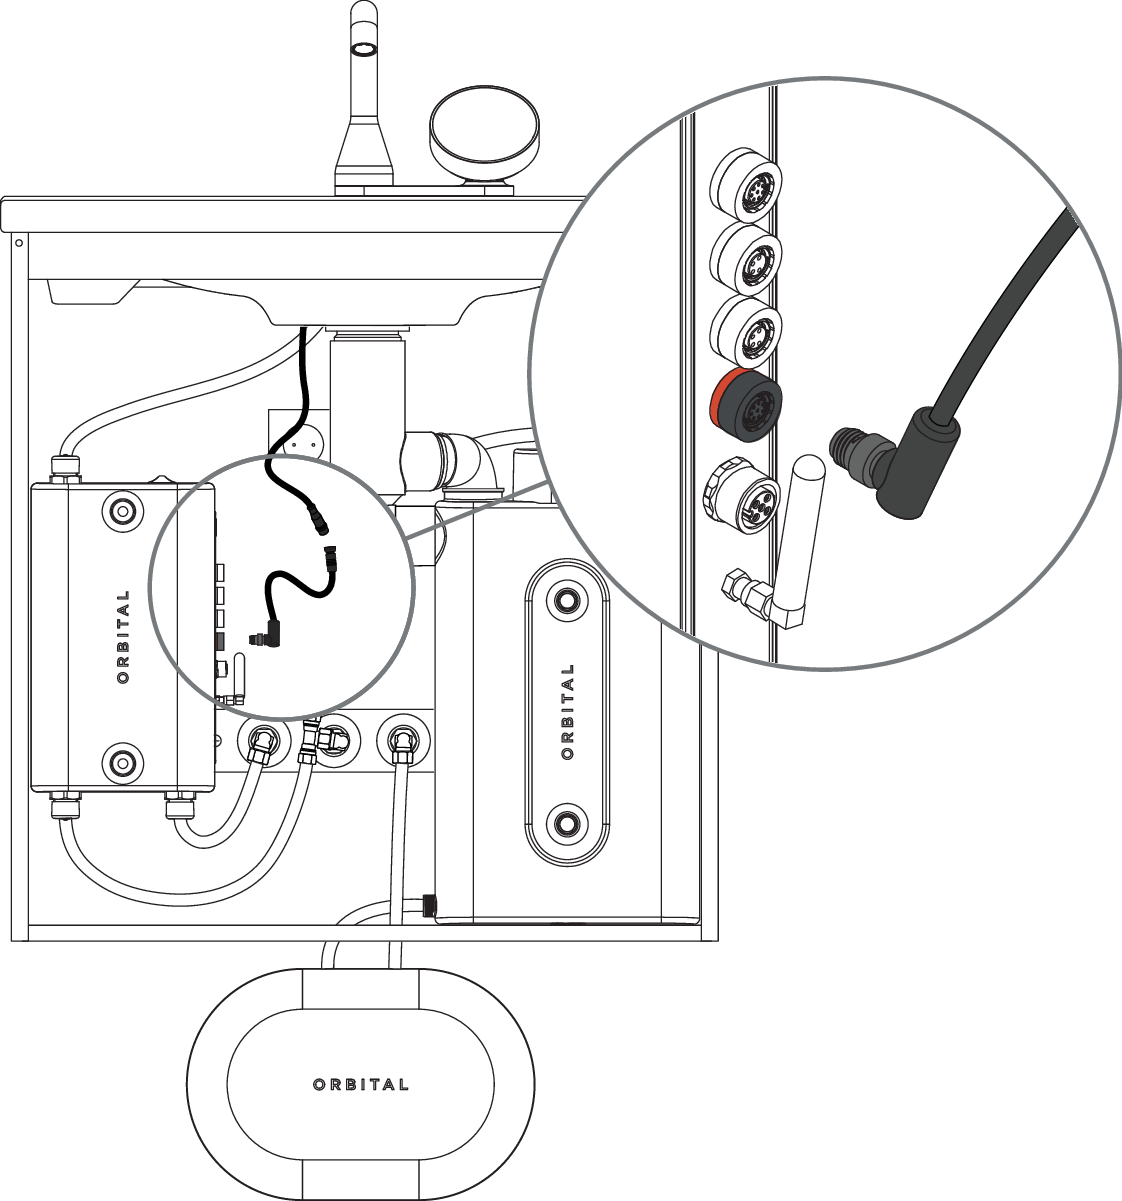
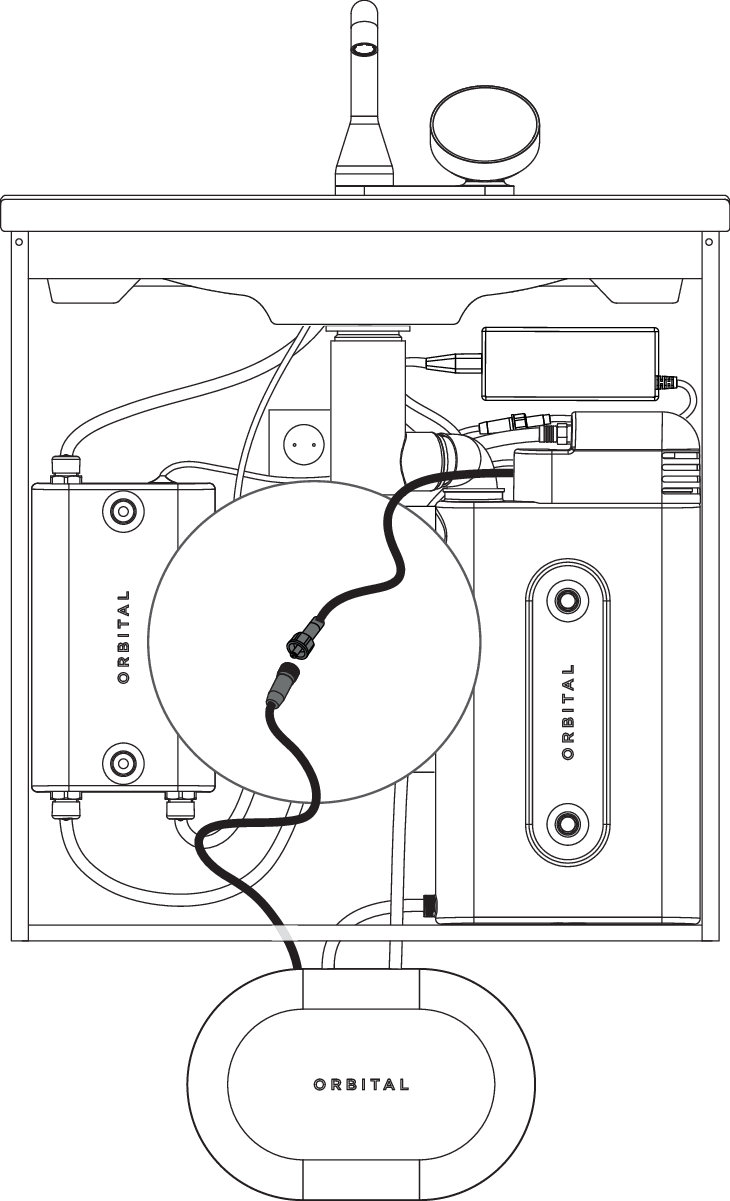
Connect the cable from the Control Dial to the Mixer.
Caution
To prevent damage to the contact, be careful and make sure to have the correct alignment between the key and slot. The contact should be angled 45° to the right.
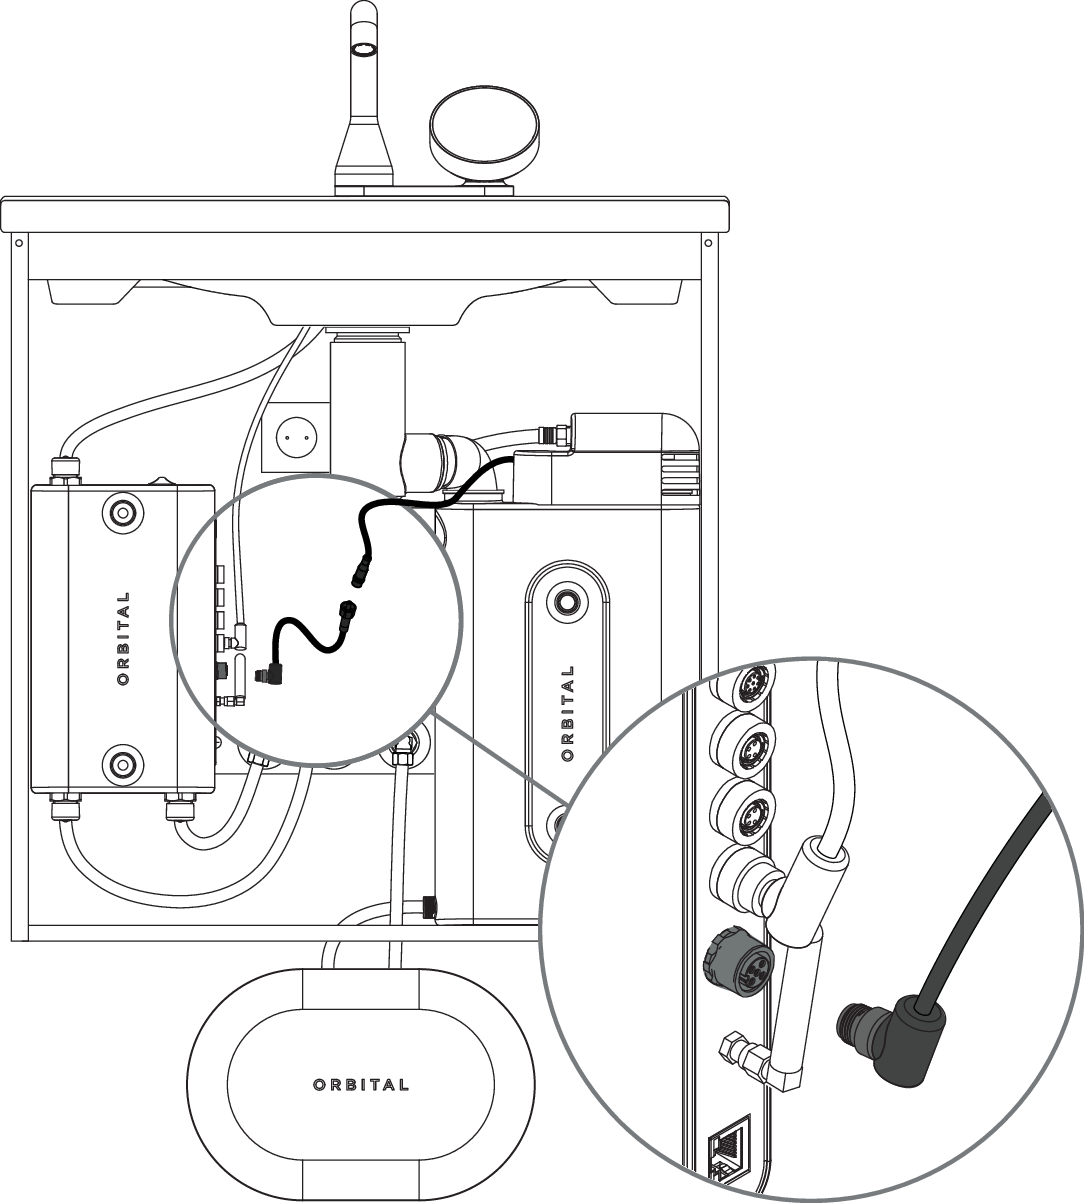
Connect the Tank to the Mixer.
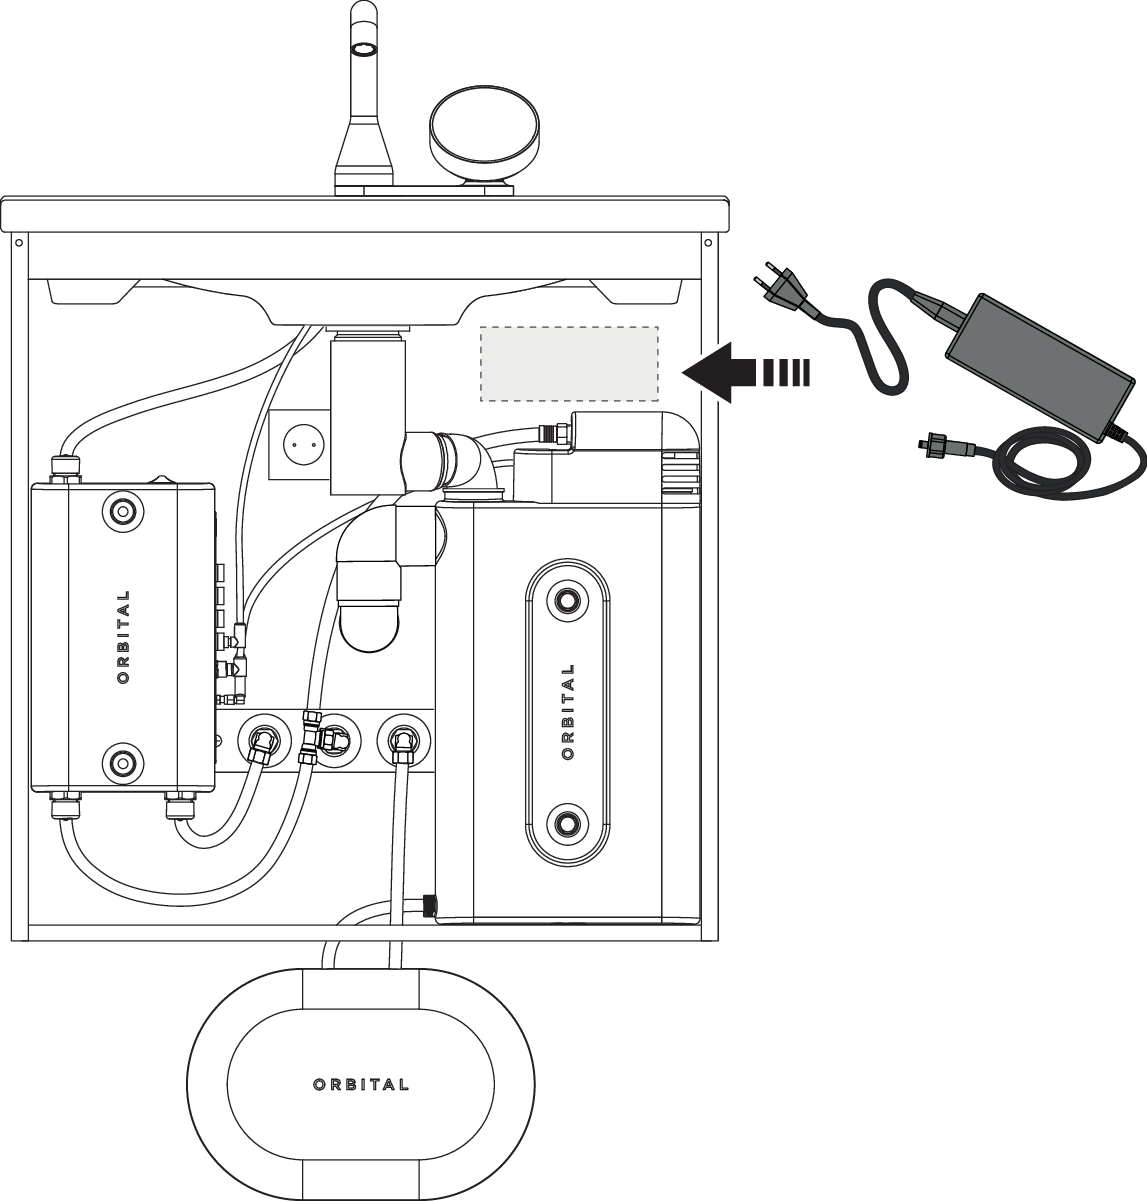
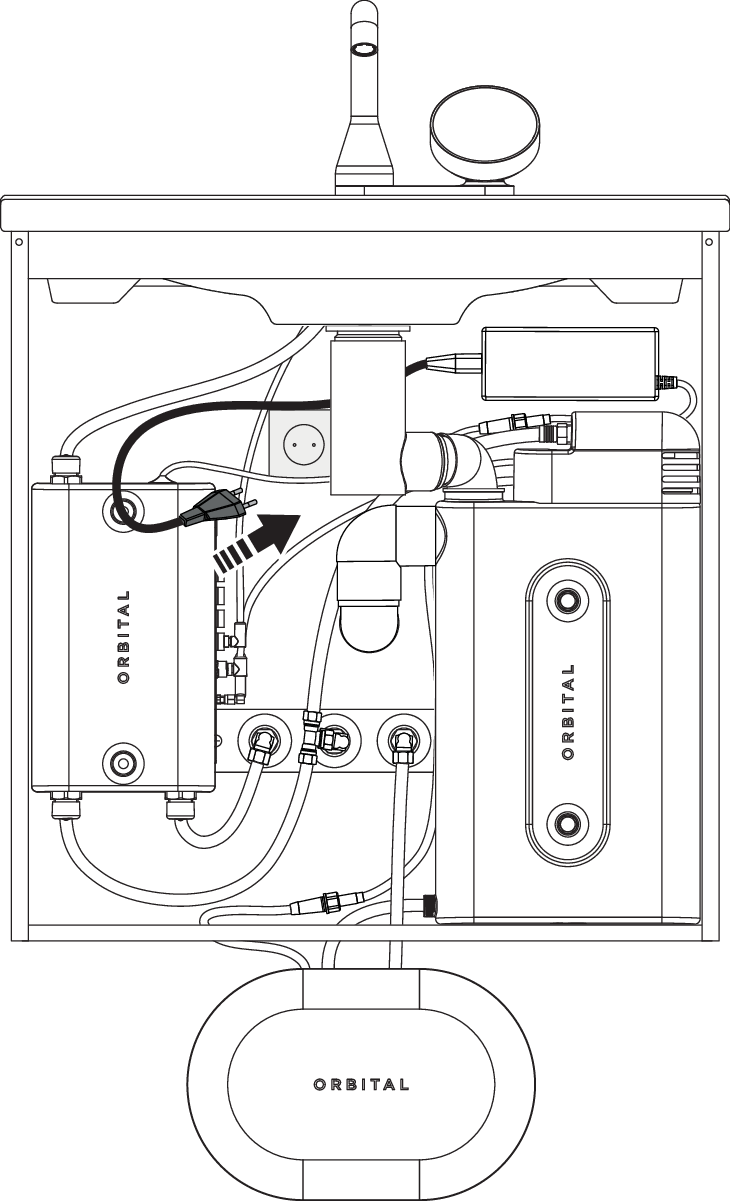
Attach the AC/DC power adapter in an available space using two screws.
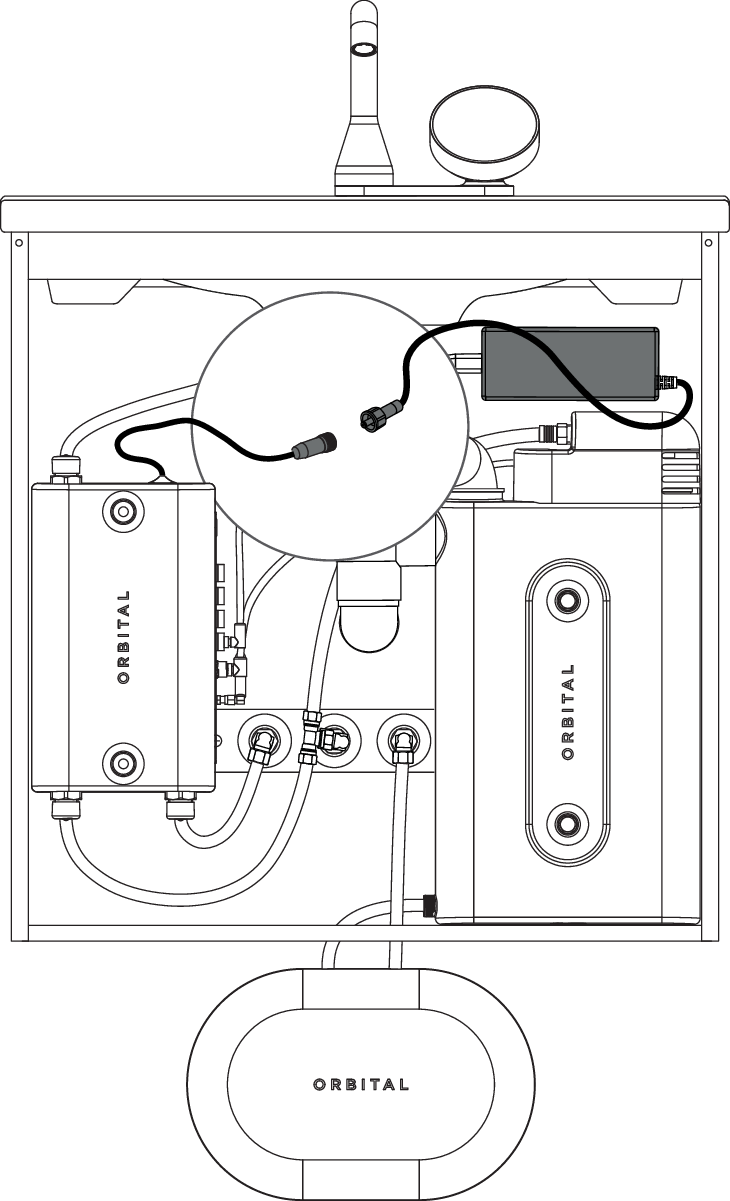
Connect the power adapter to the Mixer.
Connect the Tank to the Pump.
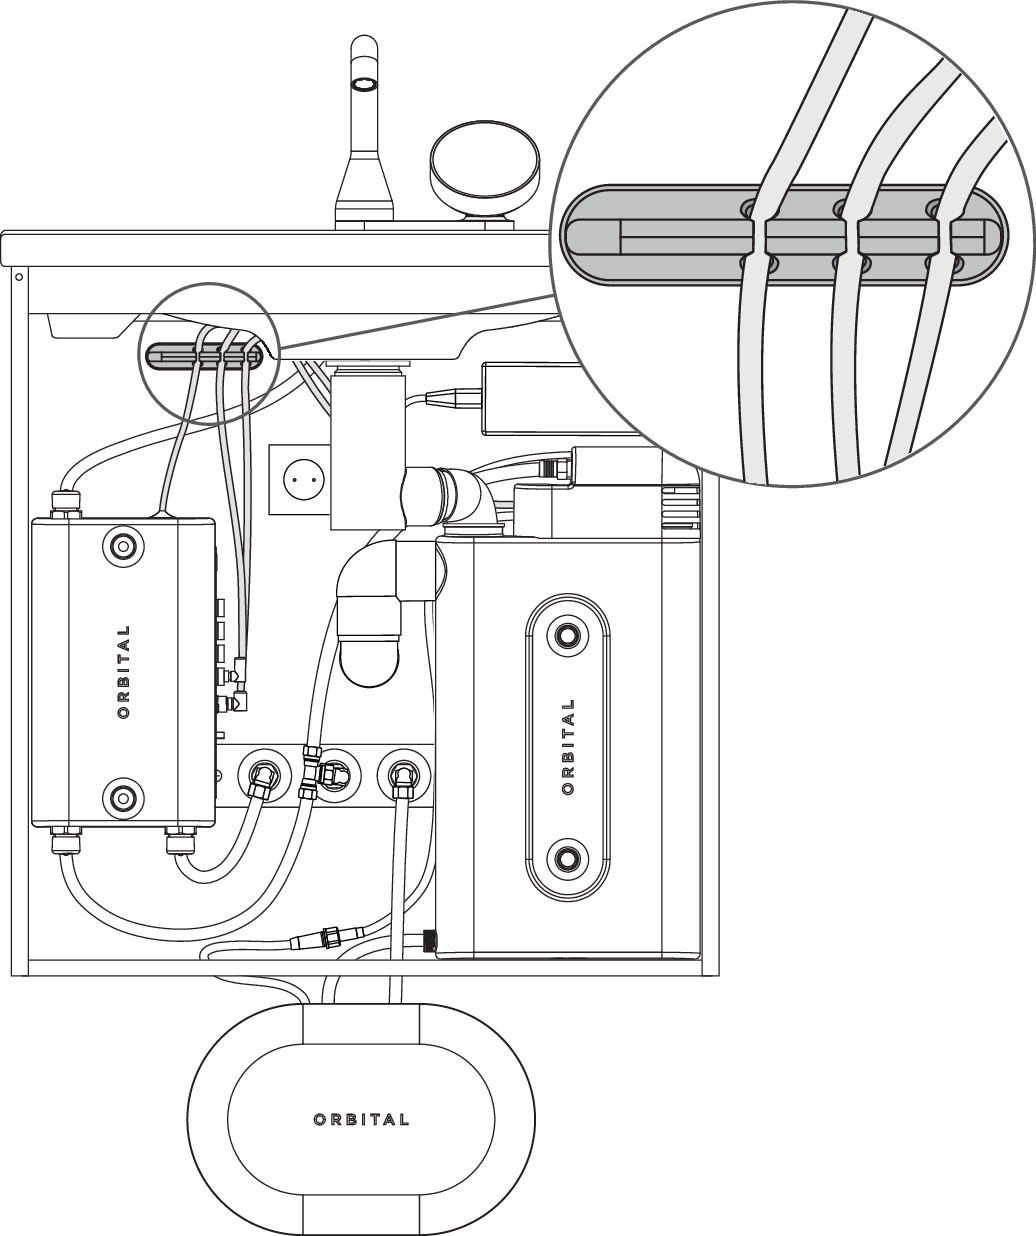
Mount the cable organizer in a suitable place in the commode and attach the cables.
Connect the power adapter to the socket.
When the system is connected to power, the Tank will fill up about 4 dl of water, to make sure there is water to flush with even if the faucet has not been used.
Flush the toilet to ensure the Pump starts and the toilet cistern is refilled. To prevent any leakage, it is recommended to verify the water tightness.