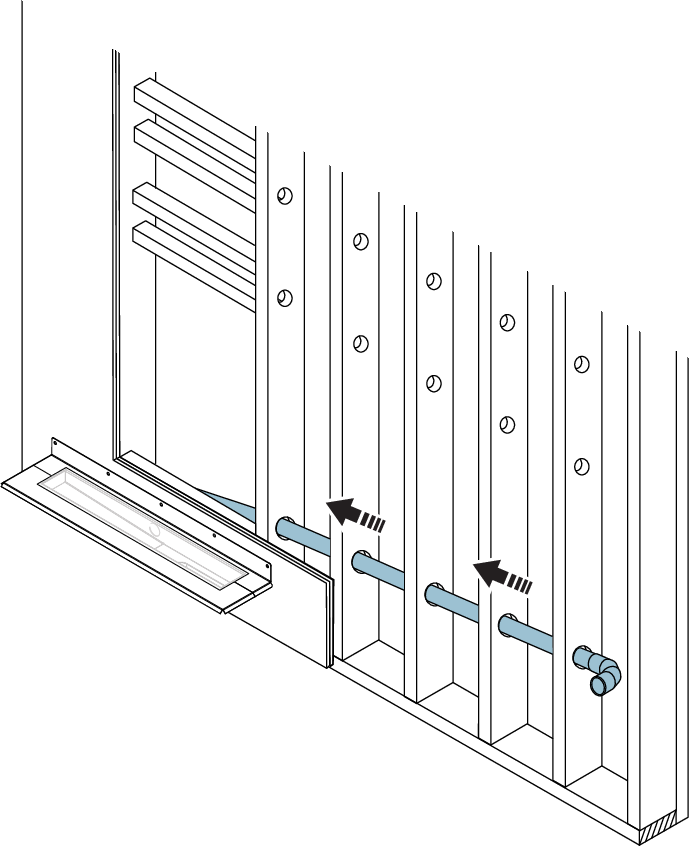
Install drain
 |
Caution
Plumbing and electrical installation should be performed according to industry rules.
Do not remove the protective cover until the frame is being installed in a later step.
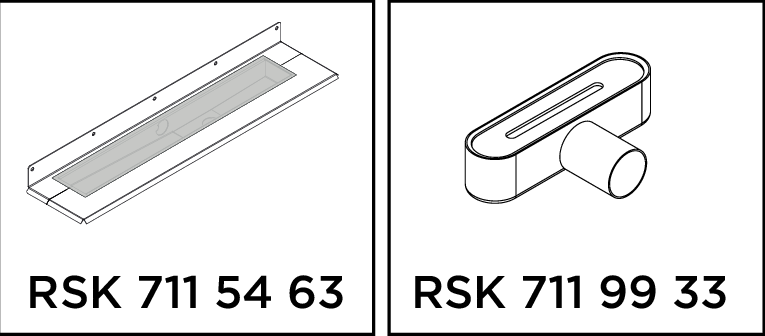
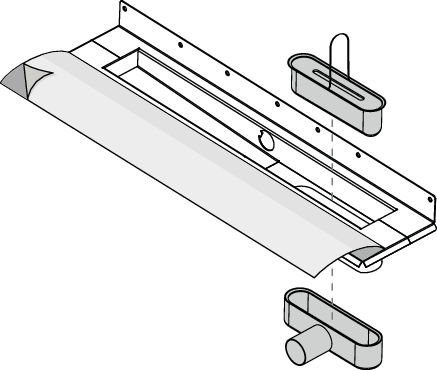
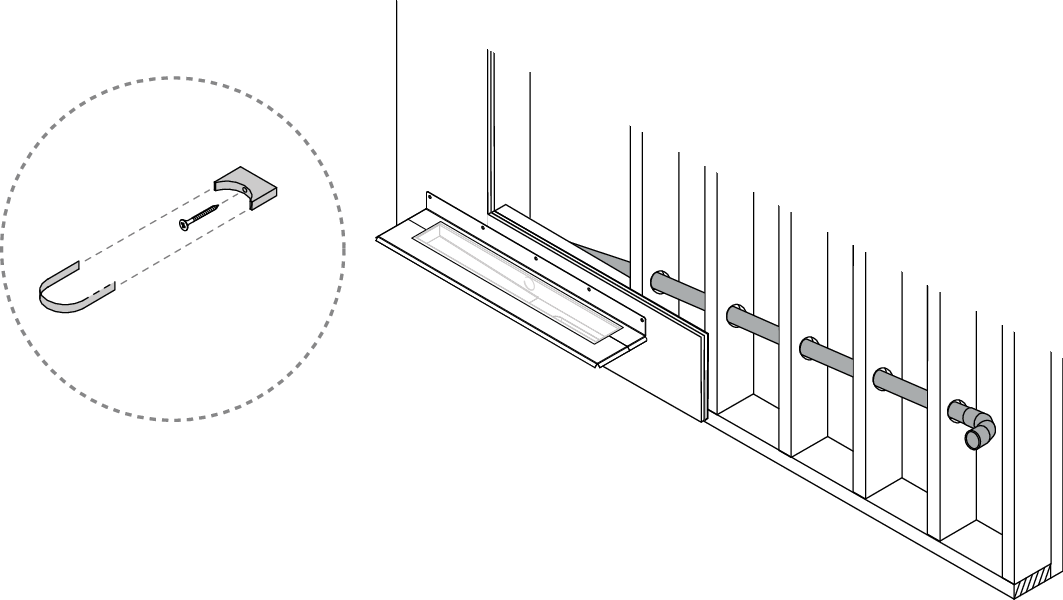
Insert the outlet unit. Fold back the protective cover to cover the drain unit.
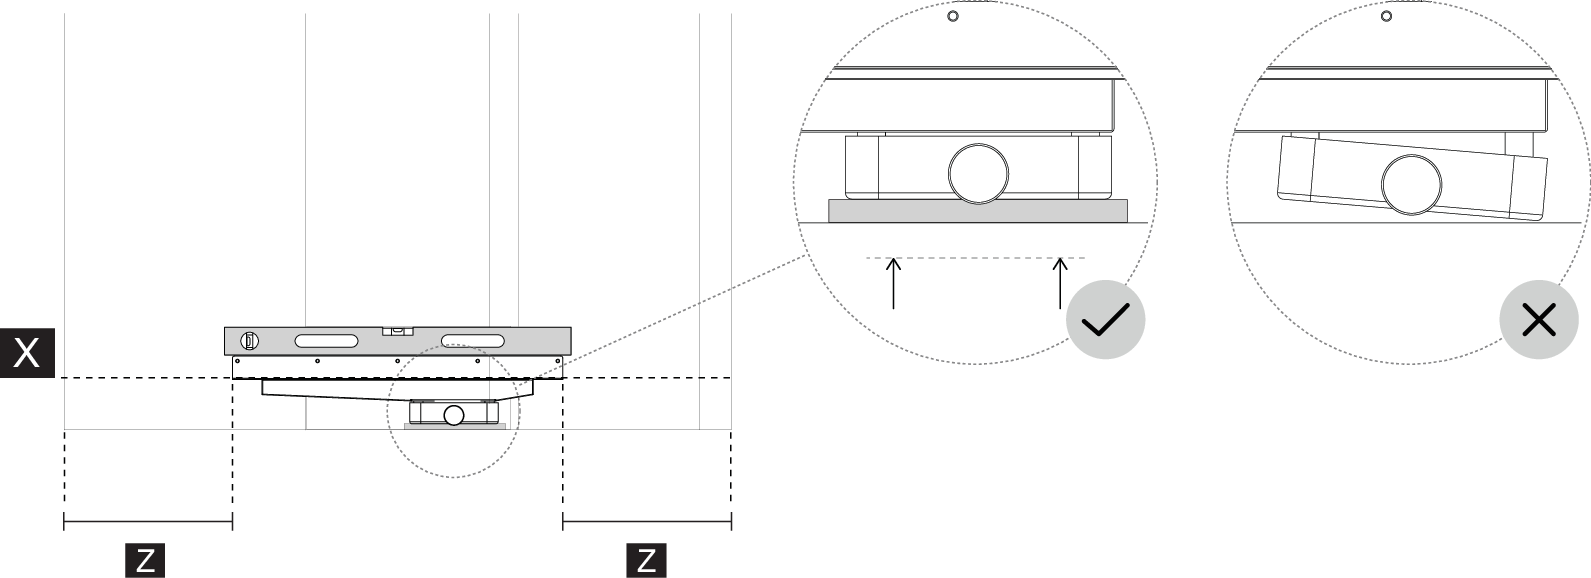
 The floor level where the waterproofing is connected to the floor drain flange.
 Drain unit is centered in the shower area.
Use all supplied screws to fasten the drain unit.
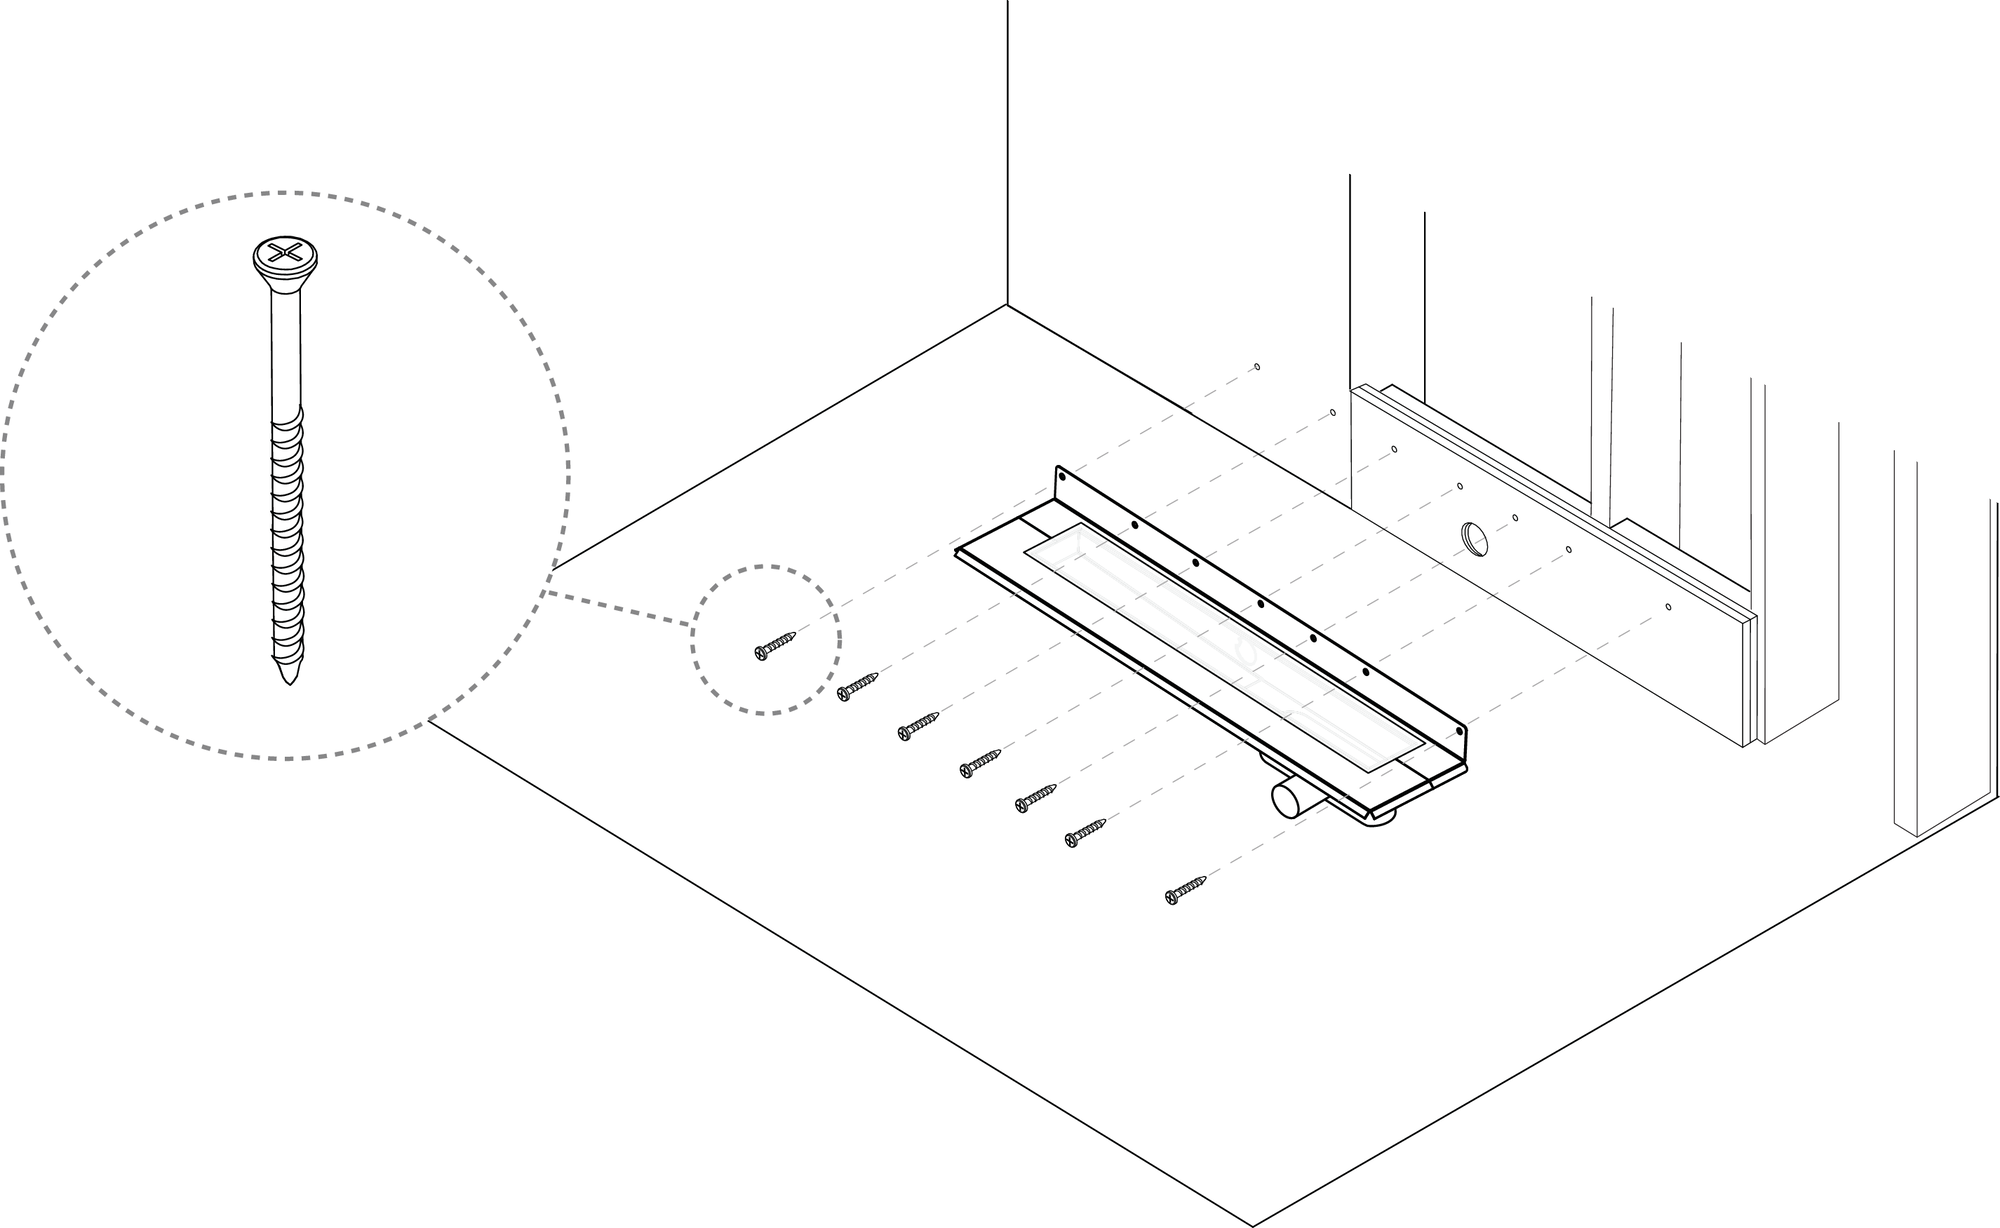
x7
Countersunk stainless steel screw
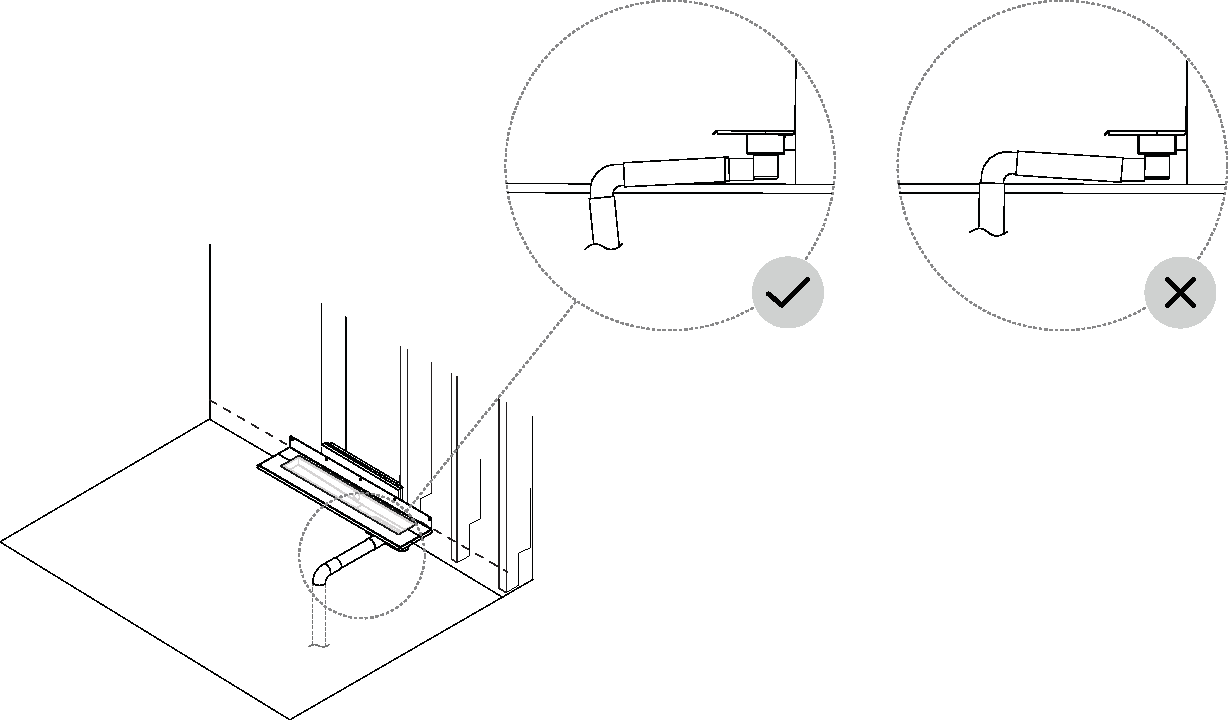
Connect the drain unit to the sewerage system as defined by industry rules.
 |
Anchors
2
Perform the installation in accordance with current Industry Rules Säker Vatten Installation. See bulleted list 2 in chapter Important installation steps.
Note
Apply Glidex lubricant when assembling.
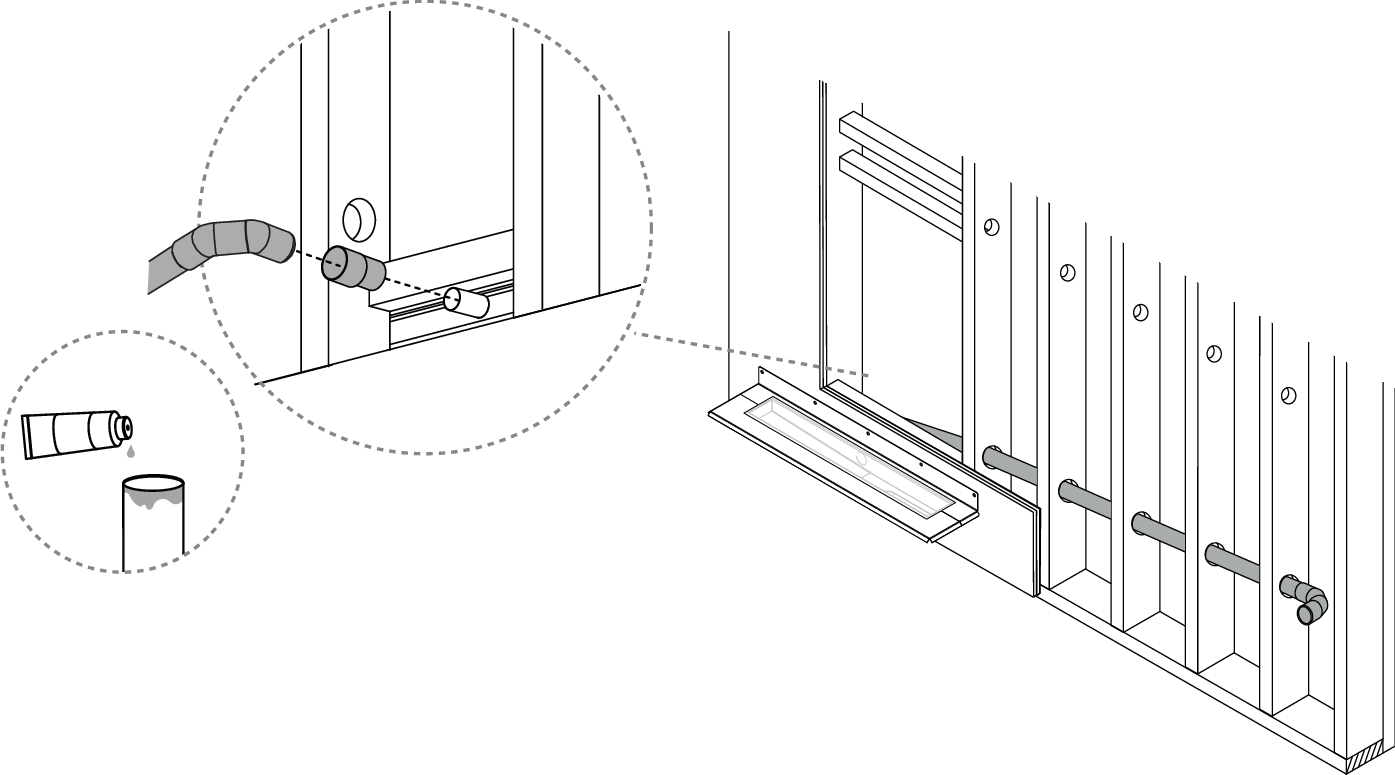
Caution
Make sure to fasten and anchor the pipes and fittings so they cannot move or be separated.
Check water tightness to eliminate leakage.
Caution
For installations in Sweden leakage test shall be performed. The drain must be sample flushed and inspected visually to ensure that the assembly is tight. The leakage test shall be documented.