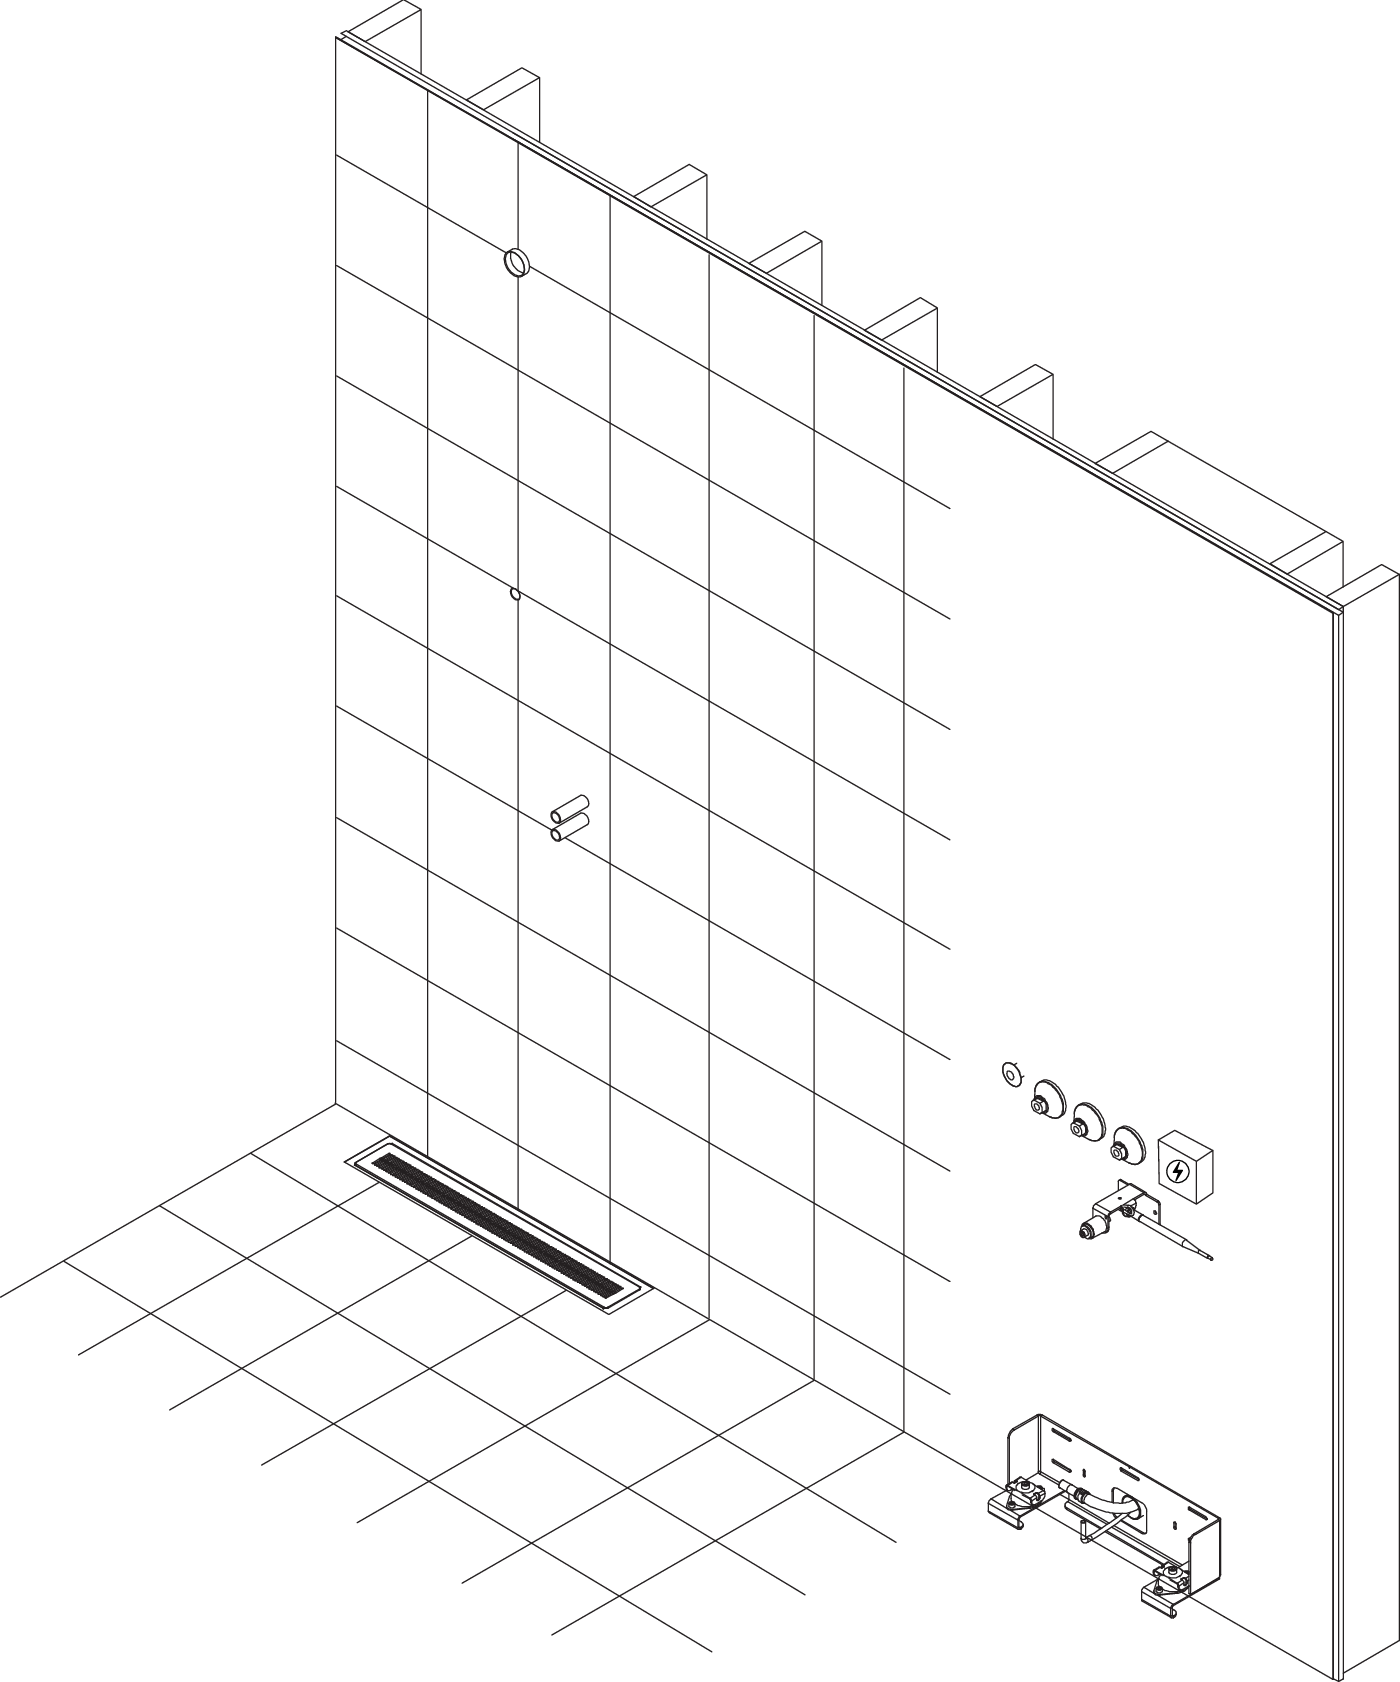
Install Core Wall Mounting
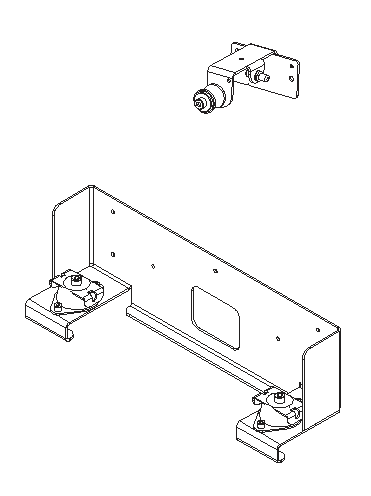 |
Measure and align the placement of the Core Wall Mounting.

The weight of the Core is approx. 25 kg. The wall construction must be able to support this load.
Caution
Seal drill holes according to industry rules. See section Seal mountings in wet zone for instruction.
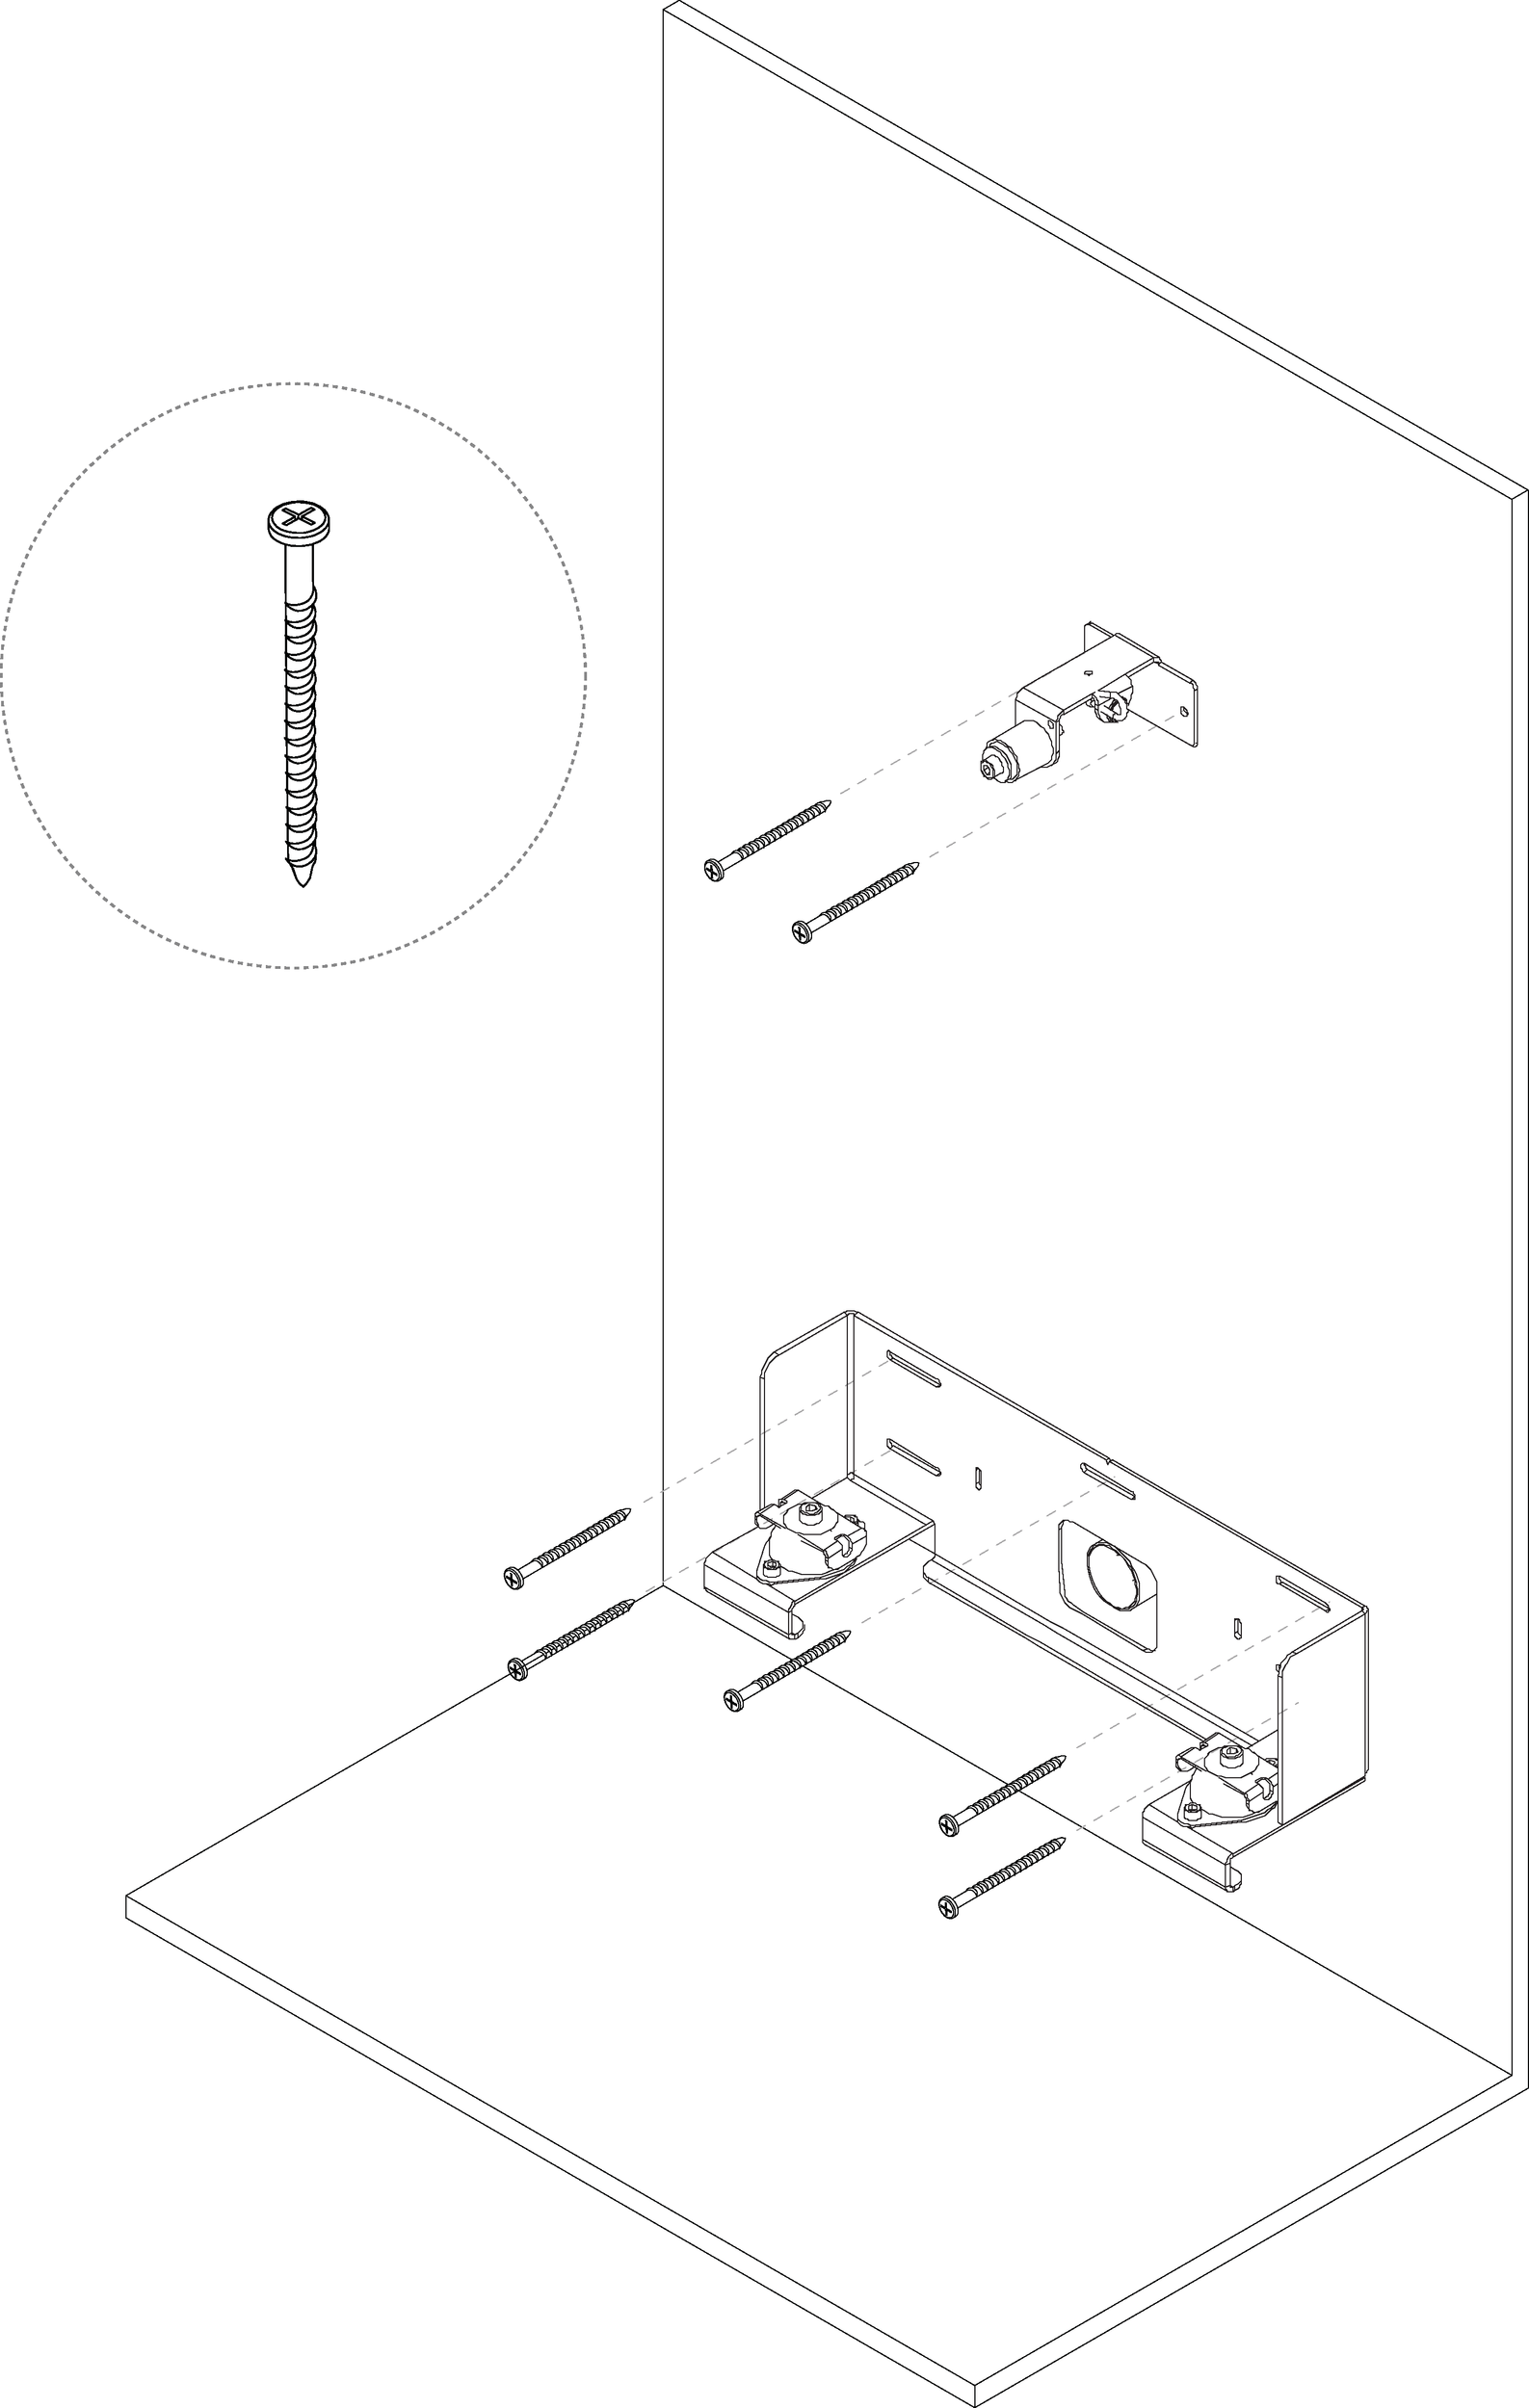
x7
Pan head stainless steel screw
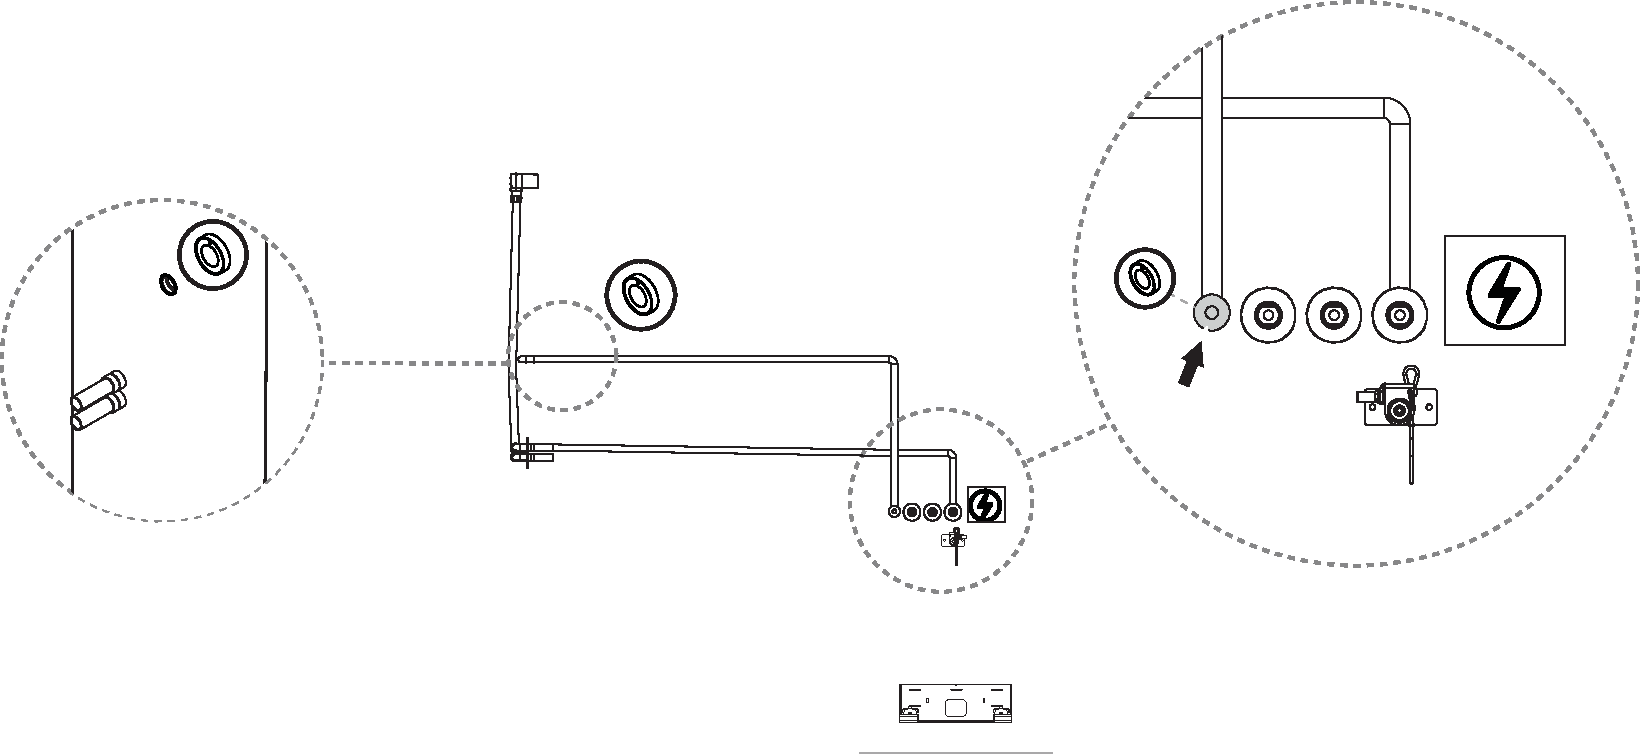
Use the wall conduits for anchoring the conduits.
Notice
Wall conduits for incoming water and electricity are supplied by the customer.
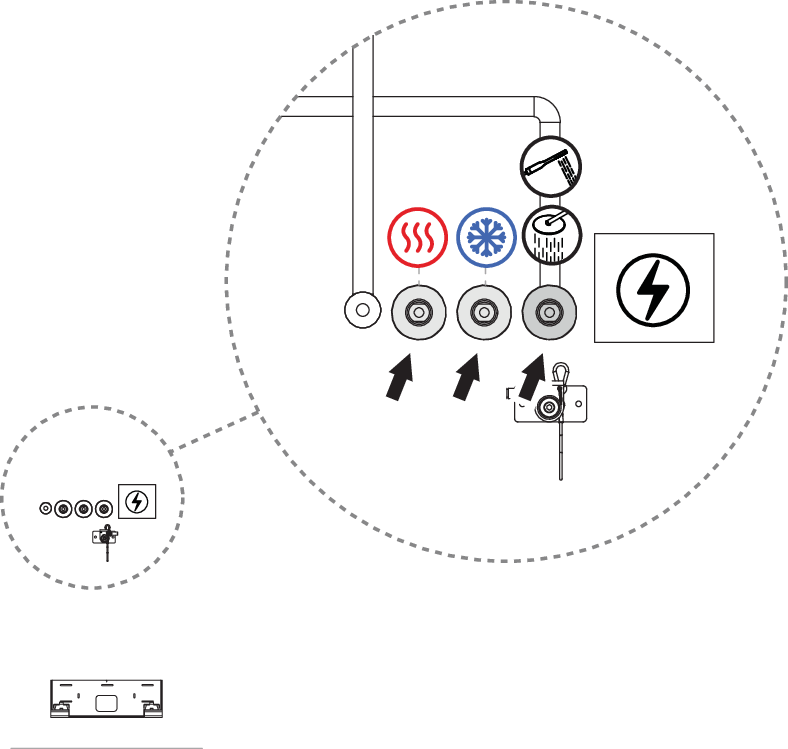 Figure 90. Only valid for Orbital Ethernet installation
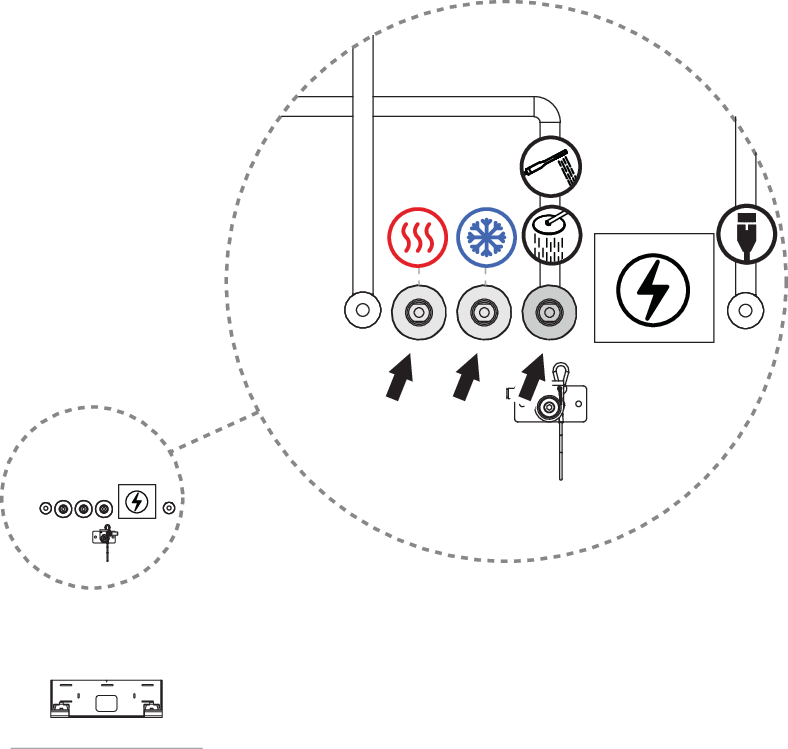
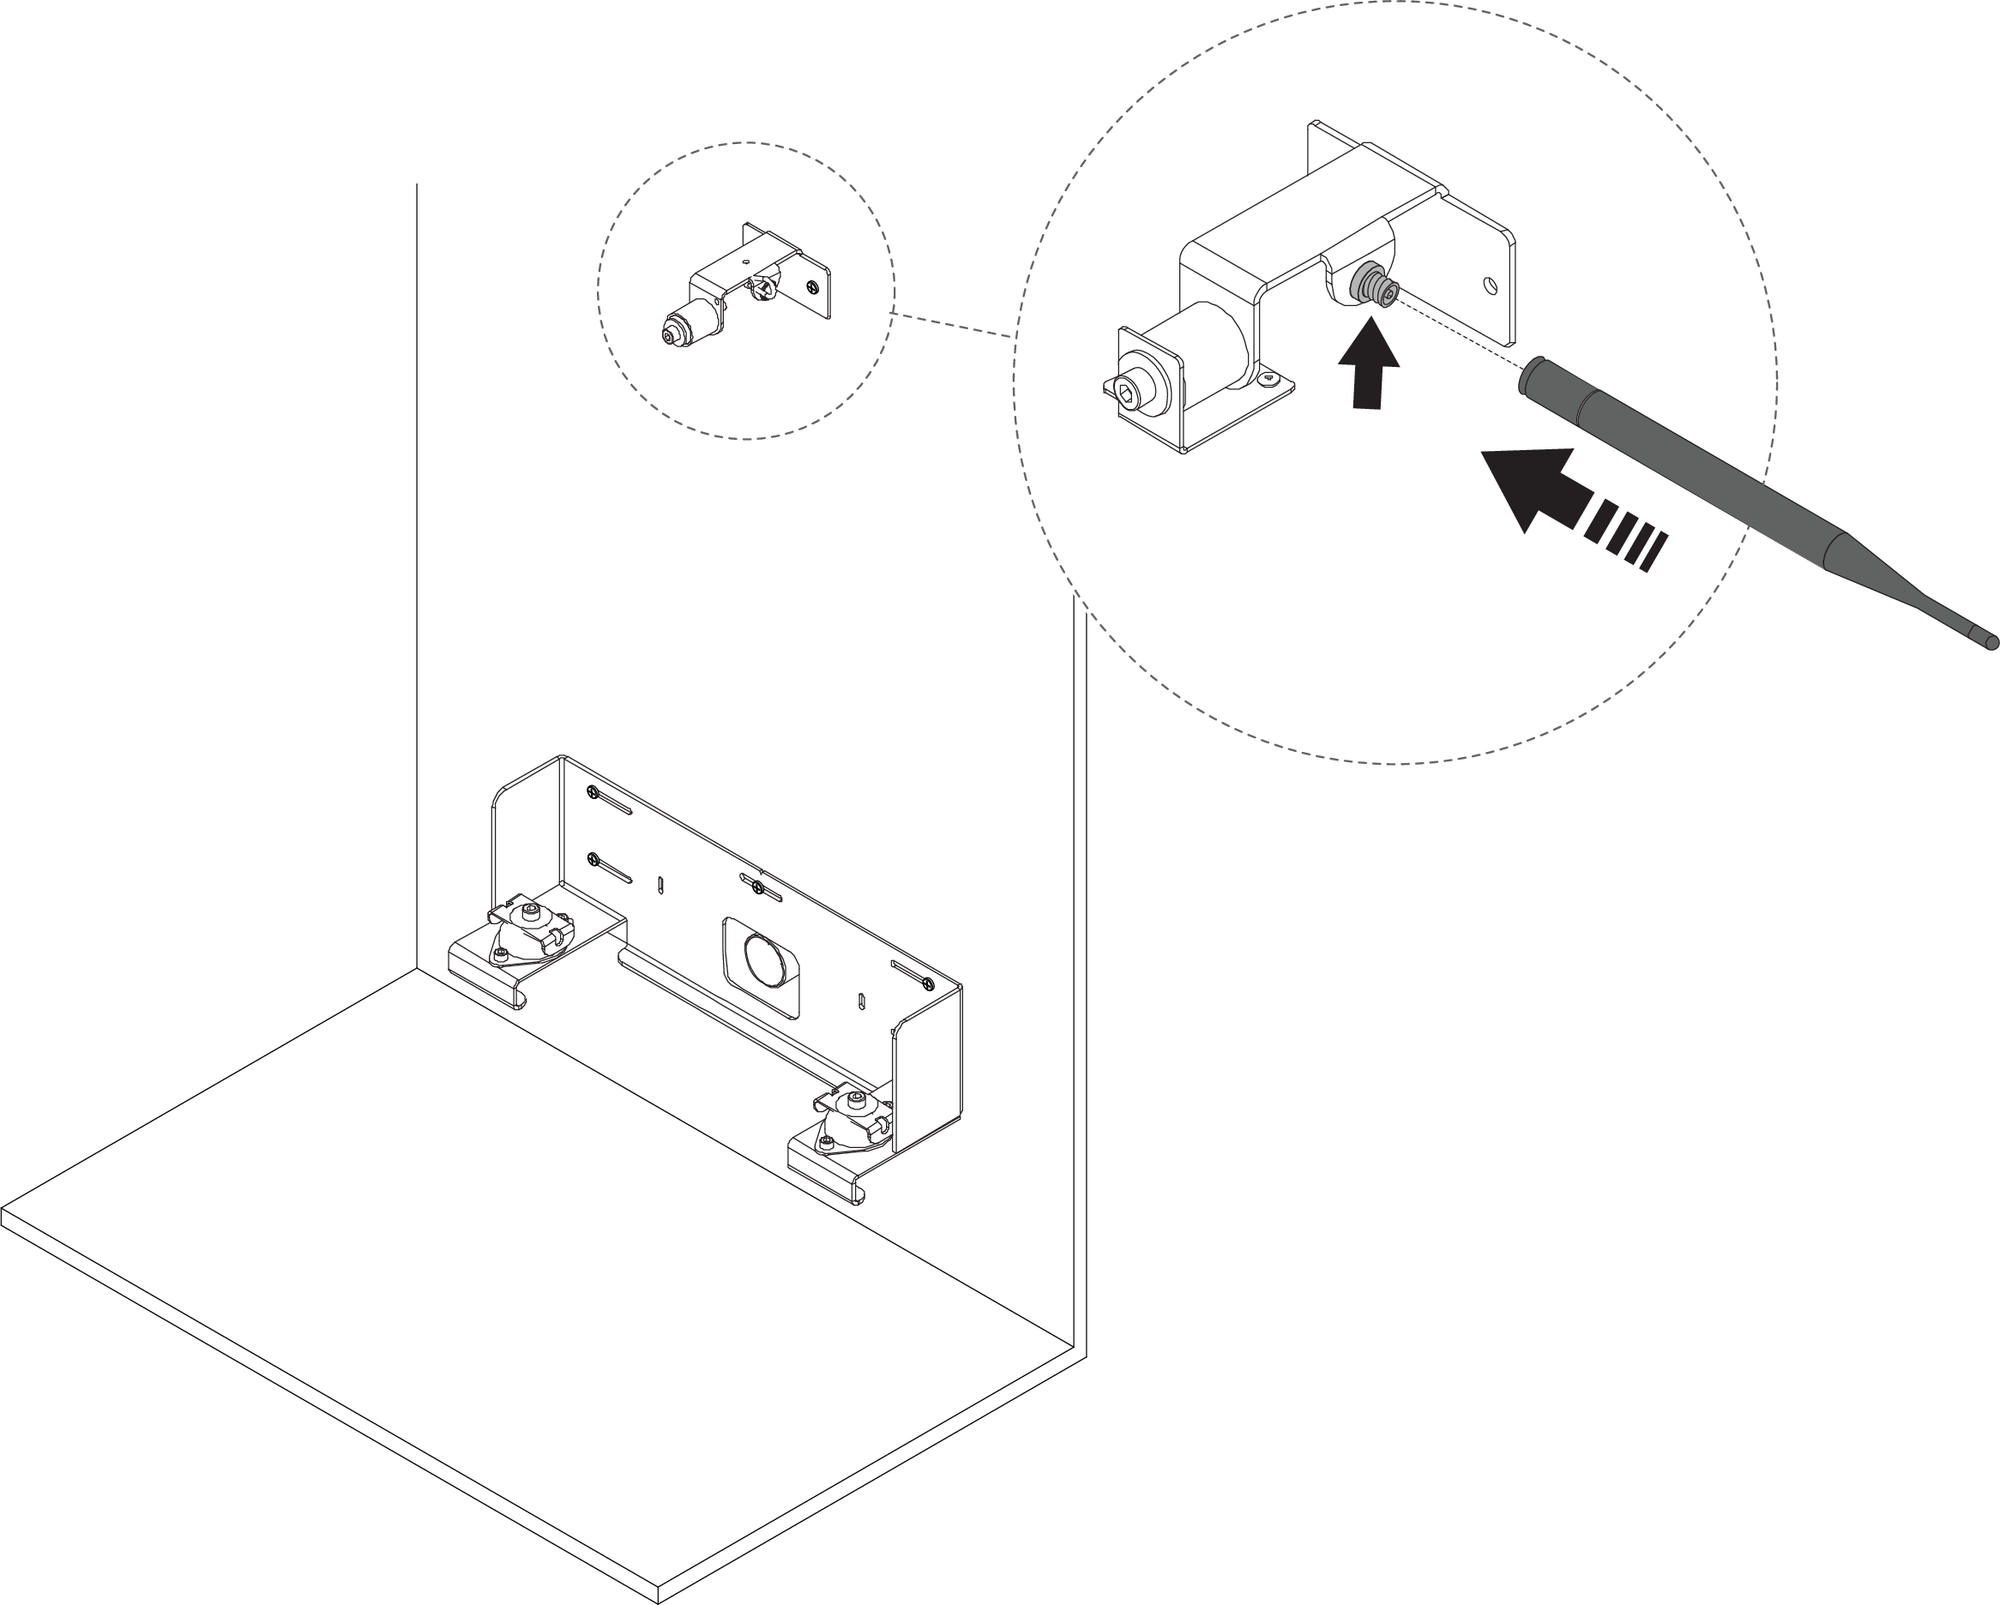
Anchor piping for Control Dial with conduit end cap.
- Figure 91. Following steps are only valid for Orbital Audio
Mount the amplifier with two screws next to the Core Wall Mounting.
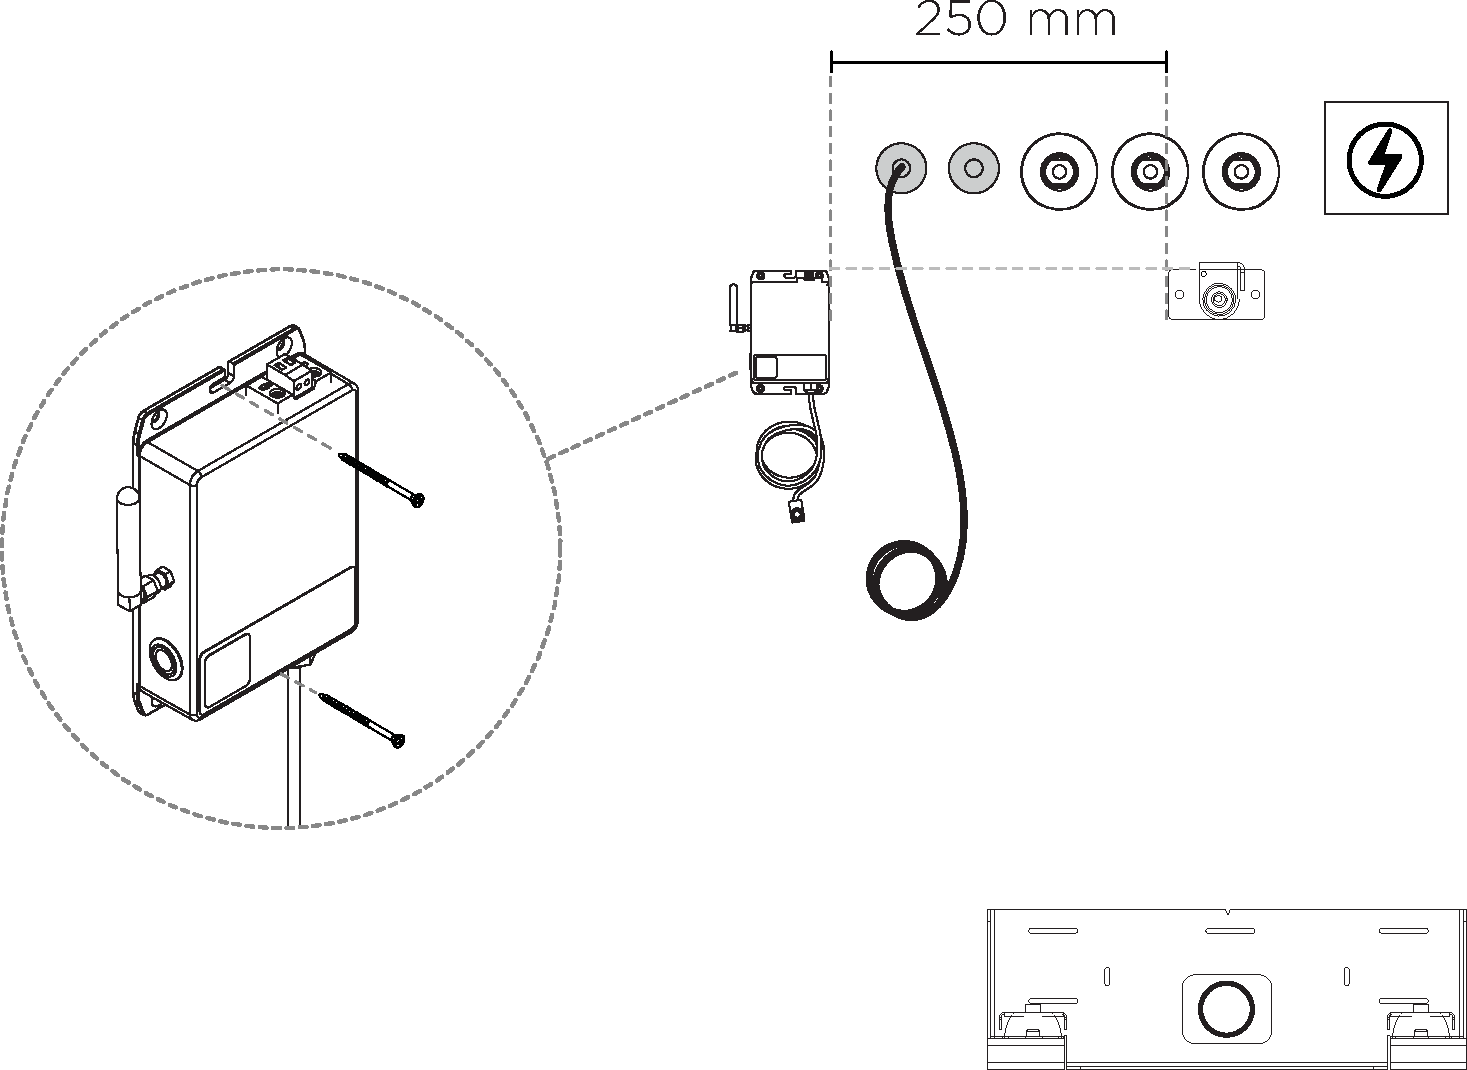
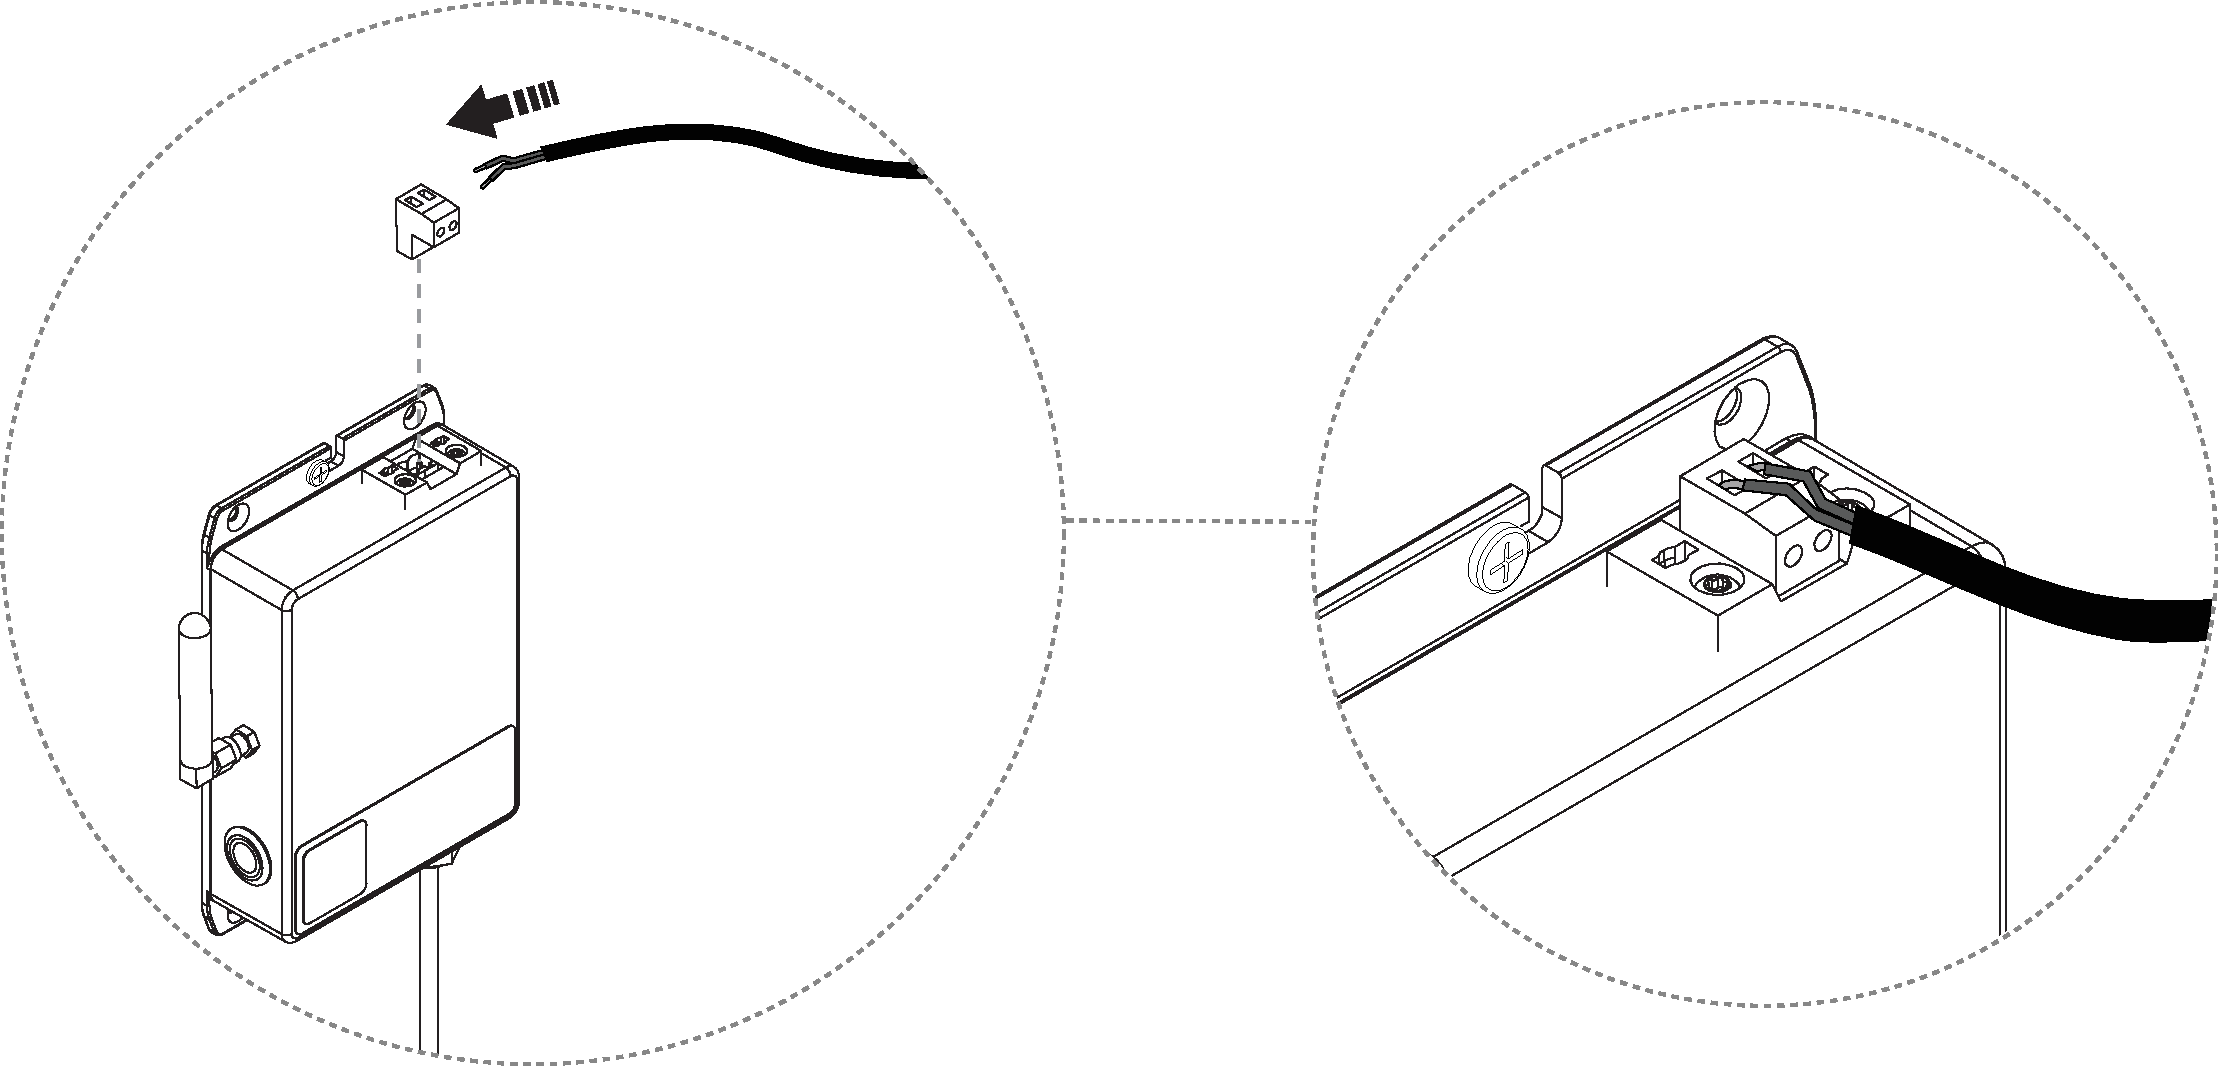
Cut the speaker cable, so it reaches the top of the amplifier.
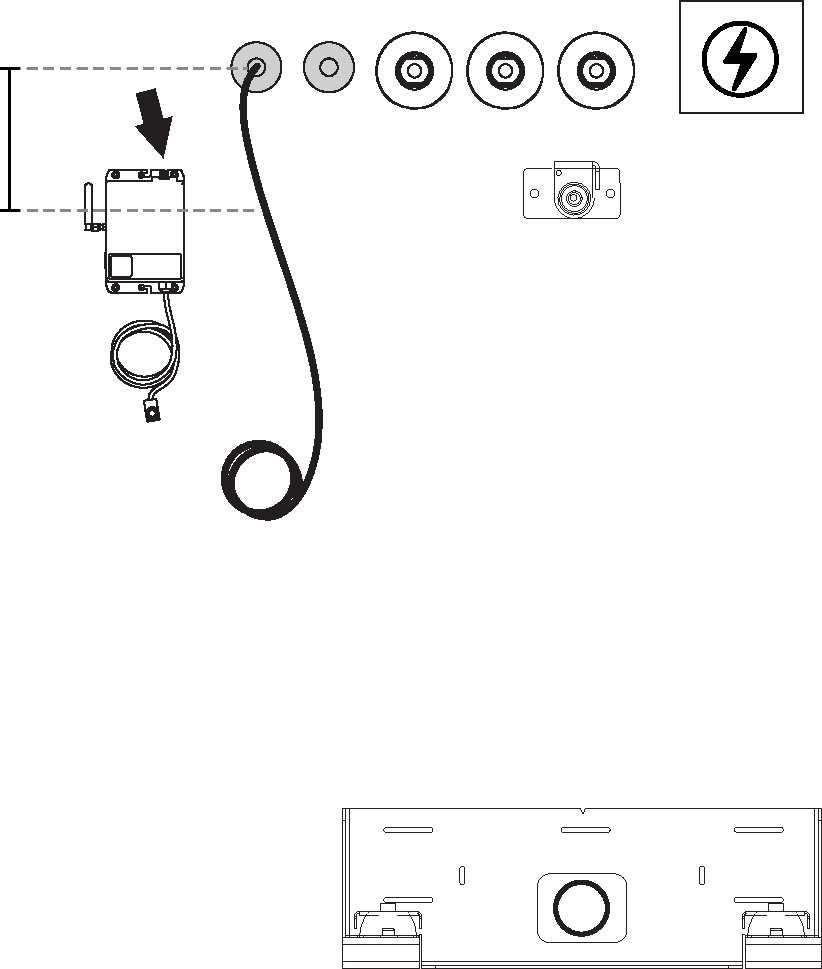
Strip and attach the cable to the amplifier.
Fixture Installation completed. Next step is to install the Orbital Shower Core, Control Dial, shower head and hand shower (including diverter and hand shower holder). See Technology Installation Manual for details.
|