Install Control Dial
 |

x4
Plastite screw
Notice
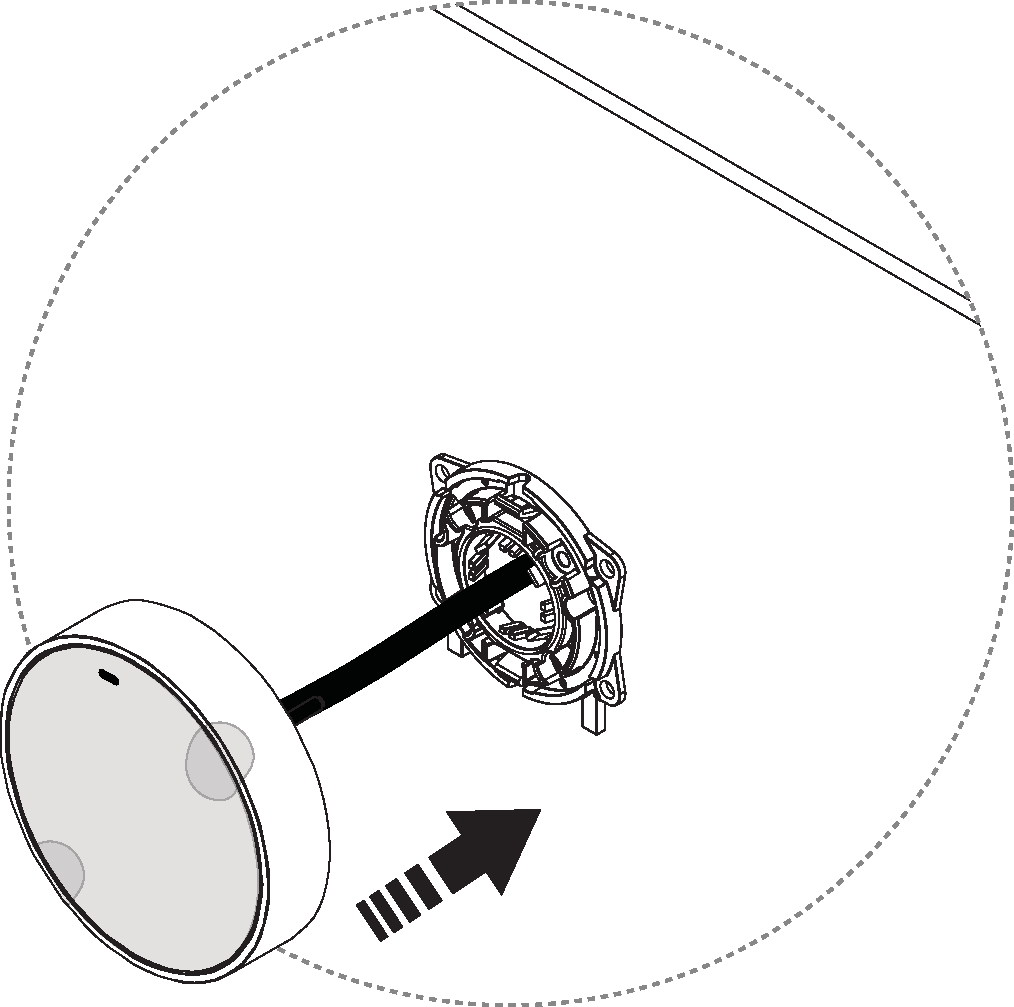
Do not remove the protective cover from the Control Dial until the installation is completed.
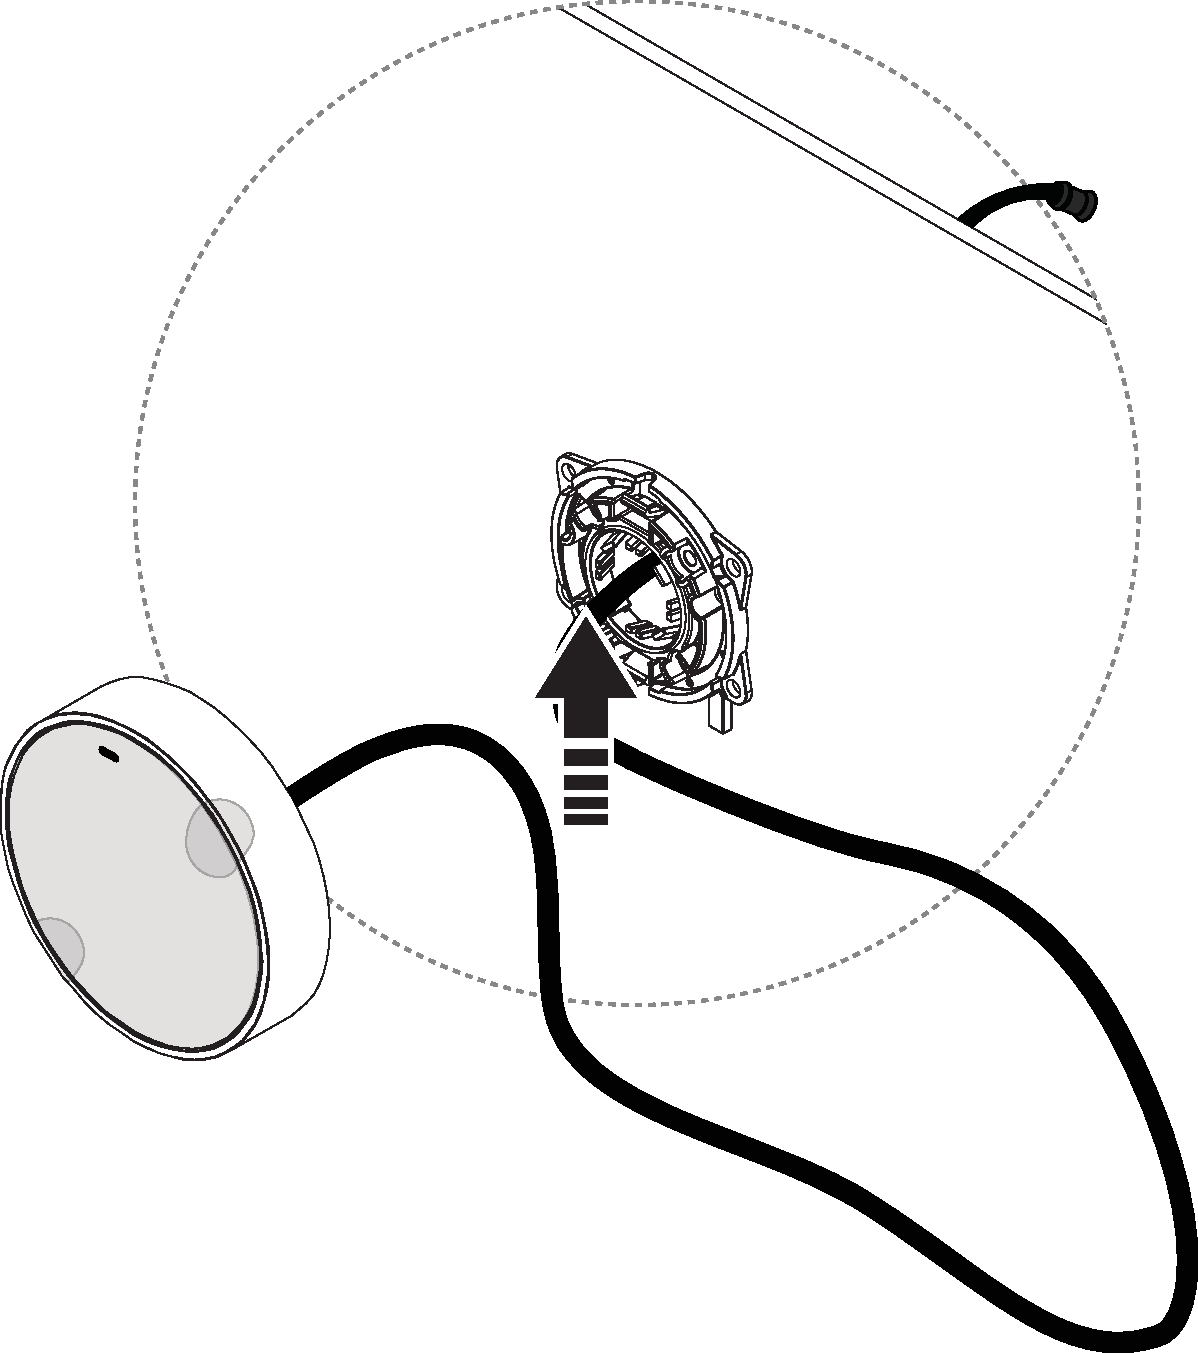
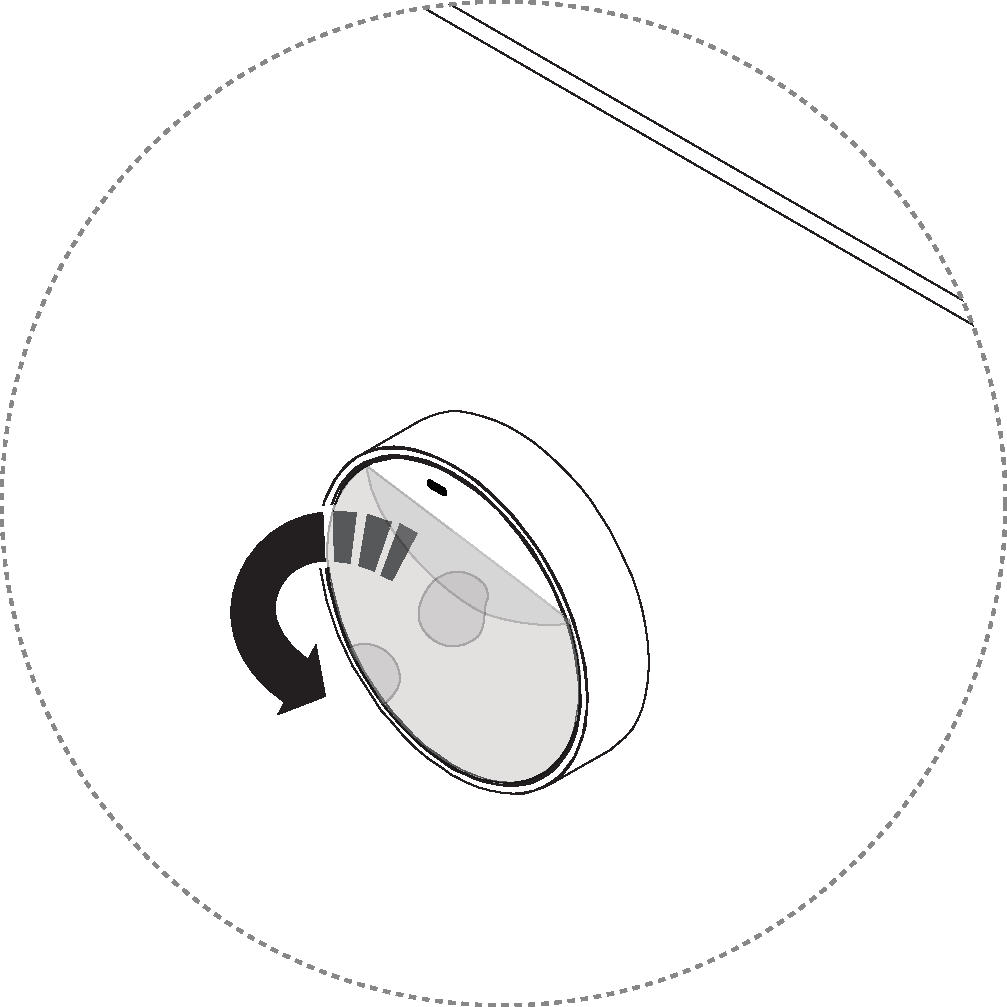
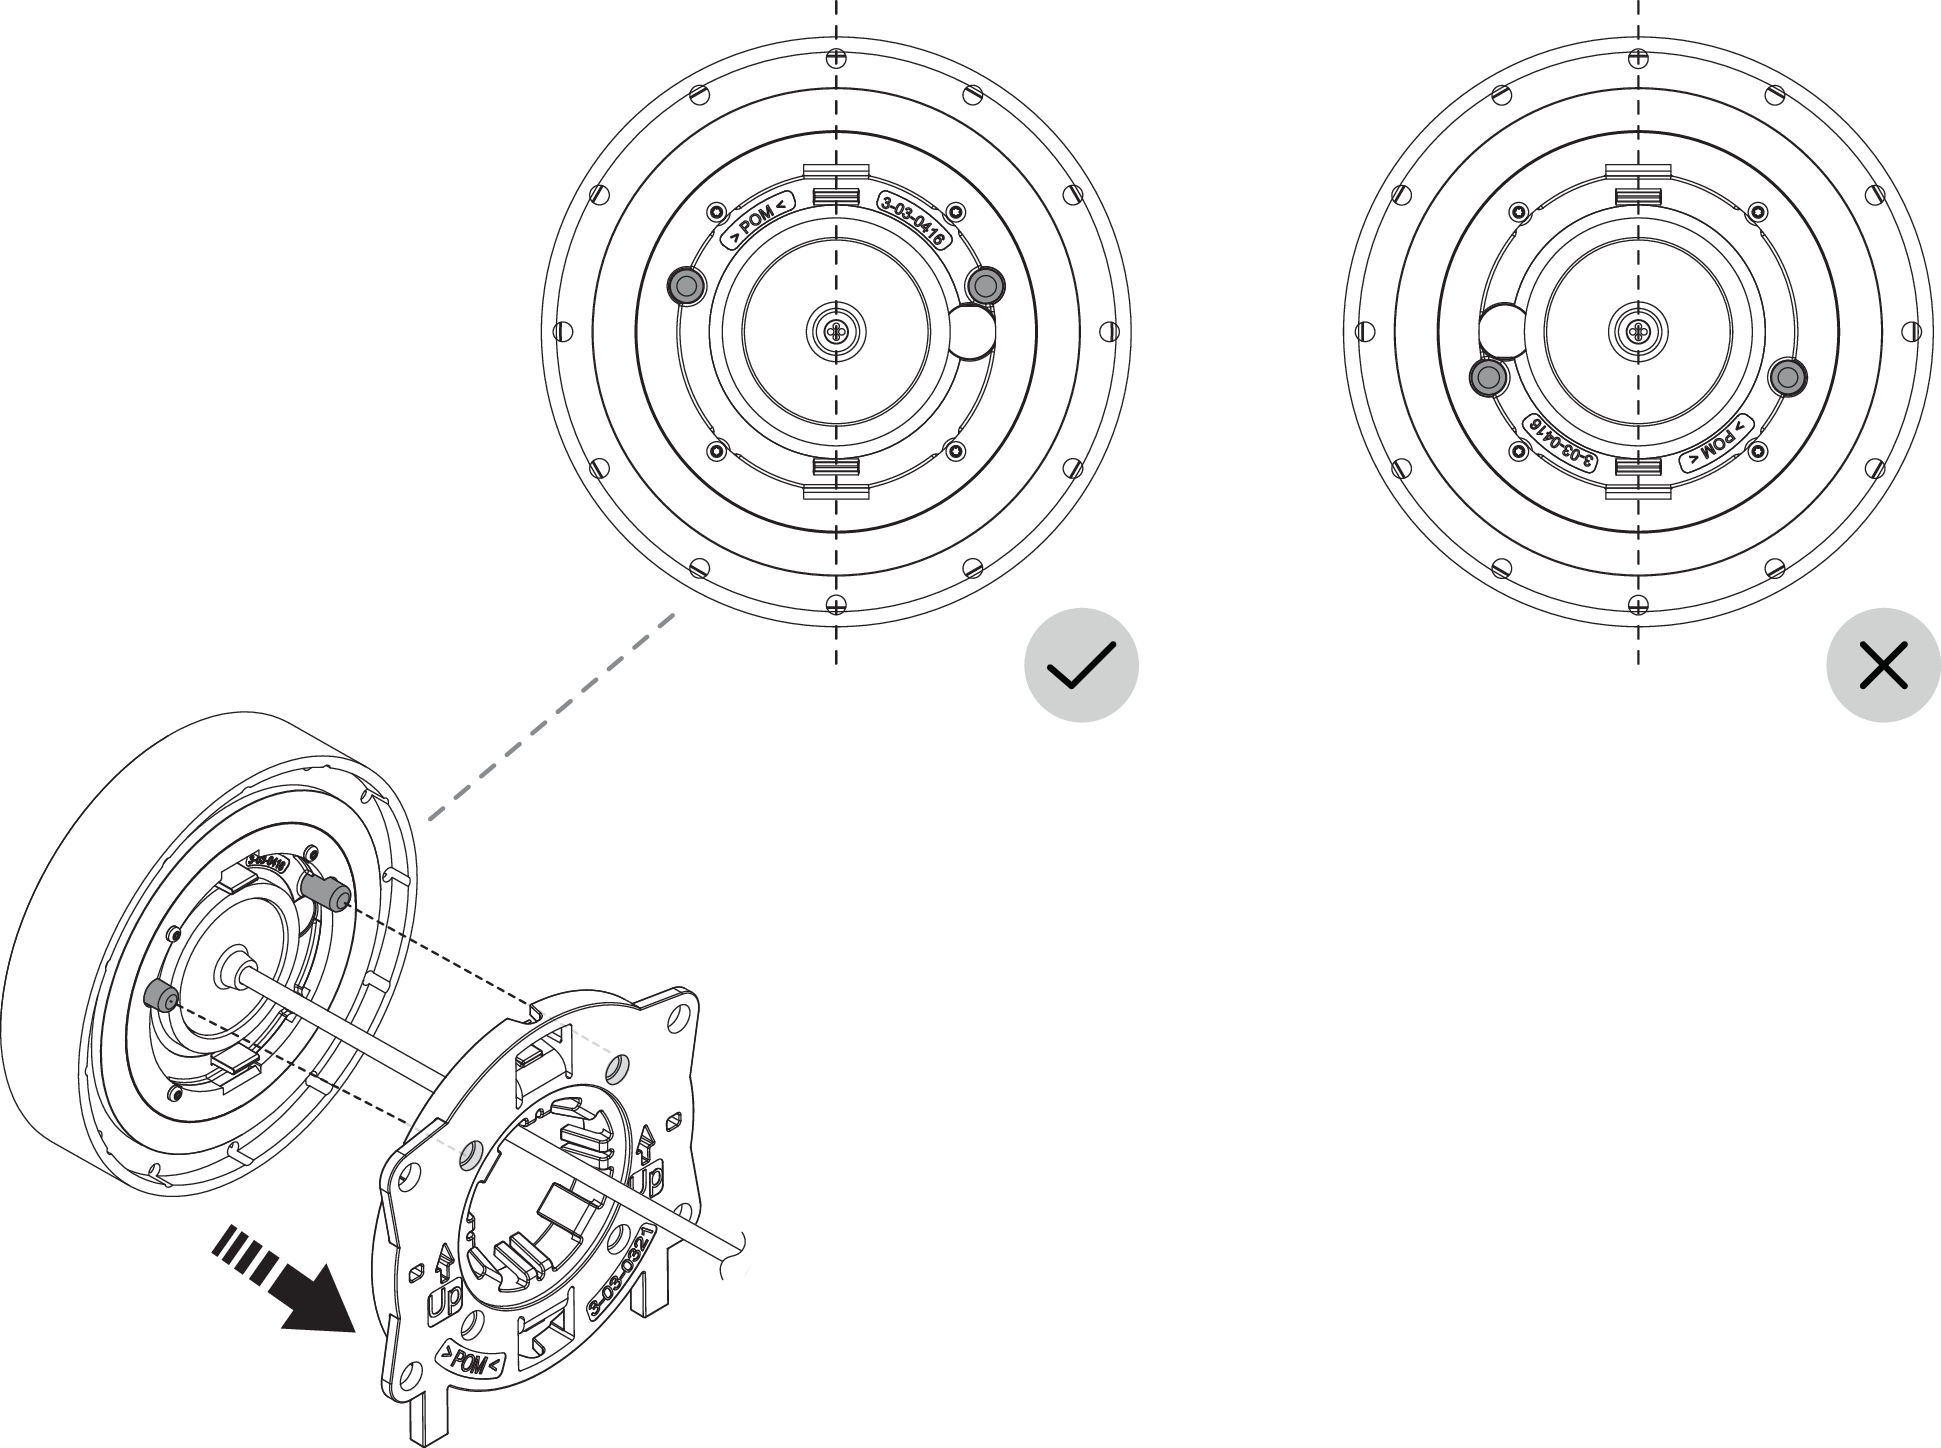
Position the Control Dial according to the “up marking” before assembly.
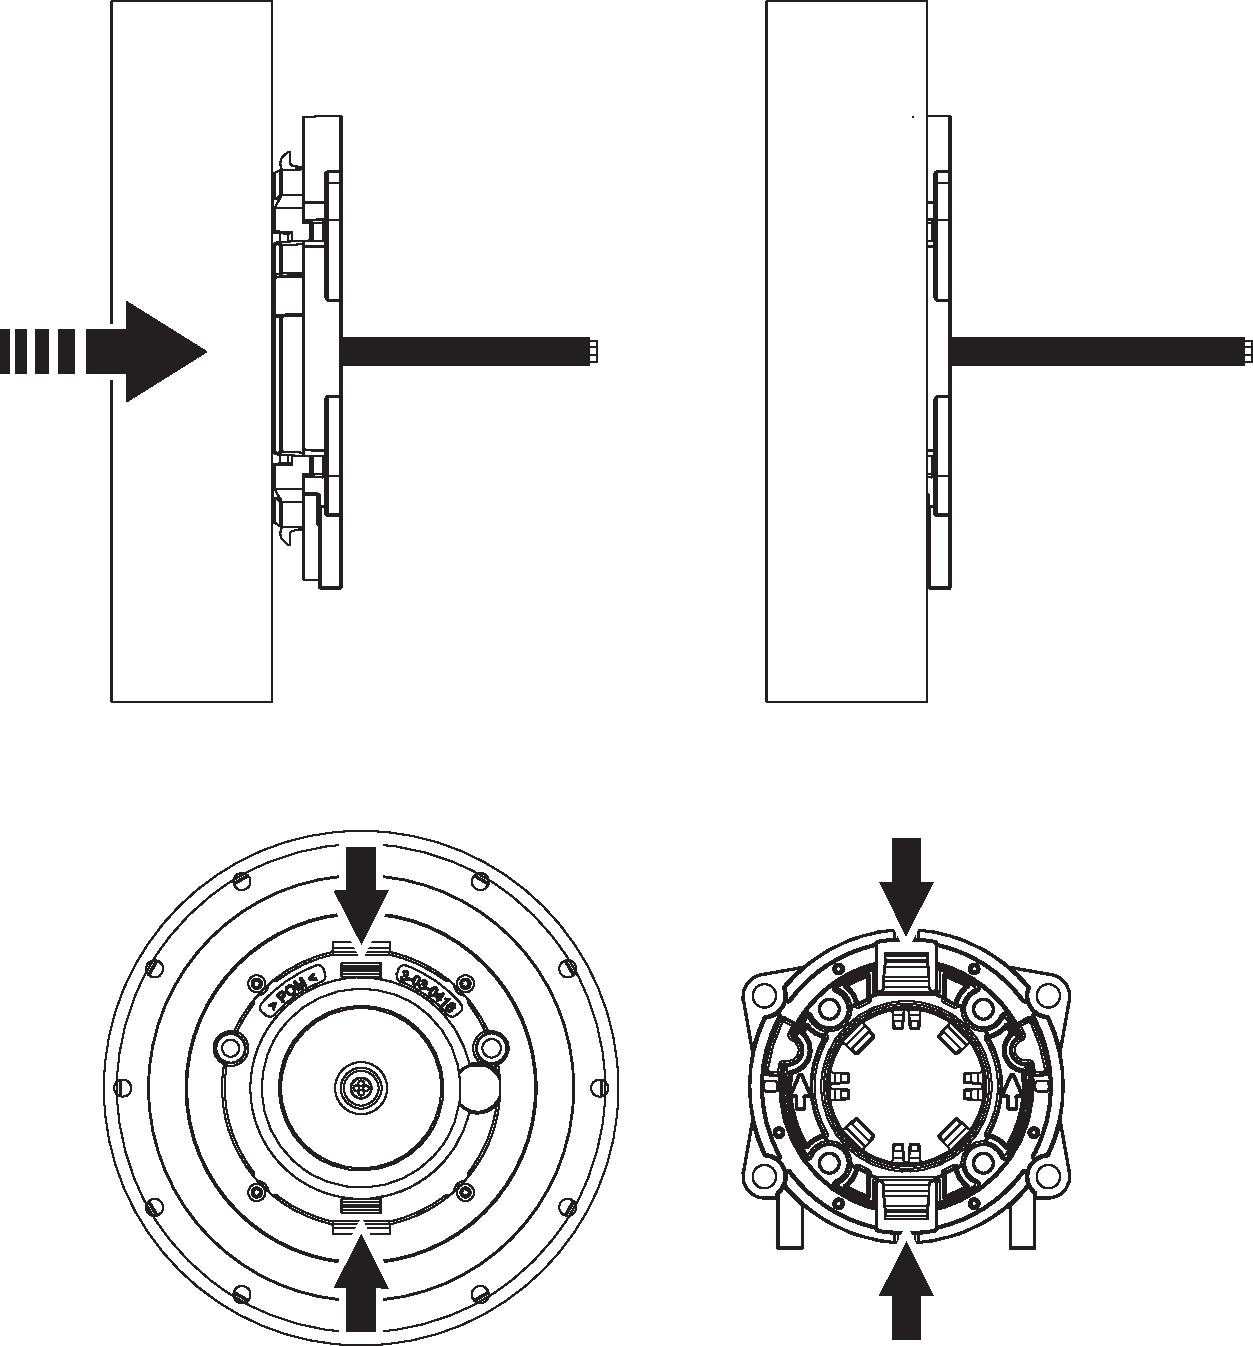
"Click!" Snap on the Control Dial onto the fixture. Make sure to align the brackets according to the arrows.
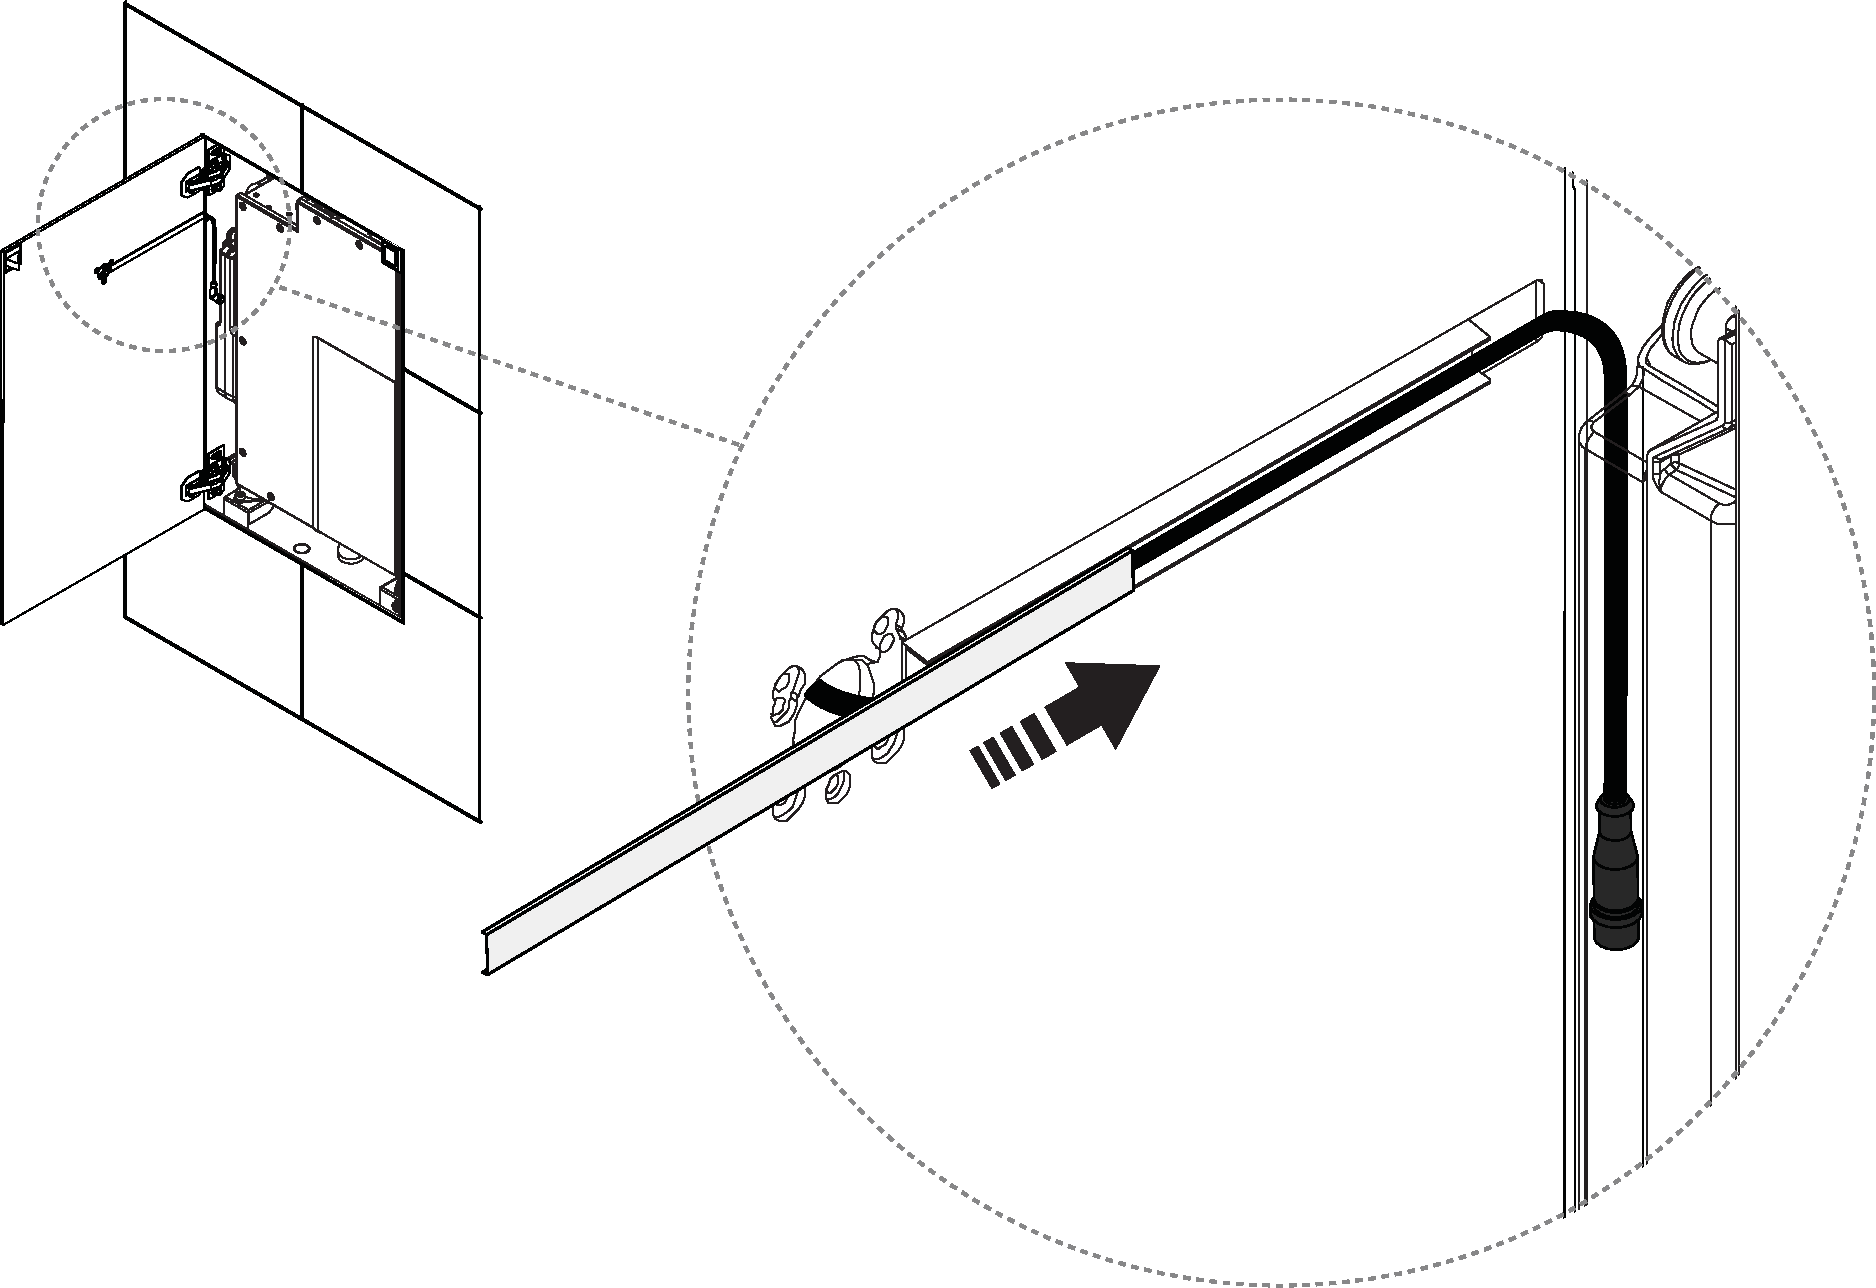
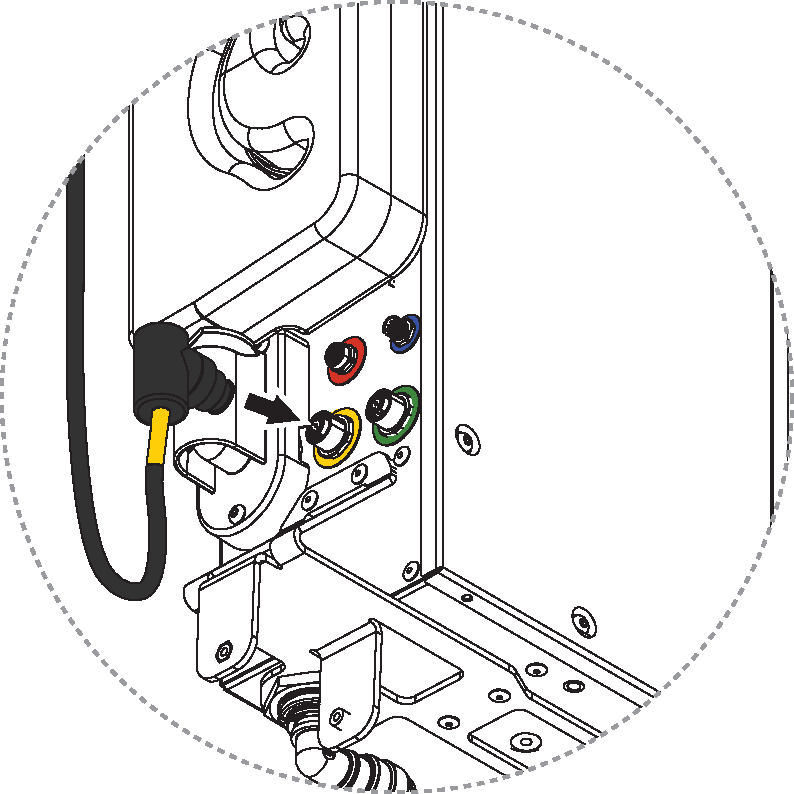
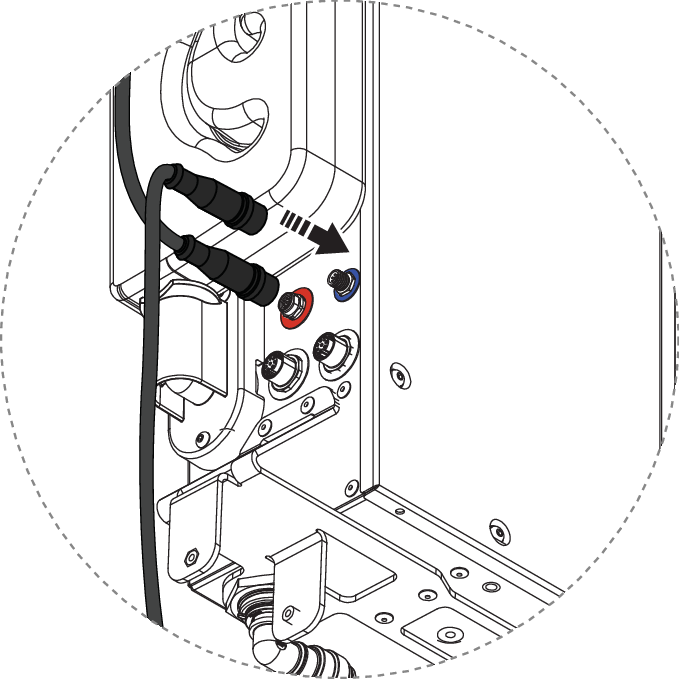
Connect the Control Dial cable to the red connector. Proceed by connecting the Sensor Tank cable to the blue connector.
Caution
Make sure to have correct alignment between key and slot in connectors. Make sure locking ring snaps and connector is locked.
Only valid for Orbital Audio Installation
Connect the amplifier cable to the Core.