Install Audio
 |
Check that the exciter is intact and attached to the back of Audio Fixture before starting the installation.
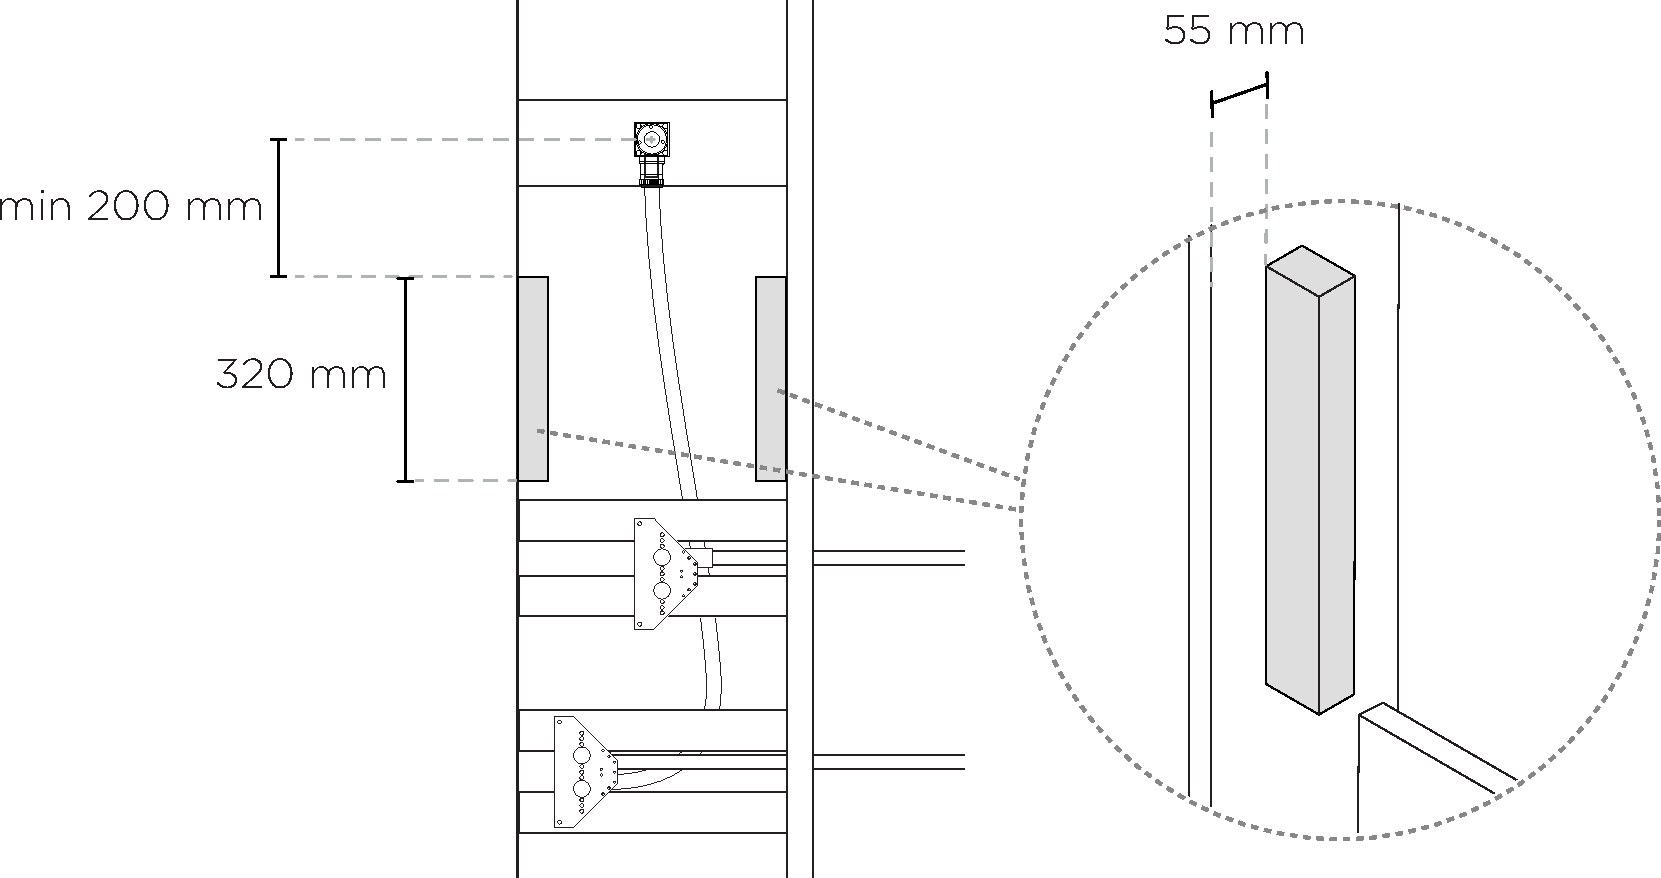
Install two studs in between the head shower and the Control Dial, where Audio Fixture will be placed. This placement gives the best conditions for the sound experience.
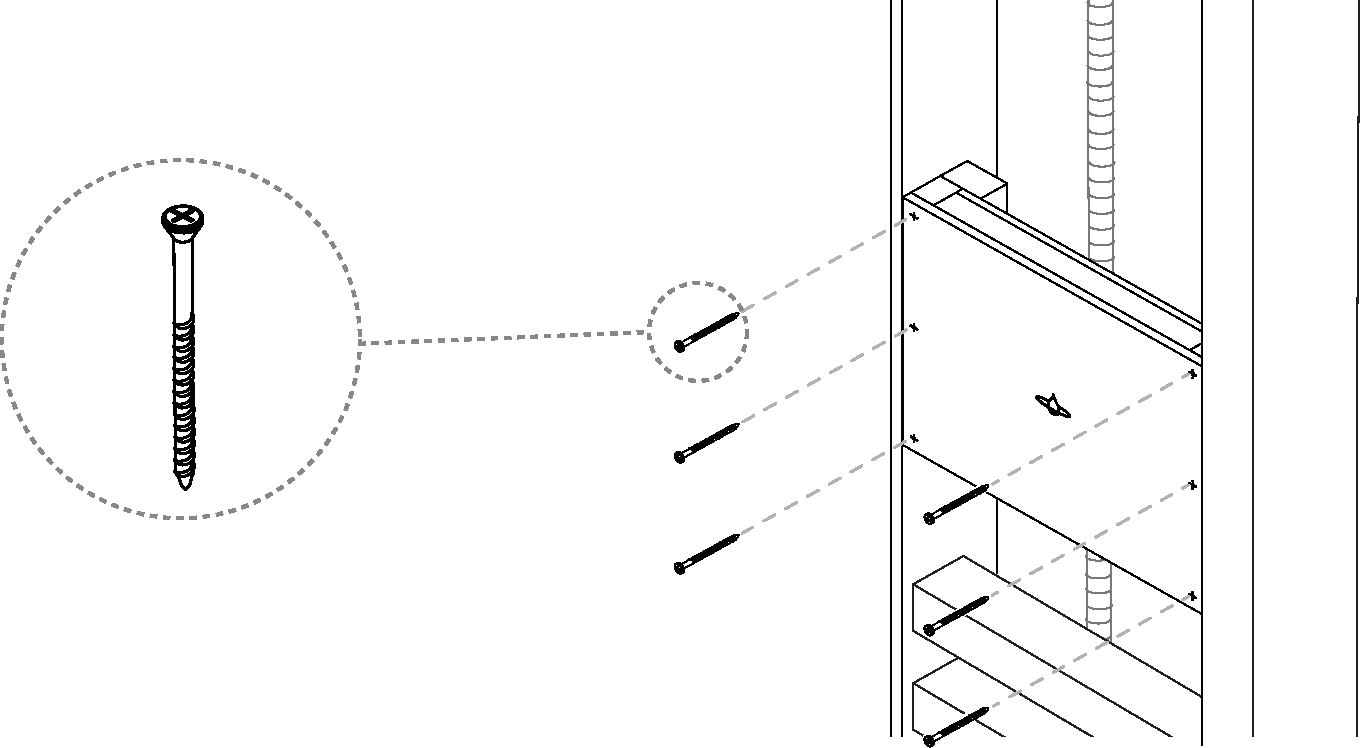
Place Audio Fixture in level with the front edge of the vertical studs. Pre-drill and attach with six stainless steel countersunk screws.
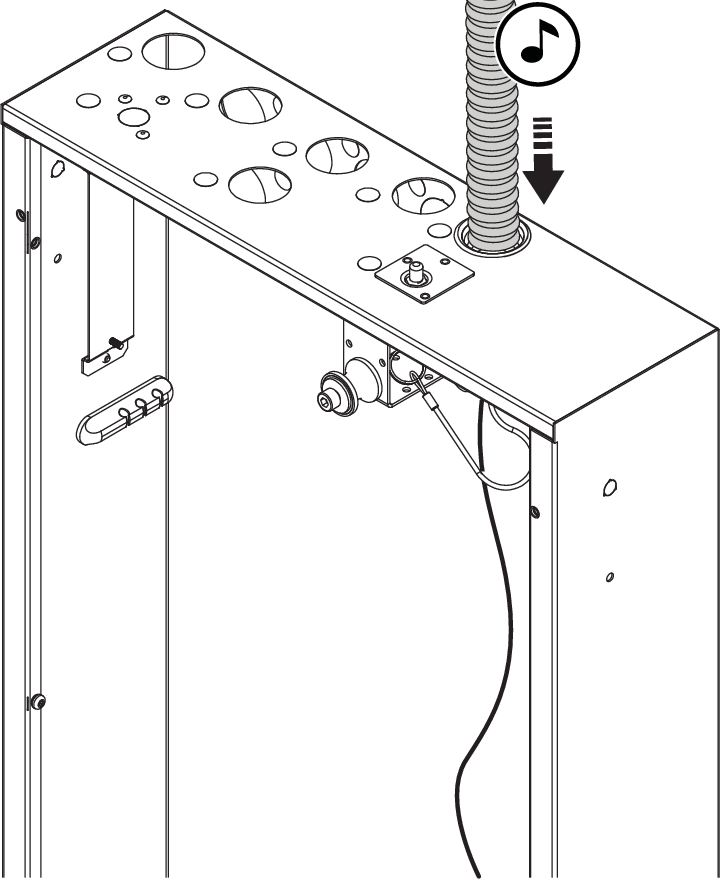
Draw the speaker cable from the back of the Audio Fixture to the Wall Box.
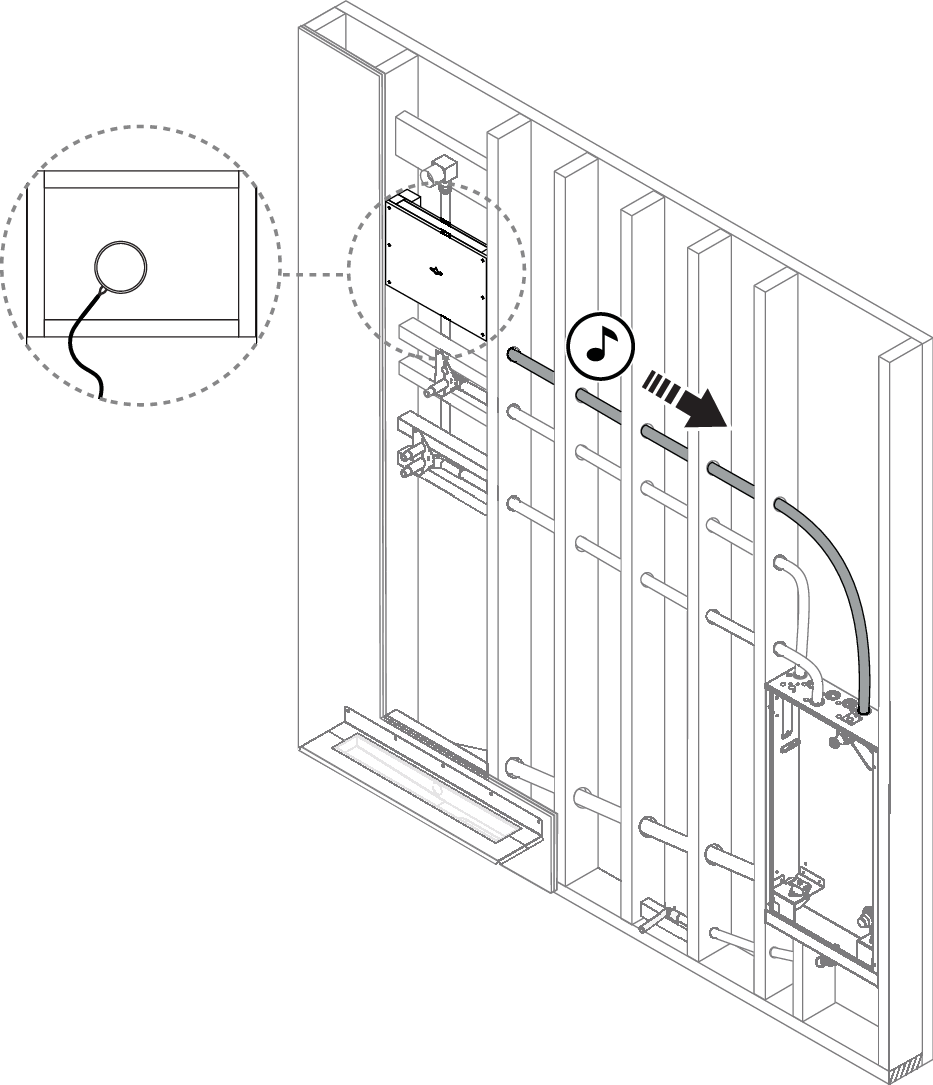
Caution
Use the supplied rubber plug.
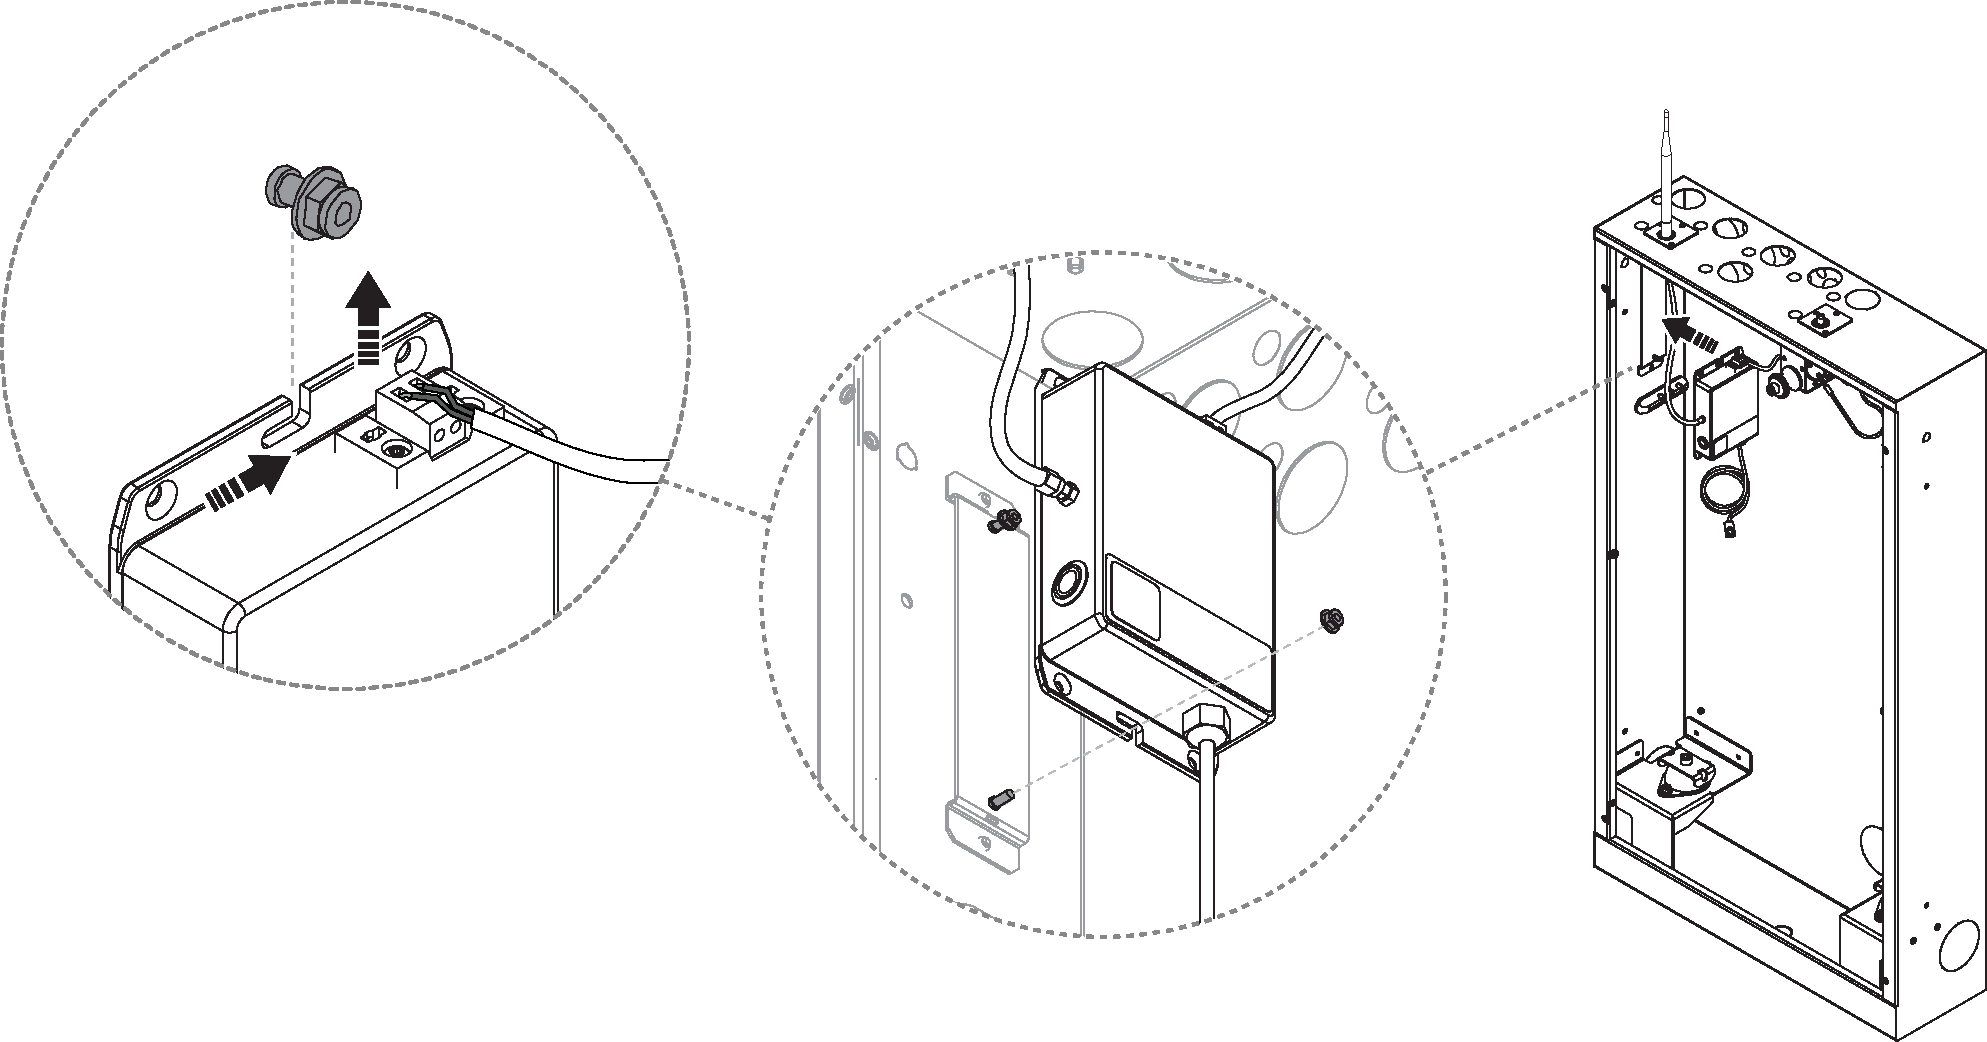
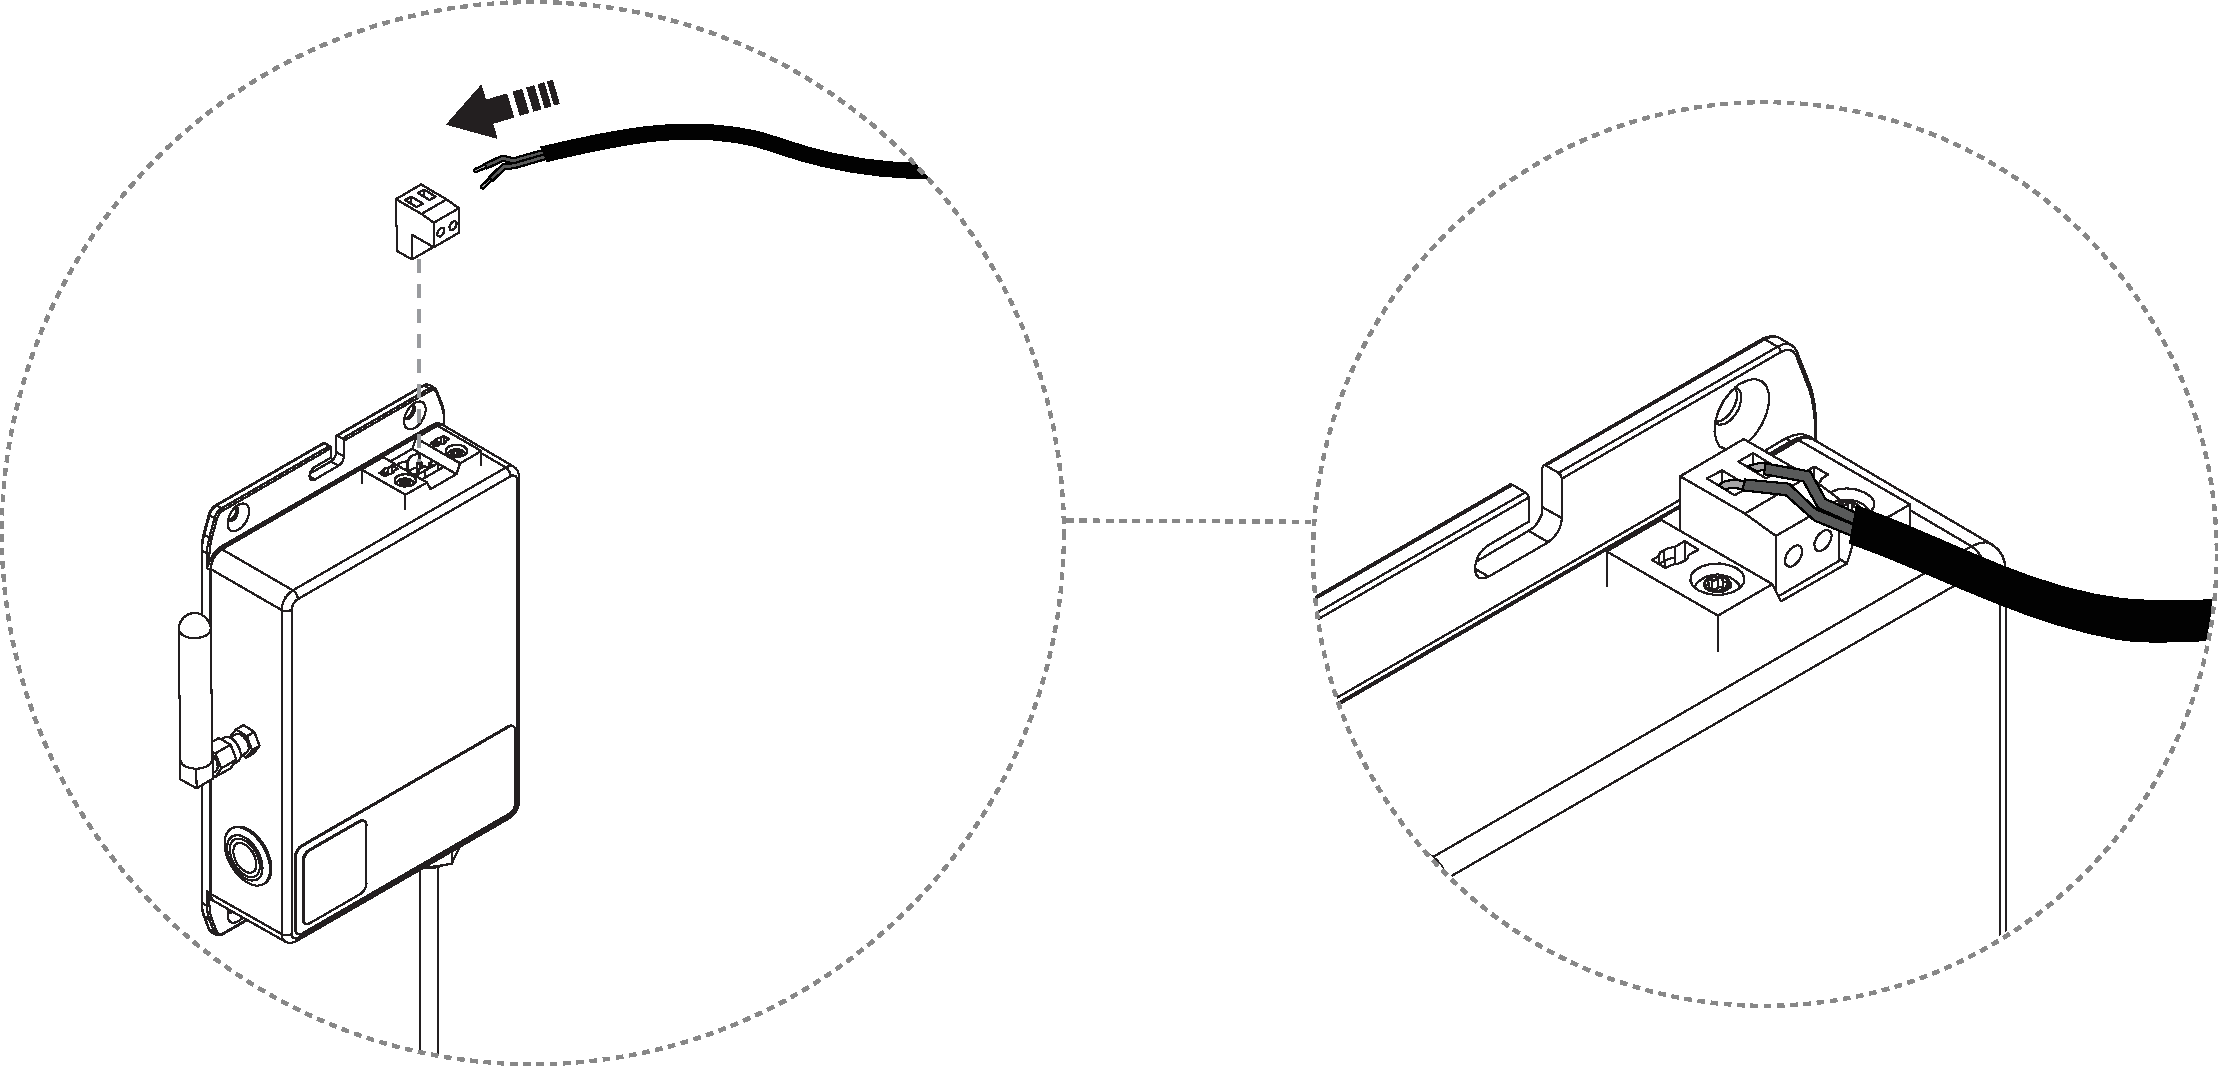
Strip the speaker cable and attach it to the amplifier.
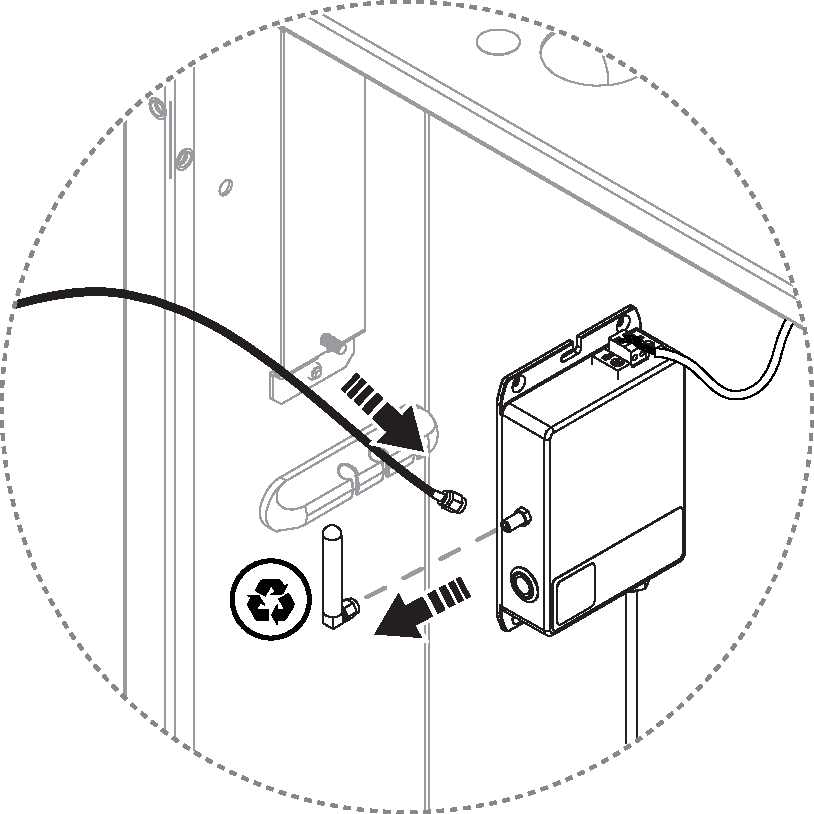
Remove the stub antenna from the amplifier, and replace it with the antenna cable.
Connect the other part of the antenna cable to the rod antenna and attach the antenna to the top of the Wall Box.
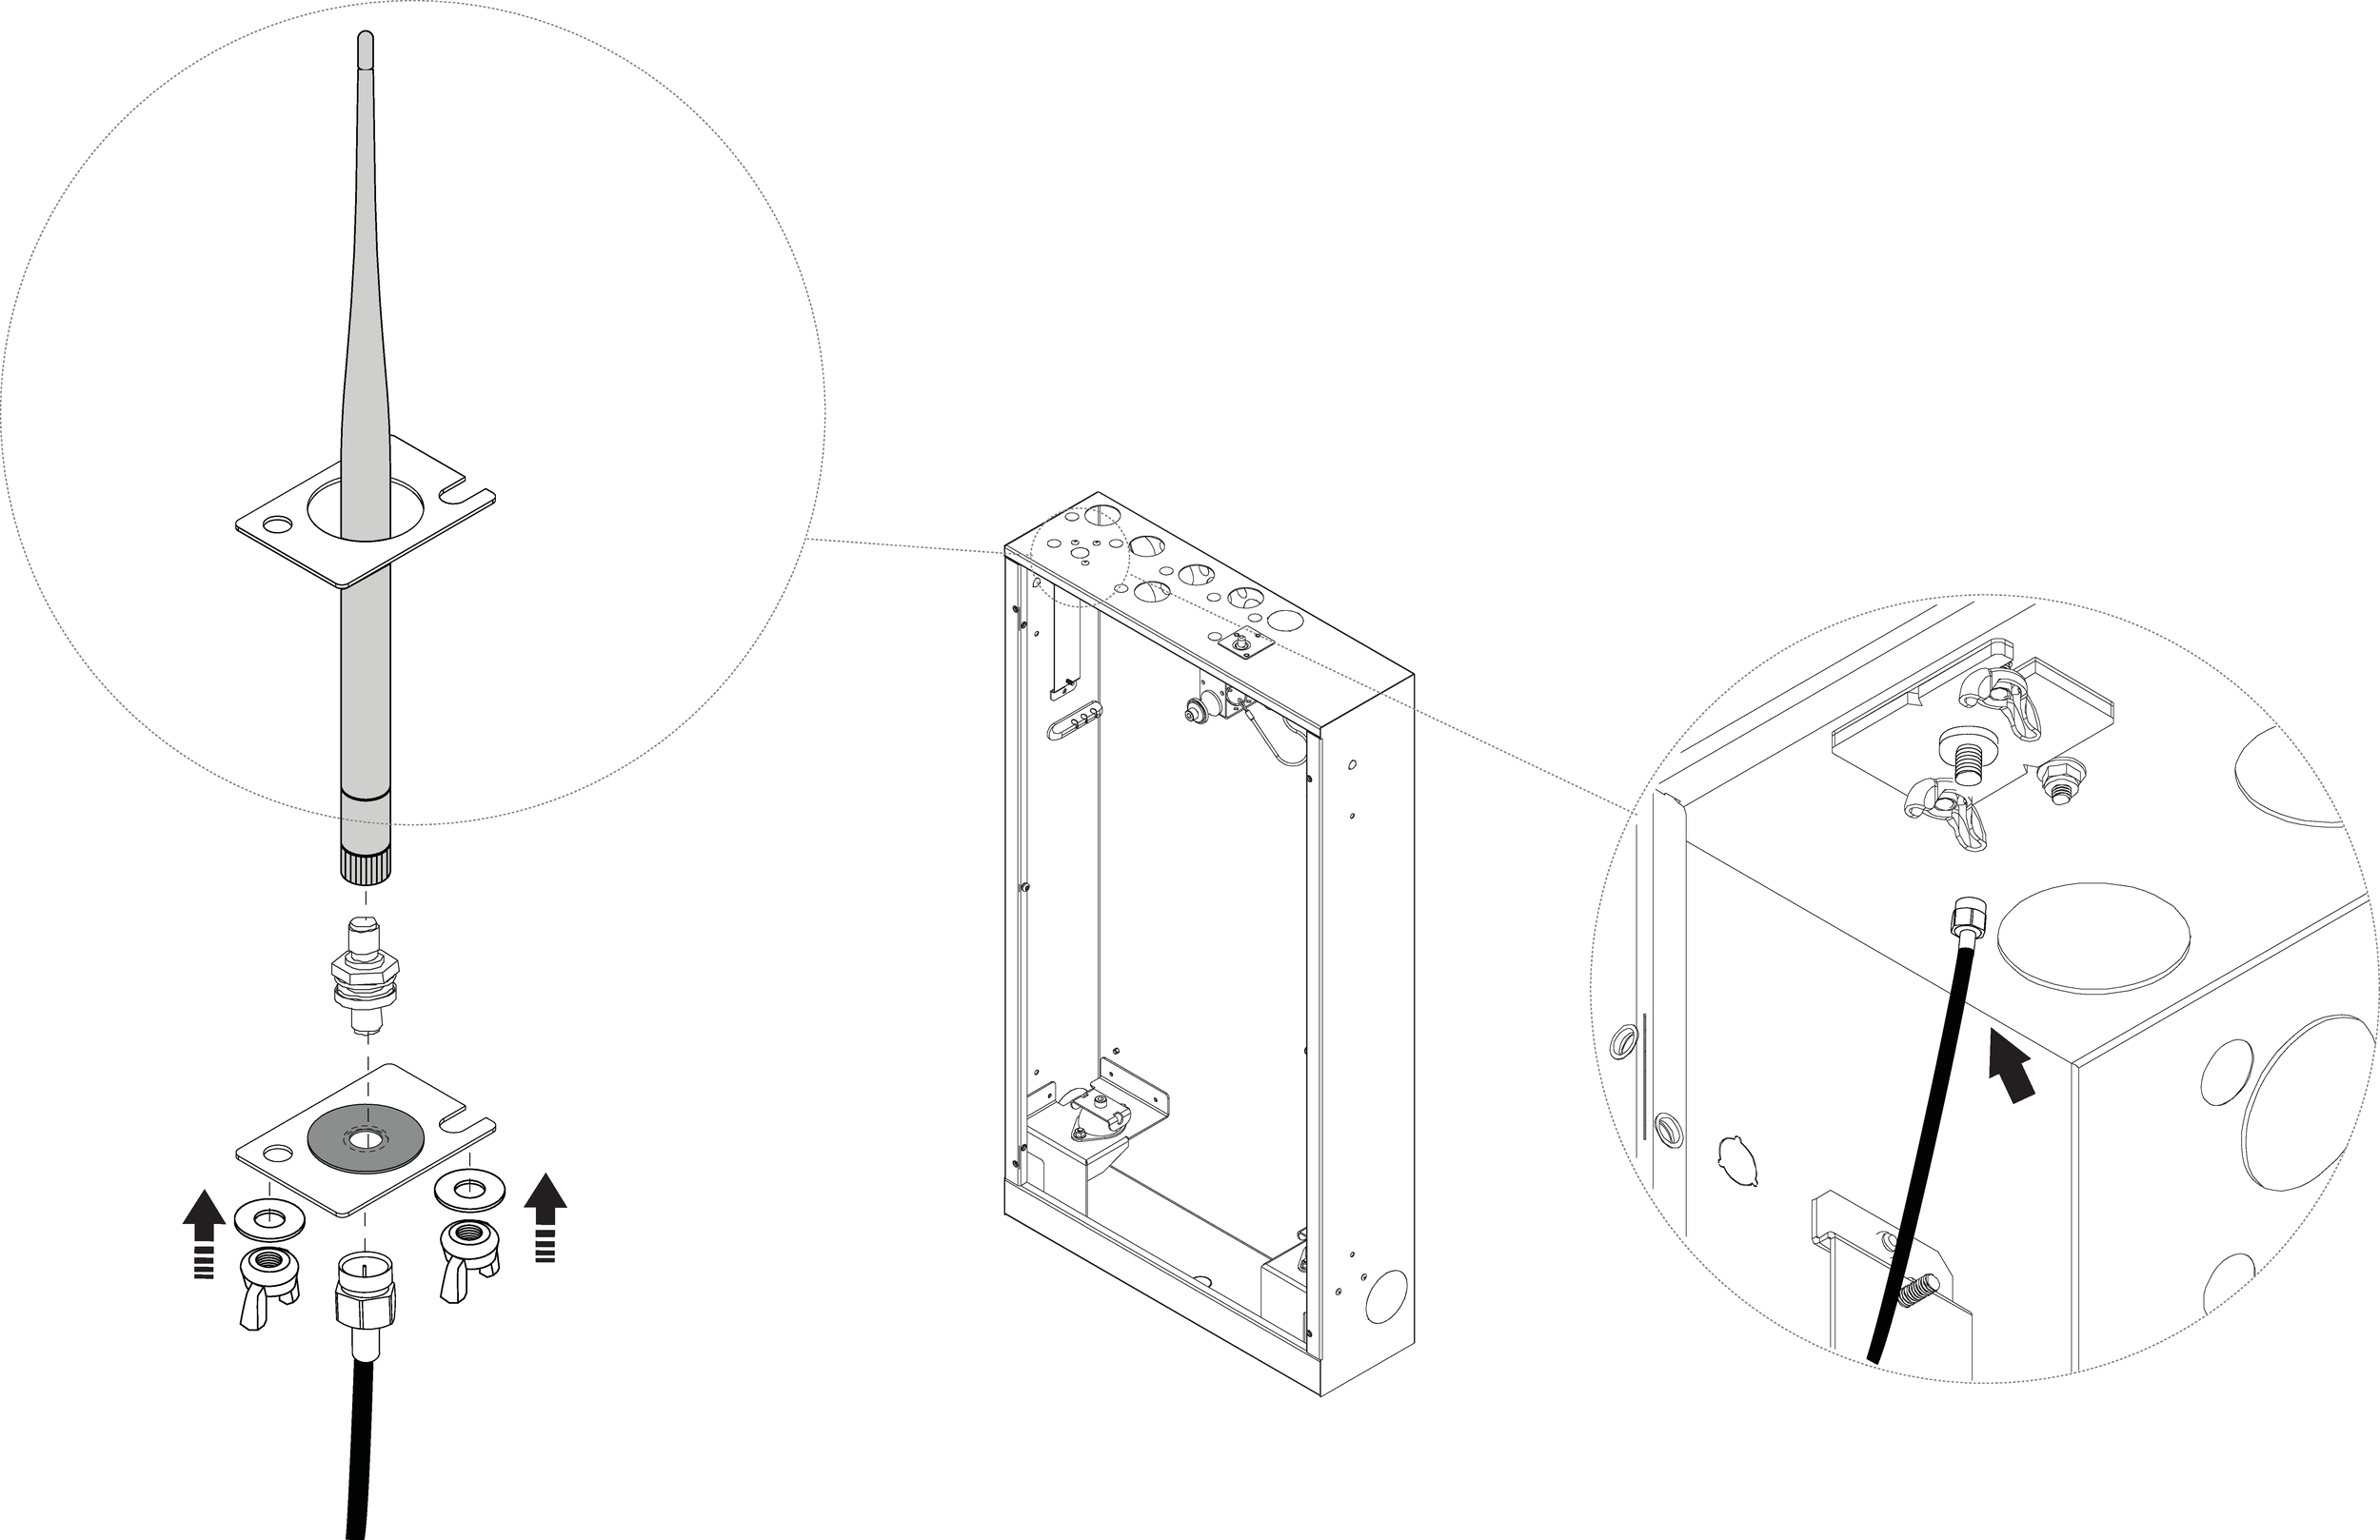
Mount the amplifier in the Wall Box by loosening the nut from the lower bracket and threading the amplifier into the upper bracket. Attach the lower nut and tighten.