Pipes & connections
 |
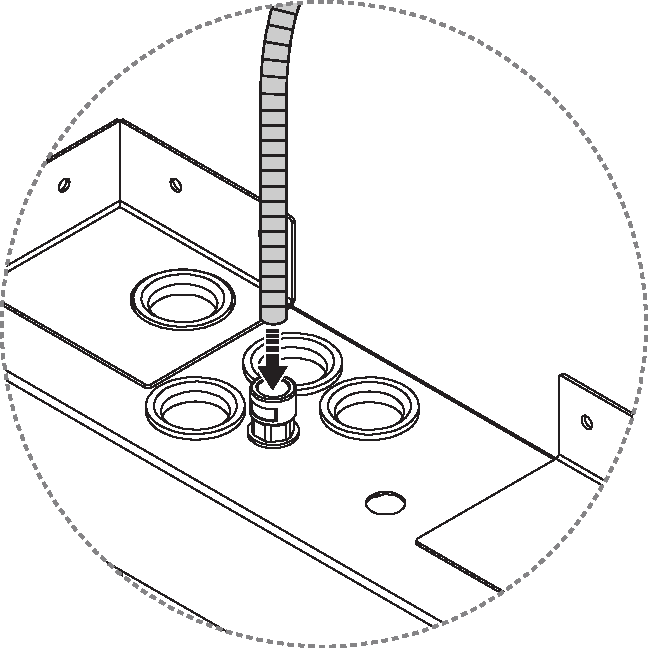
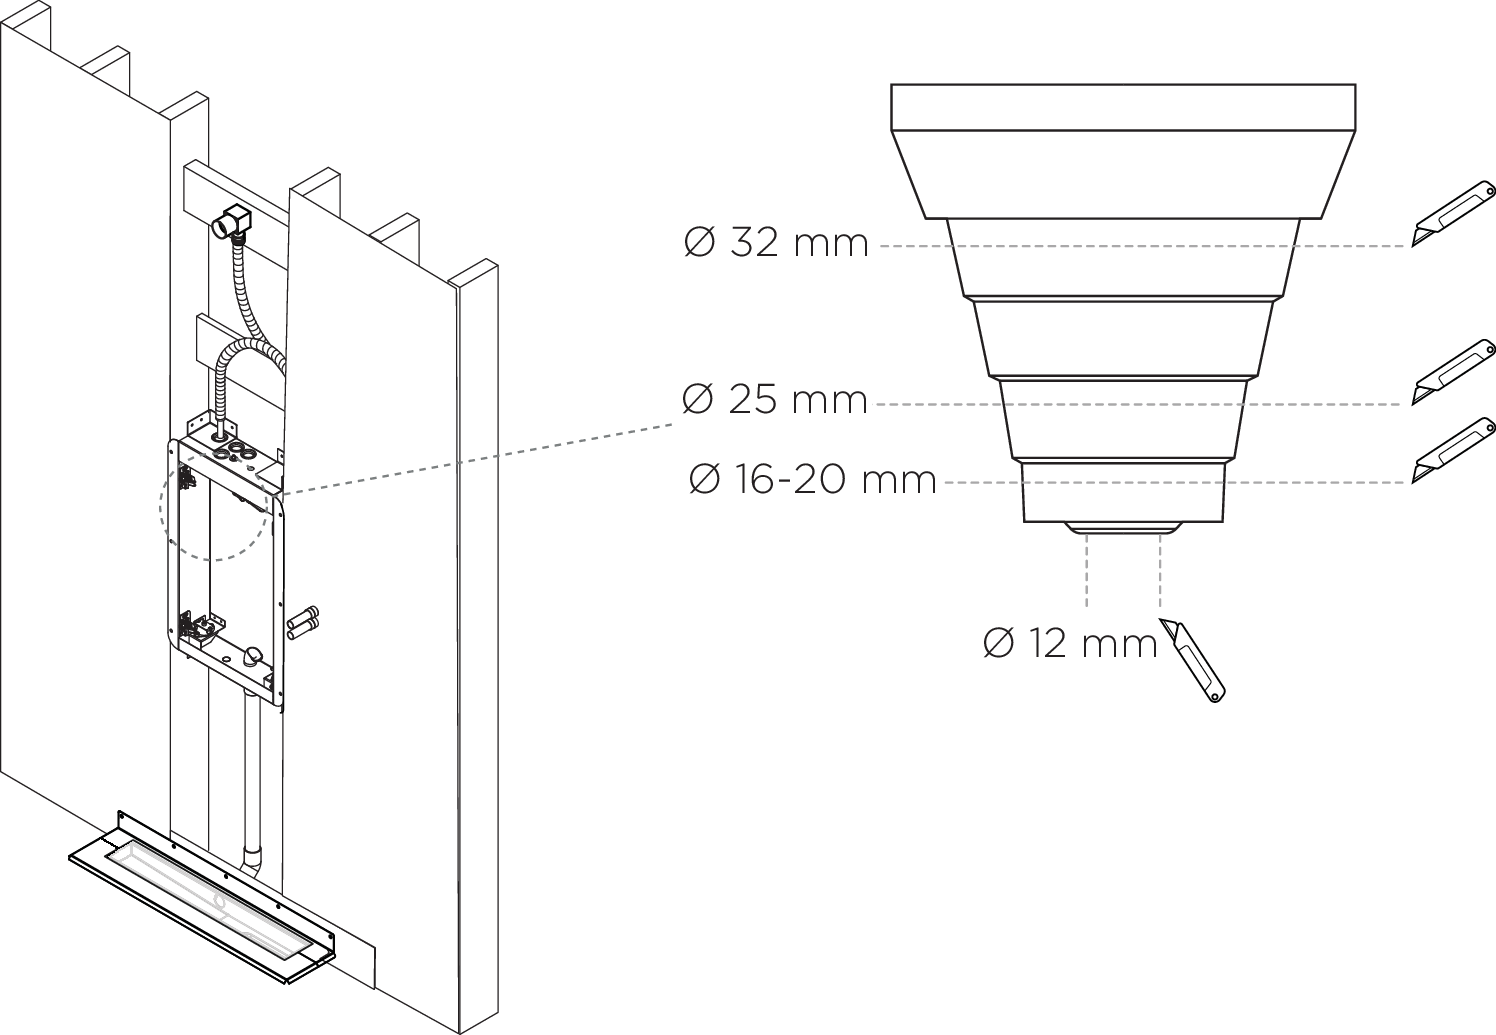
PEX hose with conduit Ø25 mm, for incoming hot and cold water
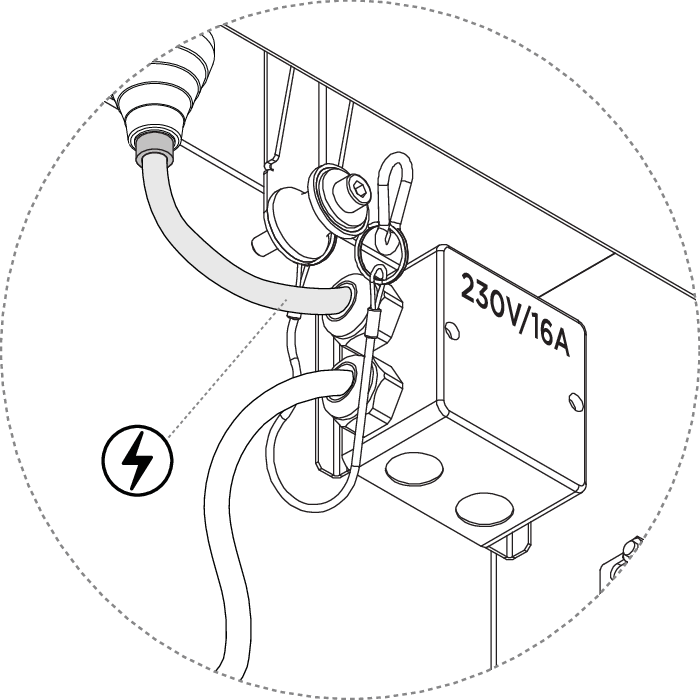
Power cable with conduit Ø16 mm
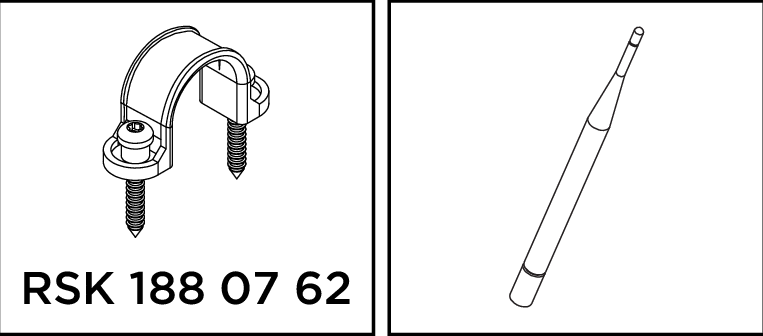
Anchors
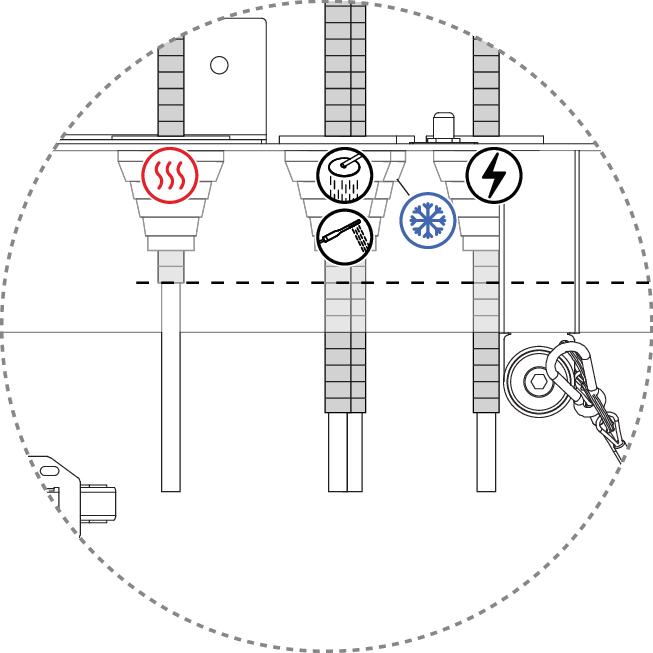
Cut the cones depending on the diameter of the conduit.
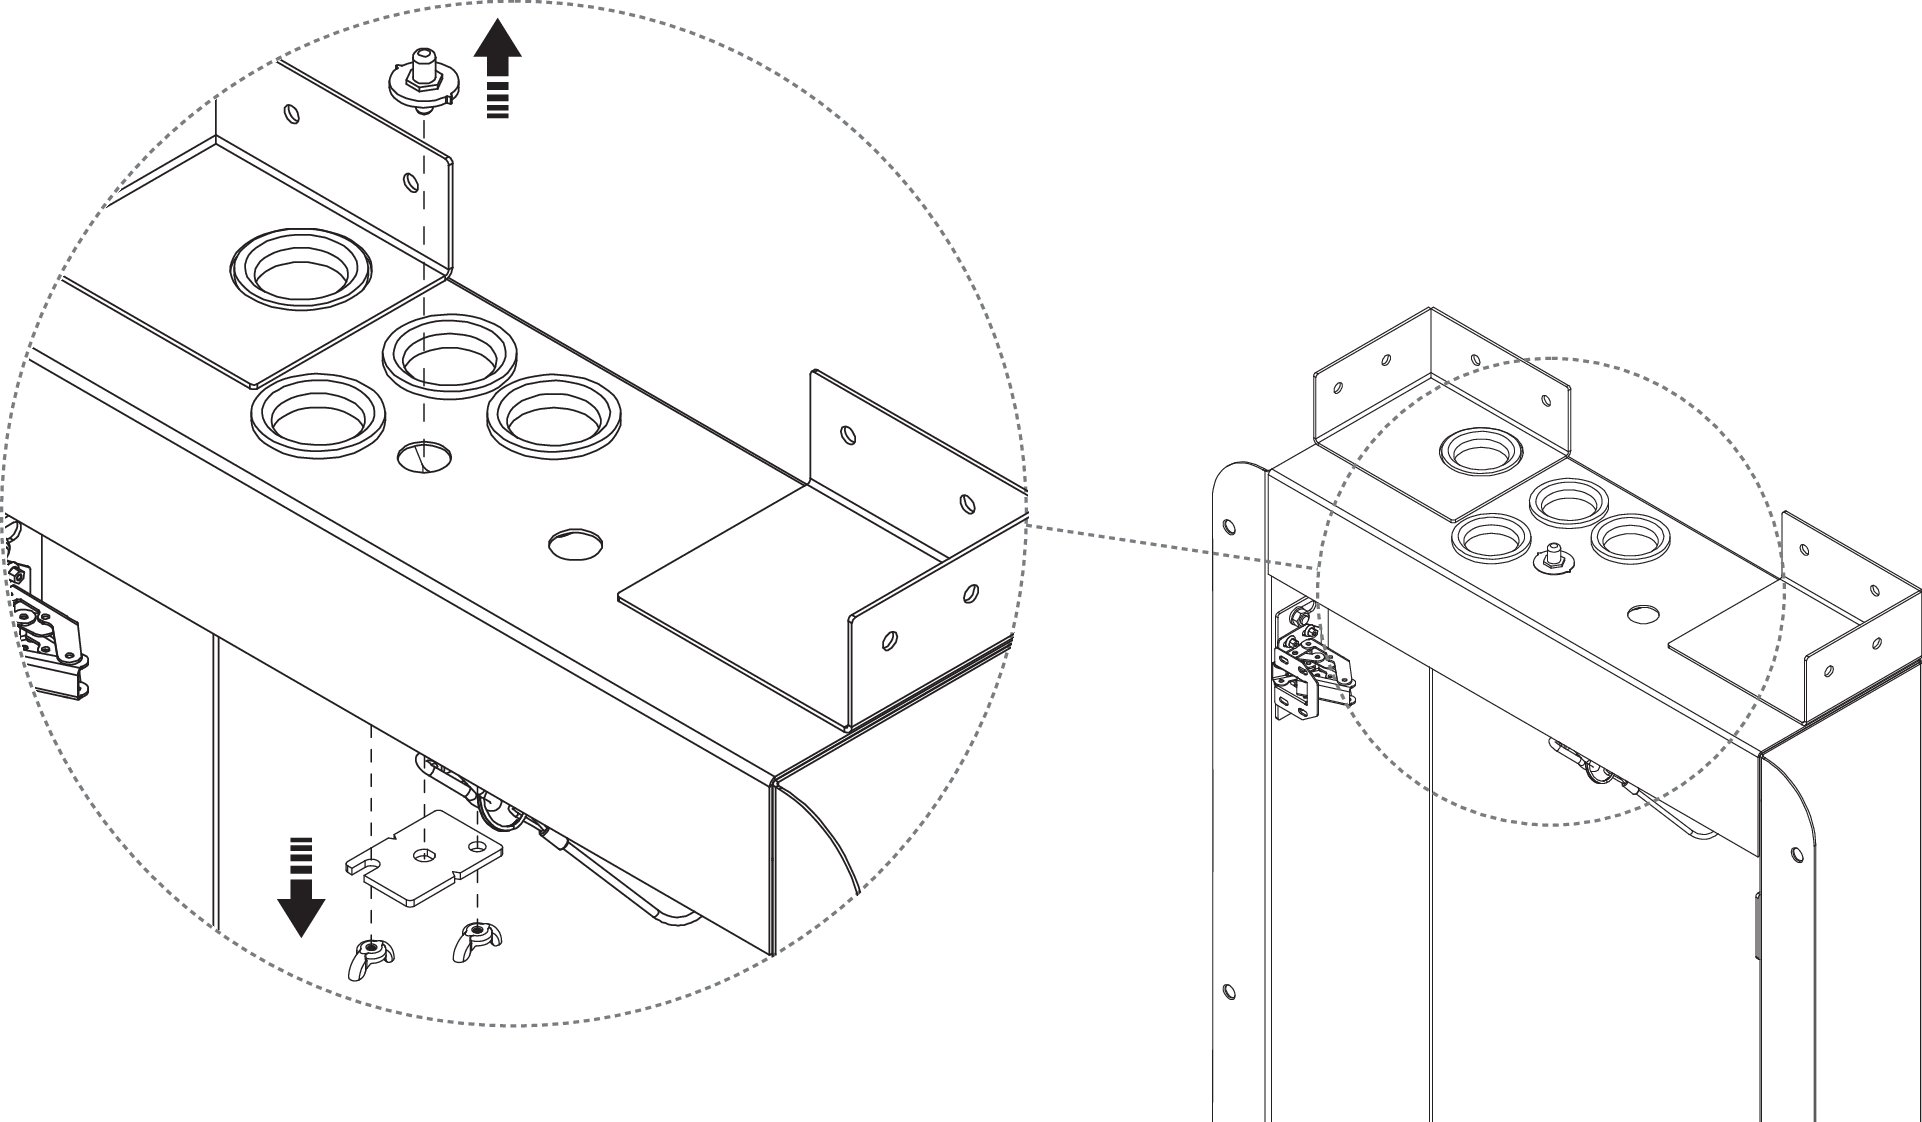
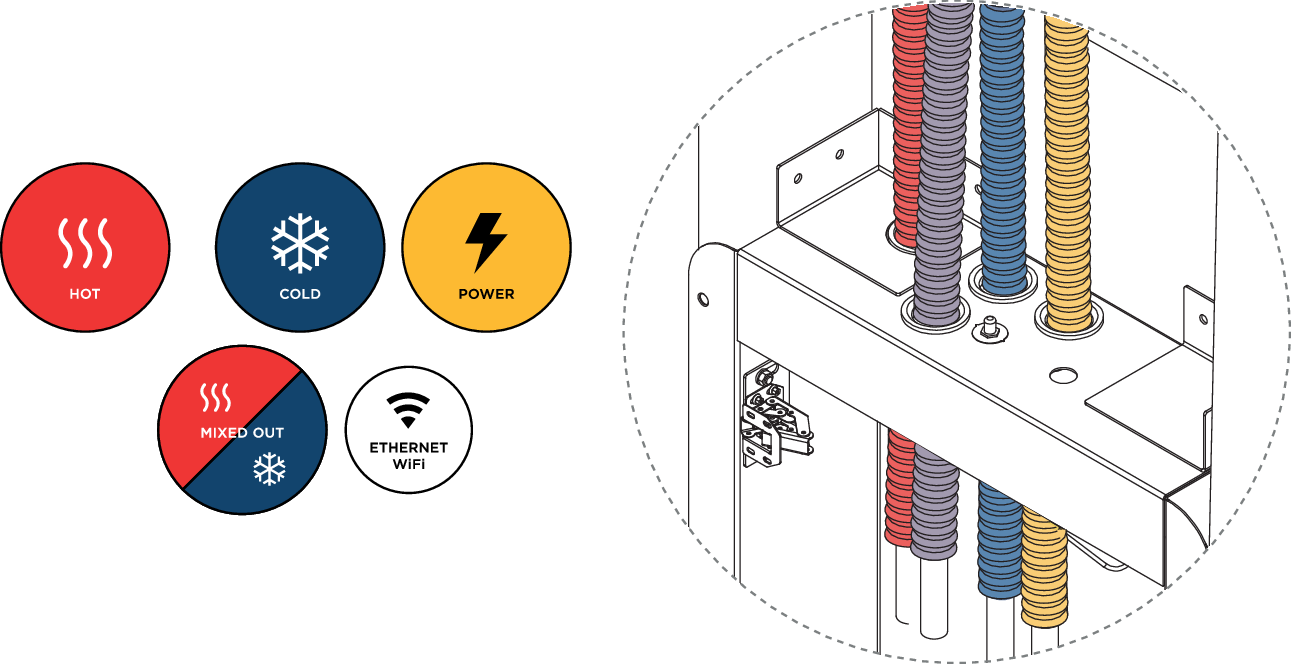
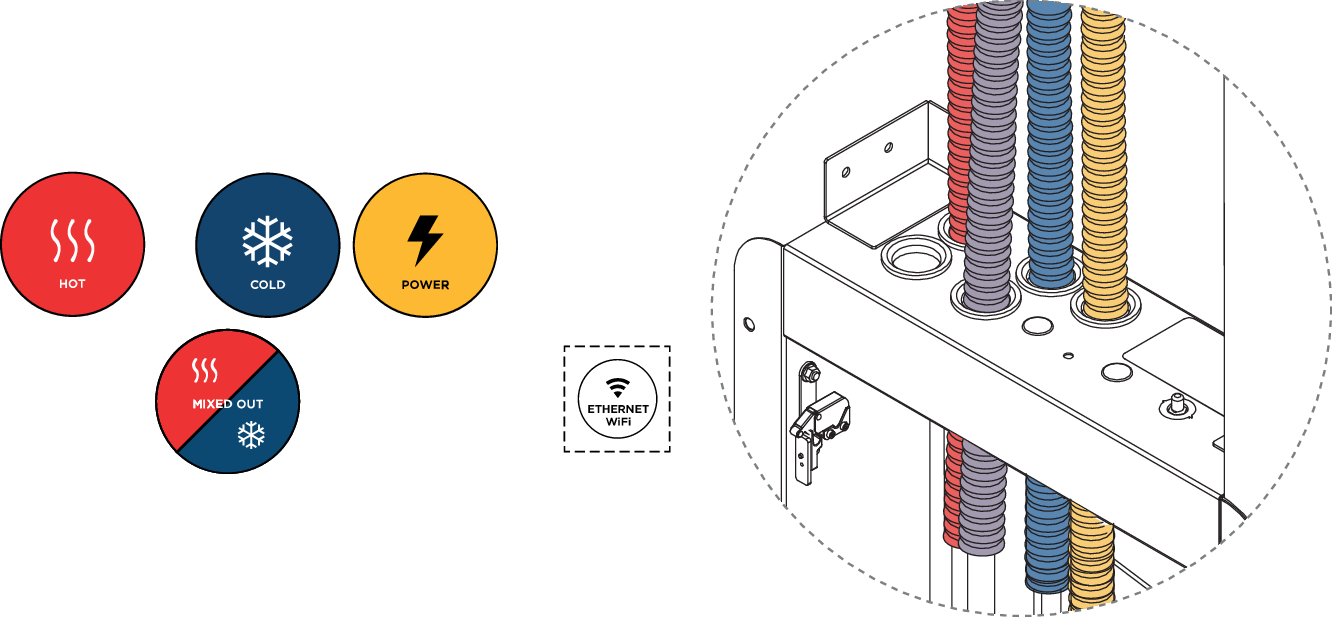
There are currently two versions of the Wall Box available, each with a slightly different inlet placement. Always double-check the sticker on top of the Wall Box to ensure the correct placement.
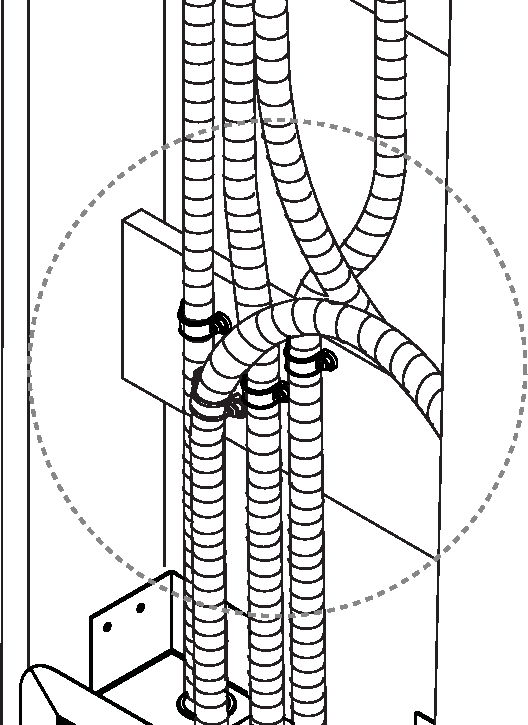
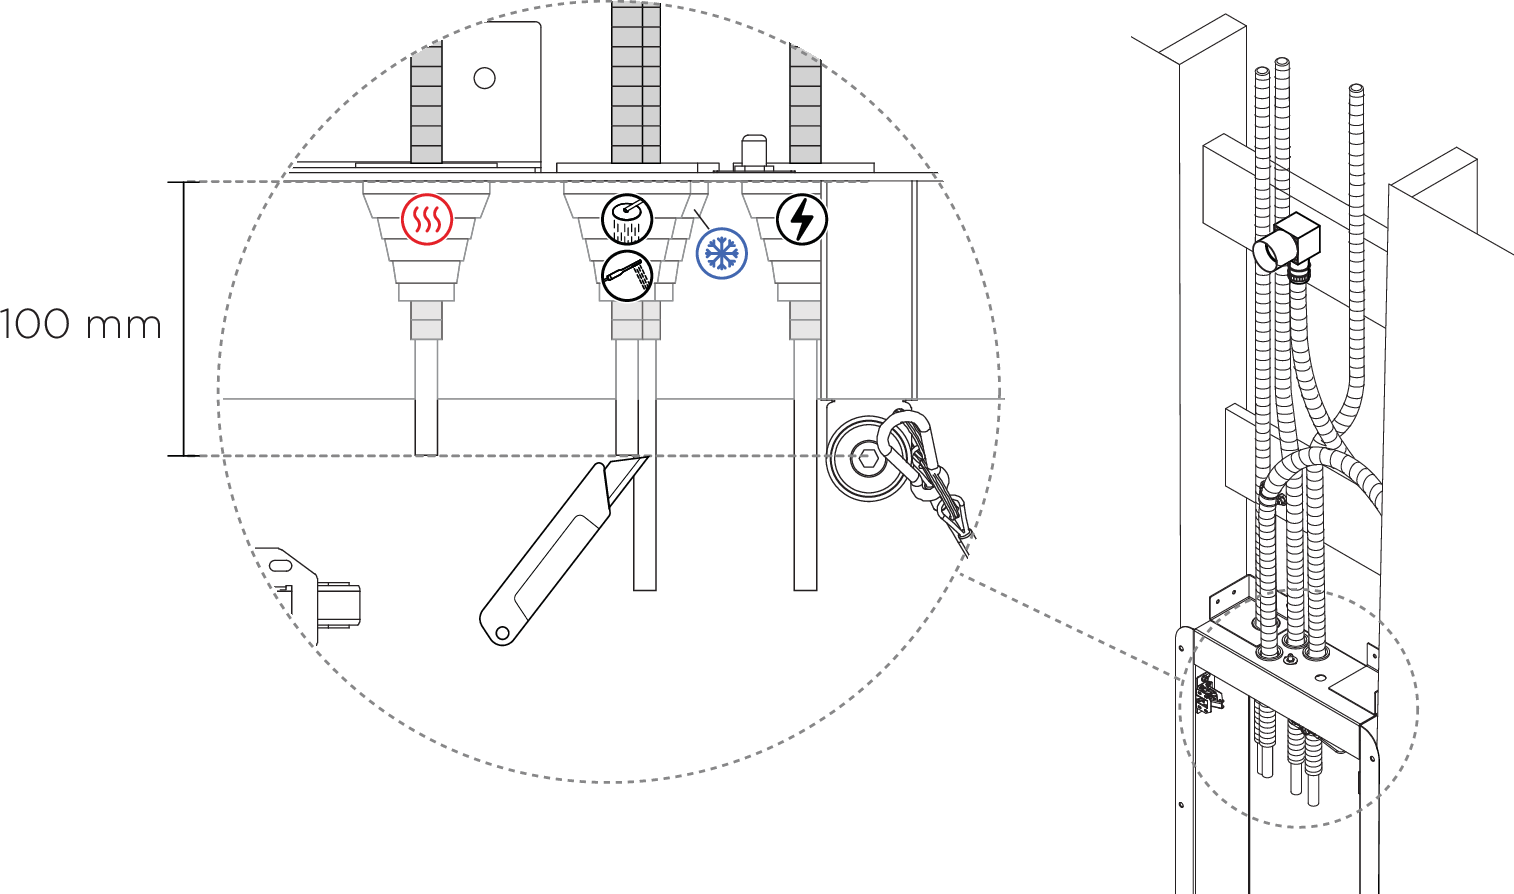
Cut the conduits.
Caution
Cut the conduits as close as possible to the cones.
Notice
Anchors provided by Customer.
Cut the PEX.
Notice
Length might be adjusted depending on the chosen connector applied later.
Warning
Electrical installation should be performed according to industry rules by a competent electrician.
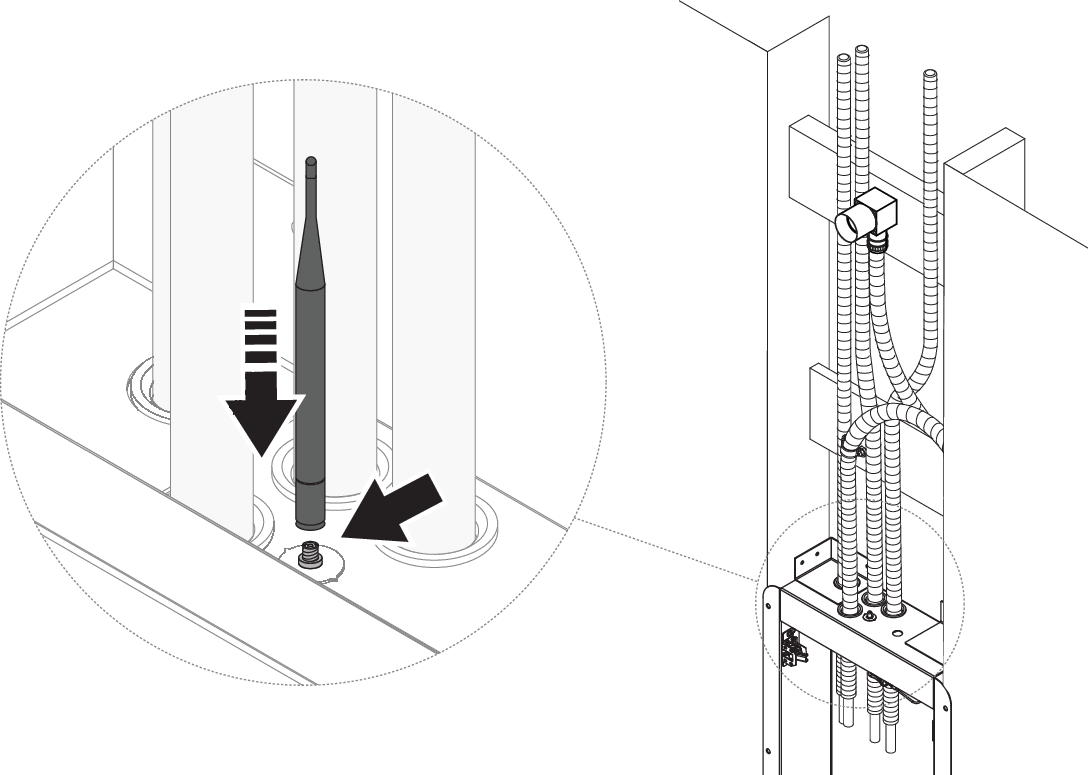
Install the Wi-Fi antenna. If using an ethernet connection, see the next step.
Only valid for Orbital ethernet installation